

What is Superfetch and How to Enable or Disable it in Windows 10, 8 or 7? Windows 10 is packed up with rich features and we can see a clear improvement over the old versions in numerous ways. Though it supports the modern hardware in a much better way, it can also be sluggish when it is not properly configured. The core reason for this is it still has bits of code and features dating back to 2000 and XP. Service Host Superfetch is a feature which was first introduced in Windows Vista. This feature was often misunderstood and there are many myths surrounding it. This guide is all about understanding Superfetch technology and helps you to enable it or disable it based on your preferences.
[toc]

So you might be victim of the rumors that says Superfetch uses up all your Computer Resources, Superfetch High Disk Usage & makes it slow and that’s what you experience. Isn’t it? Well, you can checkout all the information about Superfetch, it’s working and consequences, when and how it helps or how it affects you, how to stop or turn off superfetch? Service Host SuperFetch is somewhat similar to Service Host Local System. Checkout the quick navigation links below on What will you Learn from this Guide?
- What is Service Host SuperFetch?
- How Service Host SuperFetch Speeds Up your Computer?
- What are the Problems or Drawbacks of SuperFetch?
- How to Disable or Enable SuperFetch?
So let’s start each topic one by one.
What is Superfetch in Windows 10?
Service Host Superfetch is a service which improves and maintains the performance of the system over the time. It analyzes the Random Access Memory (RAM) usage patterns and learns the kinds of apps users would run most often. So, it basically knows what apps are being used frequently and preloads them into the memory even before the user opens it. It launches the apps much faster as they are already preloaded in RAM. It is a successor of PreFetcher which was first introduced in Windows XP. PreFetch algorithm saves the application caches in hard drive instead of RAM.
CHECKOUT – How to Fix “Unexpected Store Exception” Error in Windows 10?
How Service Host SuperFetch Speeds Up Your Windows 10 Computer?
Service Host SuperFetch feature helps to reduce the boot time and ensure that the apps are loaded more efficiently. It is an evolutionary process as it adapts itself based on the usage patterns.
During the booting process, the system needs the same files every time. SuperFetch stores the files and data and the times at which they are needed in a trace file. It loads up the files and data more efficiently in the subsequent boot which helps to reduce the booting time. SuperFetch regularly interacts with defragmenter and stores the files which are needed during the booting process in an order of time.
In the same way, it also efficiently launches the applications at better speeds. It studies your usage patterns and also the times when you use the particular application. It preloads the frequently used apps in RAM. For example, if you routine usage every morning is Google Chrome, Outlook, Media Player etc. SuperFetch preloads all these apps during the morning time in the memory. It preloads MS Word, MS Excel during the evening time if they are your frequently used apps in the evening.
What are the Problems with SuperFetch?
[wp_ad_camp_3]
Most of the times, “Service Host: Superfetch” run in the background and make sure that the apps are running smoothly. However, it may cause some problems in your PC. Sometimes, you may also notice SuperFetch as Sysmain SuperFetch.
- As it is running all the time in the background, it uses the RAM and CPU always.
- SuperFetch may slow down the system startup process as it preloads the bunch of apps and other data files from your hard drive to RAM. If you notice your hard drive is being used 100% for a couple of minutes everytime you switch on your computer then this feature could be the culprit.
- SuperFetch may cause the slight slug in the system as it relocates the loading to earlier time rather than eliminating the need to load apps in the memory.
- If you have a modern computer with SSD drive, then you may not need the SuperFetch feature. As SSDs loads the data at good speeds we don’t need any preloading.
How to Disable Superfetch on Windows 10 Computer?
For the major part, SuperFetch is a useful feature. We recommend you to keep it enabled as it helps to uplift the overall performance. But if you have any troubles with high disk usage i.e., hard drive usage or Ram usage then you can disable, turn off or stop it as a troubleshooting measure. If there is no considerable improvement in system performance, you can just enable it again. There are no side effects on Disabling SuperFetch on your computer.
Solution 1: Turn Off Superfetch from Services App
Services App is a tool in Windows Computer which lists all the services used by your Windows Computer. You can handle any services you see i.e., You can Enable, Disable, Restart or even troubleshoot any Services. Just follow the steps below to Disable Service Host SuperFetch in Windows 10 Computer.
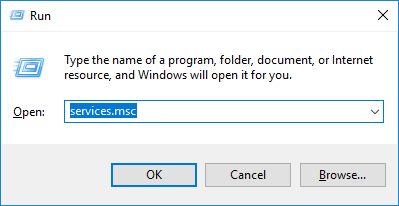
Step – 1: Press Windows key and letter R key simultaneously on your keyboard to open the Run box. Type services.msc in the Run box and hit Enter key.
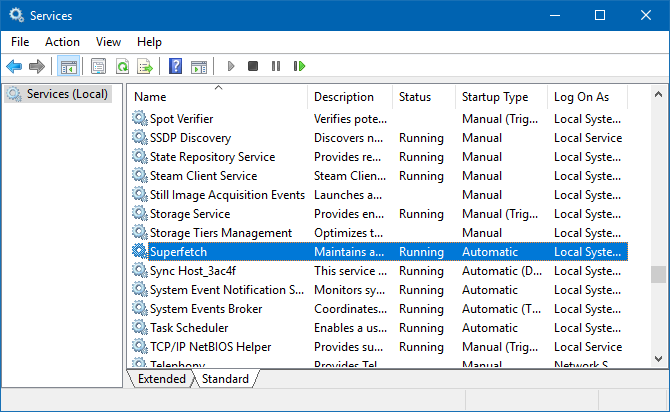
Step – 2: You’ll see the list of services in the Services window. Scroll down and find Superfetch service. Right-click and click on Stop option. Now, Superfetch is disabled on your Windows 10 computer.

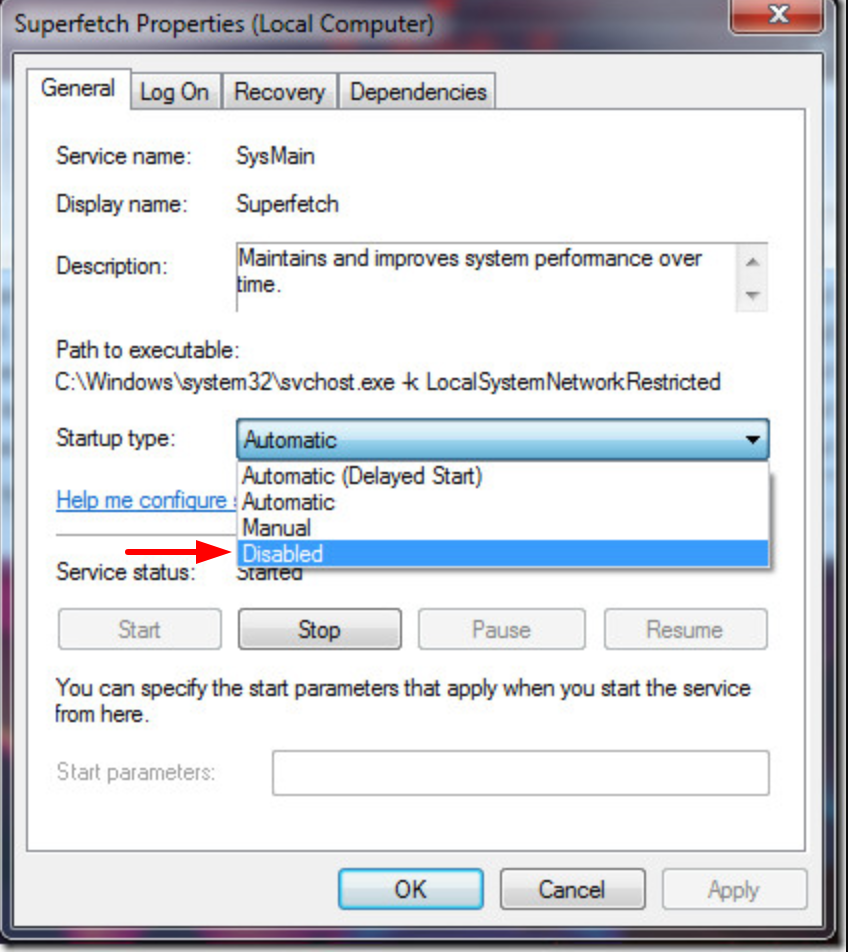
Step – 3: Windows 10 tends to start Superfetch automatically whenever it is restarted. To prevent Superfetch from starting automatically, again go to the Superfetch service in Services window. Right-click and click on Properties. In Superfetch Properties under the General tab, you’ll see Startup Type. It’s automatic by default. Change it to Disabled to stop it from running automatically. You can change it back to Automatic whenever you want to enable SuperFetch again on the Windows Boot.
This was the quick way to instantly and permanently Disable SuperFetch or even Enable it whenever you want. We also have got another method to Disable Service Host SuperFetch, check it below.
ALSO CHECK – How to Disable Avast SafePrice Extension from Any Browser?
Solution 2: Disable Superfetch using Registry Editor
[wp_ad_camp_5]
We recommend using Services app to disable the SuperFetch feature in Windows 10 computer. But in case if it’s not working for some reason, you can also disable it using the Registry Editor. Just follow the steps below.
Step – 1: Press Windows key and letter R key simultaneously on your keyboard to open the Run box. Type regedit in the Run box and hit Enter key.
Step – 2: In the left panel of Registry Editor, revert to HKEY_LOCAL_MACHINE / SYSTEM / CurrentControlSet / Control / Session Manager / MemoryManagement / PrefetchParameters
Step – 3: In the right column, you’ll see a registry called EnableSuperfetch. Right-click on it and click on Modify.
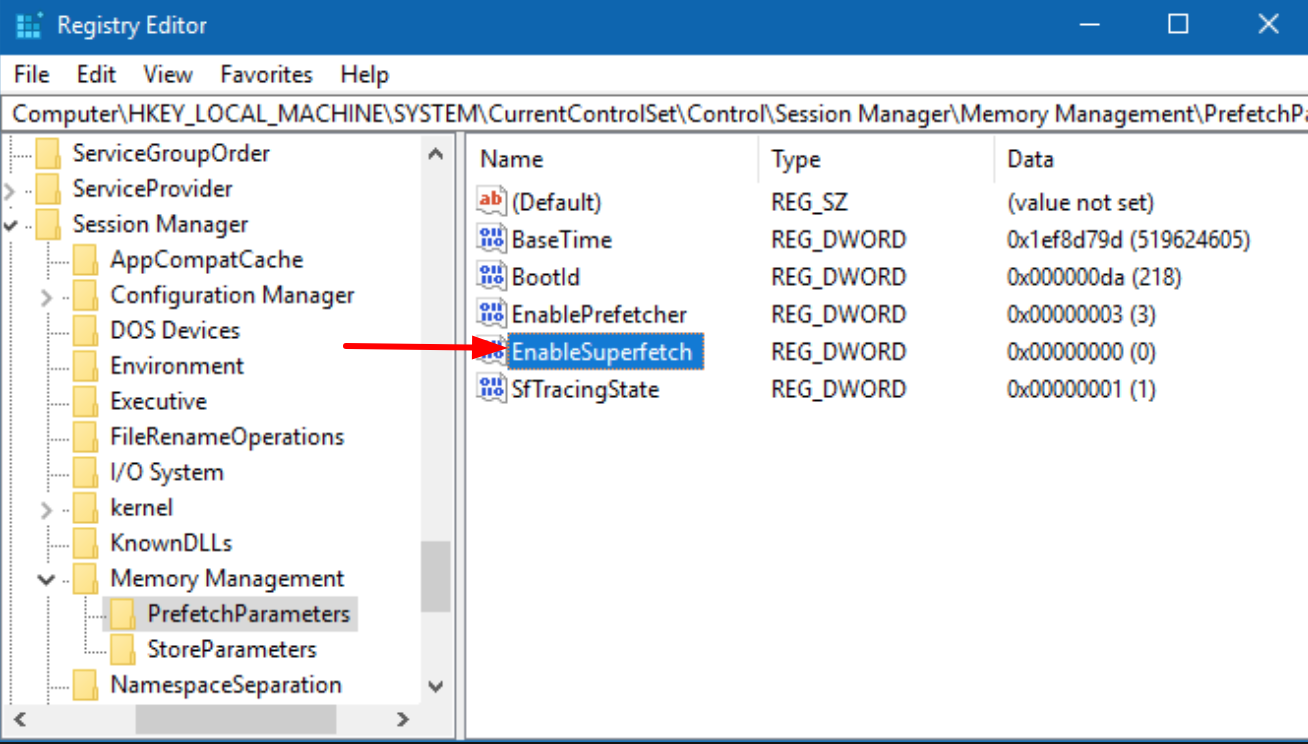
Step – 4: It opens up a key editor. Change the value of Value data to 0. Click on OK button.
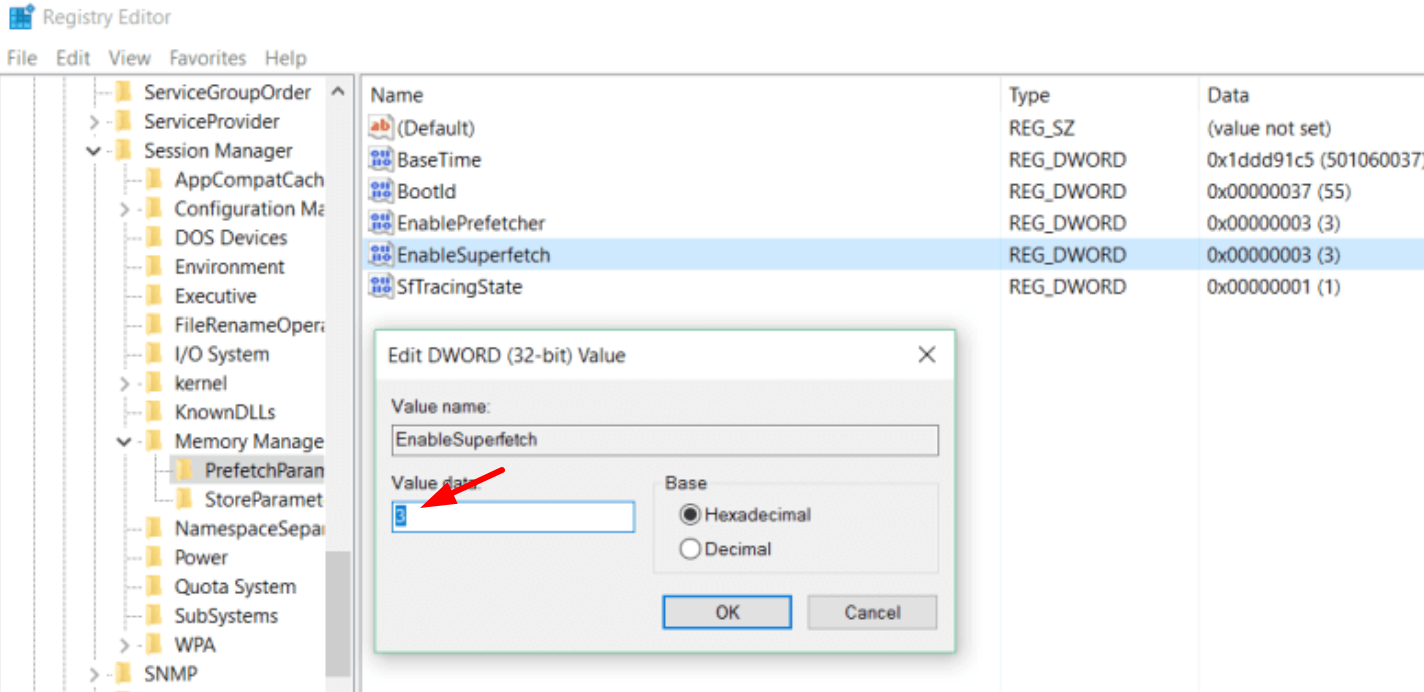
EnableSuperfetch Value data accepts the following values:
- 0 – Disable SuperFetch
- 1 – Starts PreFetch when the app is launched
- 2 – Enable Boot PreFetch
- 3 – Enable PreFetch for everything
You can use any of these values as per your Preferences or Need.
Note: Don’t edit the values in Registry editor or change the settings unless you are aware of what exactly you are doing. Editing the registry without proper knowledge may mess up your computer settings.
Wrapping up…
SuperFetch is really a cool feature which significantly improves the performance of your computer. There is no need to disable it if your computer is running fine. If you notice any slugs that slowdown especially during the startup time and when the apps are loading, you can try disabling it. It’s easy to enable Service Host SuperFetch again if you do not see any improvement in the system performance.