
What is WSAPPX?
WSAPPX is an important background process in Windows 8 and Windows 10 Operating Systems. Microsoft Universal App platform and Windows Store relies on WSAPPX. The main job of WSAPPX is to operate, install, uninstall or delete the Store apps. It communicates with the Store to keep the Windows apps updated. However, this may lead to the high disk, memory or CPU usage problems at times. When WSAPPX is consuming a lot of CPU resources, you’ll see the processes like wsappx (3) and wsappx (2) in the task manager. When WSAPPX process becomes unresponsive, it leads to high CPU usage problems, computers starts lagging and this is what irritates us a lot. Well, here are the well researched and tested solutions to stop High CPU and High Disk Usage by WSAPPX Services or Tasks.
[toc]

Why WSAPPX Uses High CPU?
When you open Windows Task Manager, you see a list of over dozen processes under the Processes tab. WSAPPX is one among them. It usually appears as svchost.exe wsappx, wsappx(2) or wsappx(3). WSAPPX process will be started when you just open and browse the Microsoft Store. It goes active when you are installing an update or downloading an application. If you expand the wsappx(3) selection, you’ll see the sub-processes like Client License Service (ClipSVC), Windows Store Service (WSService) and AppX Deployment Service (AppXSVC).
Client License Service (ClipSVC)
It is the service which provides CPU infrastructure support for the Microsoft Store. It gets initiated when the disabled apps bought from Microsoft Windows Store works in a wrong way. This service is available only on Windows 10 OS.
Windows Store Service (WSService)
It serves the same purpose as Client License Service (ClipSVC). It is there in Windows 8 OS also. If you disable any of these sub-processes, the apps you’ve downloaded from Windows Store will not work. These processes are created to safeguard the Windows Stores applications against piracy.
AppX Deployment Service (AppXSVC)
This process helps to deploy the Windows Store apps. So, it runs whenever you uninstall, installs or update any of the Store applications. AppX is the file extension of all the Windows Store apps.
All these processes consume a lot of CPU resources when you download, install or update the apps from Windows Store. If you do not use the Store and you see WSAPPX is using abnormal CPU, it means that the applications are automatically updating. Fortunately, this issue can be easily fixed!
Defect-free software does not exist.
– Wietse Venema
How to Fix WSAPPX High Disk Usage Problem in Windows 10?
[wp_ad_camp_5]
Here we have got few couple of tested and working solutions which will help you to minimize the task of WSAPPX and Reduce the CPU, Disk or Memory Usage by WSAPPX Service or svchost.exe. Just start following the solutions one by one and you will see the problem degrading at one time.
List of Fixes to Stop Disk and CPU Usage by WSAPPX:
- Solution 1 – Update Device Drivers
- Solution 2 – Increase your System’s Virtual Memory
- Solution 3 – Disable or Deactivate Windows / Microsoft Store
- Solution 4 – Scan your Computer for Viruses
Let’s check each of the solutions one by one.
Solution 1: Updating Device Drivers
Though Svchost.exe WSAPPX High Disk Usage is not related to the drivers but it may occur due to incompatibility when the device drivers are outdated or corrupted. When Windows OS tries to update a corrupted driver, the WSAPPX services turns unresponsive and uses the CPU resources in an abnormal manner.
Here are the steps to update the device drivers in Windows 10 or 8.
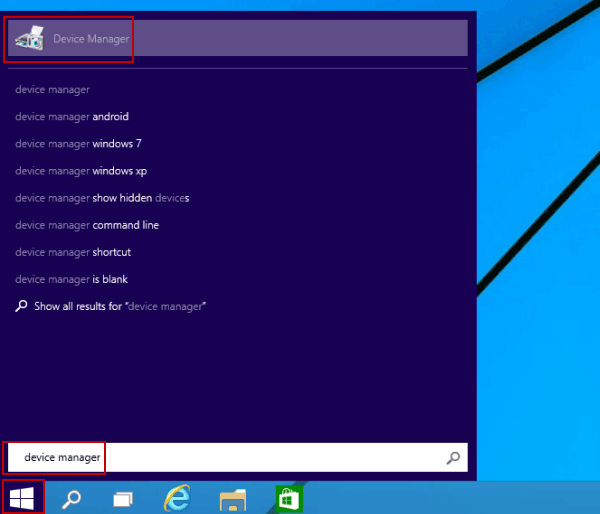
Step – 1: Click on the Start button and search for Device Manager. Click on the Device Manager from the search results.
Step – 2: Click on the little triangle sign beside the Display adapters to expand it. Right-click and click on Update Driver.

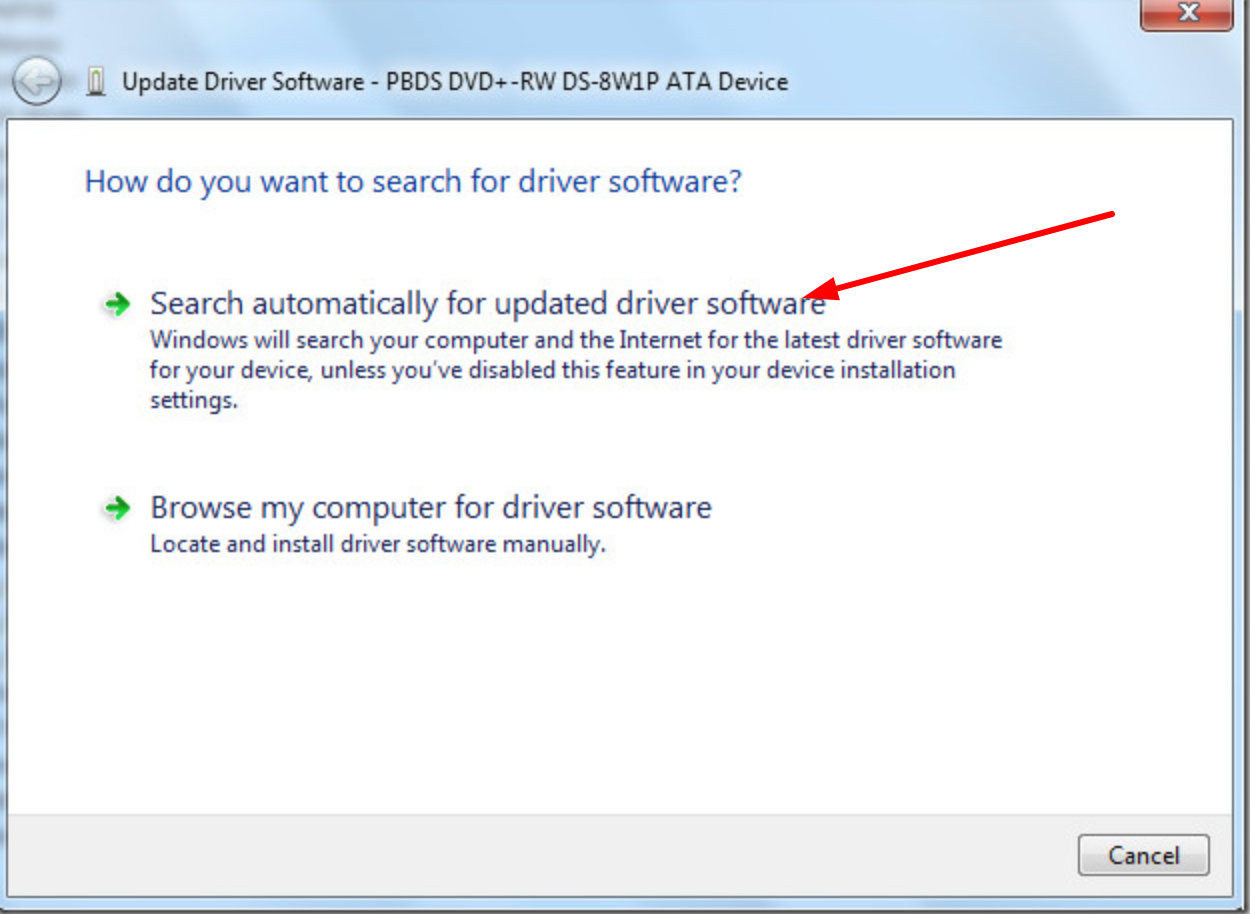
Step – 3: Select the option Search automatically for updated driver software. Windows 10 will search for the updates of the particular drivers.
Step – 4: In case, Windows failed to find the driver update, you have to search for the drivers on the manufacturers’ websites. Manufacturers like HP, Dell, Toshiba etc host the drivers on their official websites. You’ll have a clear instruction there on how to install them on your computer.
Once you are done, check the CPU usage. If you still find the problem with your computer, go to the next solution.
RELATED – What is WMI Provider Host and How to Fix High CPU Usage by it?
Solution 2: Increasing System’s Virtual Memory
It is recommended to allocate more virtual memory for the processes to function properly. Increasing the virtual memory makes it easy for the background processes to run smoothly. Here are the instructions to increase the virtual memory.
Step – 1: Click on the Start button and click on the Settings icon.
Step – 2: Type “performance” in the search box. Click on “Adjust the appearance and performance of the Windows.” option.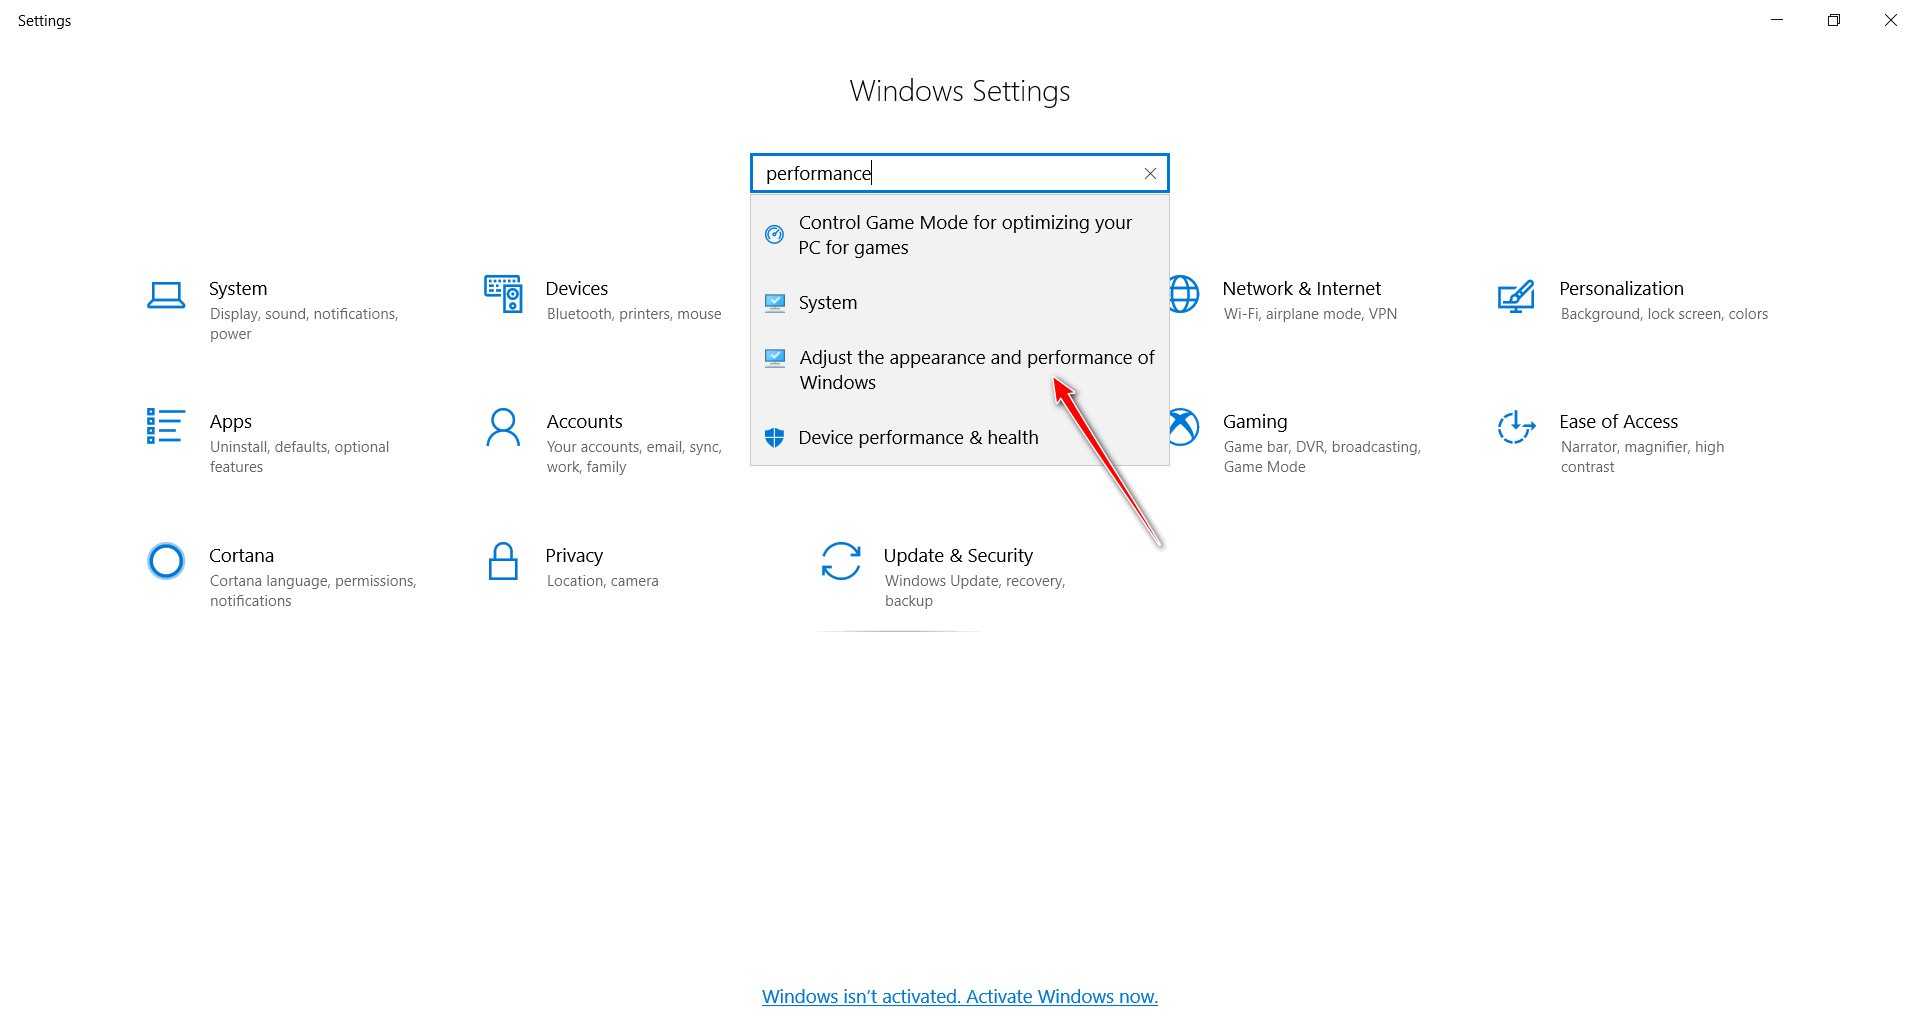
Step – 3: Click on the Advanced tab. Under the “Virtual Memory” section, click on the Change button.
[wp_ad_camp_3]
Step – 4: Untick the option ‘Automatically manage paging file size for all drives’ and click or tap on Custom Size.
Step – 5: Now, enter the Initial Size. It must be equivalent to RAM in megabytes (MB). Maximum Size is double the Initial Size. Click or tap on OK button to save the settings. And then Restart your computer.
Your Virtual Memory is now increased. Continue using Windows normally and keep track of WSAPPX Task and your Windows Performance. You will see great performance than before.
ALSO CHECK – What is SuperFetch and How to Disable SuperFetch in Windows 10?
Solution 3: Disabling or Deactivating the Windows Store
Windows Store is a program in Windows 10 which updates the Windows System apps like Photos, Mail, Movies and many other. Most of us do not use such apps. It has been observed on many computers that disabling the Windows Store program has eased the high disk usage issues. Follow the instructions below to disable the Windows Store on your Windows 10, 8 or 7 computer.
Method #1: Using Group Policy Editor
Step – 1: Press and hold the Windows key and letter ‘R‘ key simultaneously to open Run dialog box. Type gpedit.msc and hit Enter. It opens up the local group policy editor.

Step – 2: Go to Computer Configuration and click or tap on Administrative Templates.
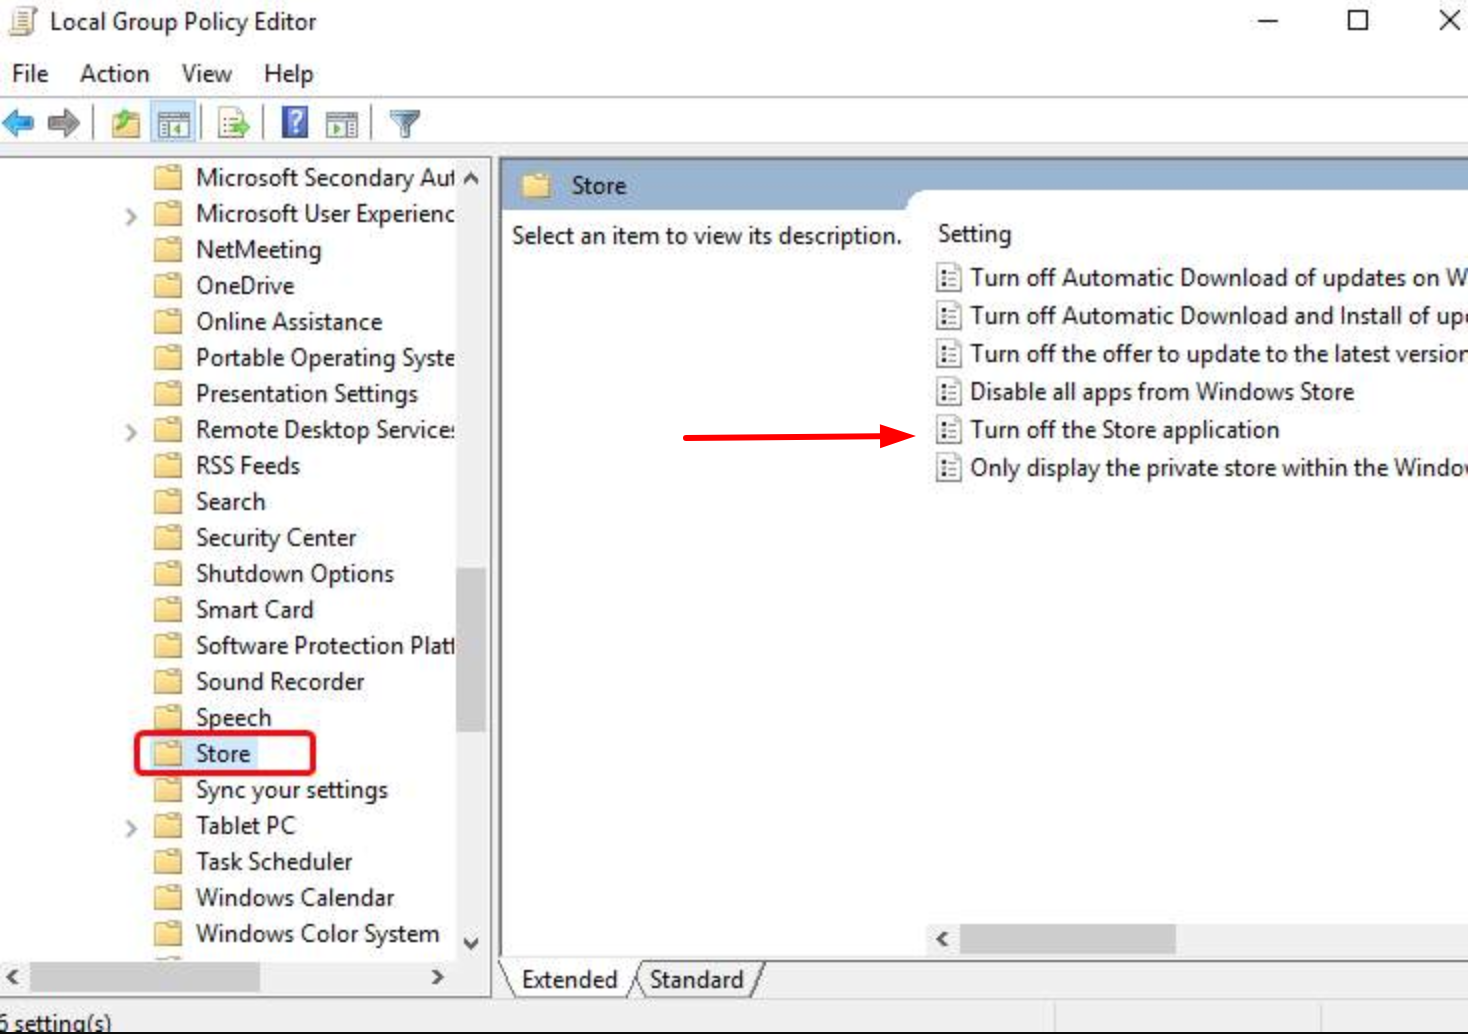
Step – 3: Double-click on the Windows Components. Go to Store and double-click on it to open it in the right panel.
Step – 4: In the right panel, you’ll see an option called Look for the Turn Off Store application setting. It’s usually the second last one there. Right-click on it. Click on Edit and change it’s status to Enabled. Hit on Apply button and Click OK to save the settings.
Step – 5: Restart your computer.
Method #2: Using Registry Editor
In case if you are having any troubles to open or edit the Group Policy Editor, you can disable the Windows Microsoft Store by using Registry Editor.
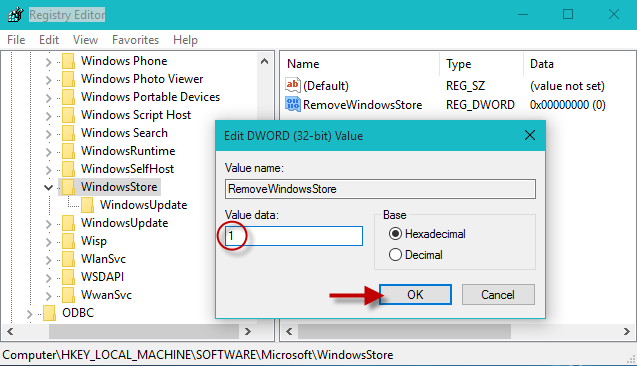
Step – 1: Press and hold the Windows key and letter ‘R‘ key simultaneously to open Run dialog box. Type regedit and hit Enter to open the Registry Editor.

Step – 2: In the registry editor, navigate to HKEY_LOCAL_MACHINE\SOFTWARE\Policies\Microsoft\WindowsStore.
Step – 3: In the right panel, Double-click on the RemoveWindowsStore Option (which is usually the last one). Type 1 in the Value data box. Hit on OK to save the settings.
Now that you’ve successfully disabled the Windows Store, check the CPU disk usage. If it’s still high, move on to the next solution.
CHECKOUT – Service Host: Local System Using Up All Your Resources? – Fix Now
[wp_ad_camp_5]
Solution 4: Scanning Computer for Viruses
Malware and viruses may cause this issue in Windows 8 and Window 10 computers. Ensure that your computer is completely scanned with an antivirus software. If you are using Windows 10, you do not need to install any third-party antivirus software as there is a default virus protection program called Windows Defender. Here are the instructions to scan your computer using Windows Defender.
Step – 1: Click on the Start button. Click on the gear icon to open the Settings app. Click on the Update & Security. In the left panel, you’ll see Windows Defender. Click on it to open it.
Step – 2: Windows Defender opens in a dialog box. Click on the link Open Windows Defender Security Center.
Step – 3: It opens up a new window. In the left panel, click on the shield icon which is a Virus and Threat Protection button.
Step – 4: Click on the Advanced Scan button. Choose the first option which is a Full Scan.
Step – 5: Wait till the full scan is completed. If you find any suspicious programs, uninstall or fix them. And then Restart your computer.
Let’s hope this final solution helps you fix the High Disk and CPU Usage by WSAPPX Program.
SUGGESTED READ – Best Free Antivirus List for 2018 – Check Features & Free Download
Wrapping up…
WSAPPX is certainly one of the crucial processes in Windows 10 operating system. Windows OS uses it to update or install the apps via Windows or Microsoft Store. WSAPPX high CPU or disk usage problem occurs due to various reasons and the reasons may even be illogical.
We hope that our solutions helped you to solve the issue. In case, if all the above methods fail, it’s better to clean boot your computer. You have to manually isolate the problem by uninstalling the unnecessary startup programs. Please let us know if you are still facing the high disk usage problem even after executing the above solutions. If you have got any other working solution then do share it with us. Thank you! 🙂