
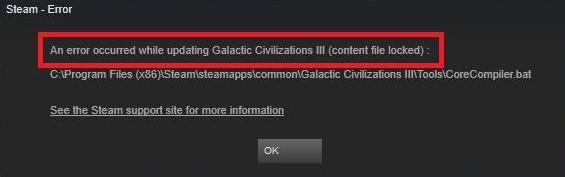
Many users were facing Steam Content File Locked Error when they were trying to update their games. This error does not allow the user’s to write update files on their Hard Disk. Due to this you won’t be able to play the latest version of the game. This is a very frustrating error. Many believe that it is tough to solve this problem but, in reality you can easily fix this problem. In this article we will guide on How to Fix Steam Content File Locked.
[toc]
Method 1: Check your Installed Antivirus Software
Most of the time the Antivirus Applications mark Steam files as potential virus. This is the reason you are not able to write those files in your hard disk. You need to Disable your Antivirus temporarily to update your steam game or mark the steam folder as Trusted and remove it from the scanning list. You don’t need to Uninstall your Antivirus Application. Every Antivirus Application works differently so the method to temporarily disable them is also different. Follow the steps given below:
For Kaspersky Users:
- Launch your Kaspersky Antivirus Application.
- There you will find Threads and Exclusions. Click on it.
- Then head over to the Trusted Zone.
- Now, you need to add Steam.exe as a Trusted Application so that it can work properly.
- Finally, make sure you make the settings to Do not scan opened files and Do not restrict application activity.
- In this final step you need to verify integrity of game files. (Steps to do this are given below)
For McAfee Users:
- Launch your McAfee Antivirus Application on your computer.
- Select the Virus and Spyware Protection Option.
- Then you need to find Real-Time Scanning. Turn this option Off.
- Now, you need to verify integrity of game files.(Steps to do this are given below).
For Other Antivirus Applications:
- Right Click on your Antivirus Application Icon.
- Then select Stop, Disable or Shutdown.
- In some Antivirus Applications you need to open the program and Disable it from the program’s menu.
- Now, you need to verify integrity of game files. (Steps to do this are given below).
CHECKOUT – How to Fix PUBG Mobile Lag in Gameloop Emulator?
How to Verify Integrity of Game Files?
- Restart your computer.
- Relaunch steam and Hop over to the Library Section.
- Right click on the game in which you are facing this issue.
- Simply select Properties Option.
- In the Properties Tab go to the Local Files Tab.
- Now, you need to click on Verify the Integrity of Game Files Button.
- Steam will start verifying that game.
Method 2: Repair Corrupt Files in Your Computer
If the first method didn’t helped you then we can Troubleshoot the corrupted or missing files. Then we can Re-download the entire file again.
- First, you need to Exit Steam.
- The hop over to Steam Directory.
- Now, you need to Move to the folder Logs. Then simply click on Txt.
- Scroll or move to the bottom of the Text File. Here, you need to search for Recent Errors.
- Search for the Root Folder.
- Now, simply Restart your Steam and then move to the downloads folder.
- Steam will automatically ask for Updates for the Game. Update the files to resolve this issue.
Method 3: Reset Winsock
Winsock Catalog can also cause this Steam Content File Locked Error. If we Reset the Winsock then this error would be fixed. Follow the steps given below.
- Press the Windows Logo Key and R Key simultaneously on your Keyboard.
- This would open the Run Command.
- In the Run Box type cmd and hit OK Button in order to open the Command Prompt window.
- Type netsh winsock reset and press the Enter Key.
Winsock has been Rested. Try to update your games now and see if the Steam Content File Locked is fixed or not.
CHECKOUT – How to Fix Steam Friends Network Unreachable Error?
Method 4: Change Steam and Relocate Games Files Location
If the above methods don’t work then the best solution is to Change Steam and Relocate Games Files Location.
- Hop over to Steam Client and click Settings.
- Here, you need to select Downloads and then click on Steam Library Folders.
- Hit the Add Library Folder Option.
- Select a new location on your computer for Steam. Exit Steam client.
- Now, you need to go to Current Steam Directory. The default location for this is: C:\Program Files\Steam
- Except SteamApps, UserData folders and exe. delete all the files and folders.
- Move the above folders in the location which you choose in Step 4.
- Open Steam again and Relogin.
While moving the Steam Folder or after Launching it if you face any problems follow the steps given below:
- Close down your steam and go to the location where you relocated Steam.
- Change the SteamApps folder from that directory to your desktop.
- Uninstall Steam which will remove all your Old Steam Settings.
- Install Steam onto your computer again to the initial location that you selected.
- Now, you need to move the SteamApps folder to the new Steam directory in your computer. Now, all your saved games and settings will be copied.
- Launch Steam.
- Simply enter your Credentials. Now, you need to verify the integrity of games files which you want to play.
- Now, your problem should be resolved.
CHECKOUT – How to Fix “NVIDIA Installer Failed” Error in Windows 10, 8 or 7?
Concluding…
We hope that this article was useful for you. The error can be very frustrating but, you can easily fix this by following all the steps mentioned above in this guide. Are you facing any other issues in your computer or with Steam? Let us know and we would come up with solution for it.