
Virtualization is one of the most powerful features in Windows 10. Enabling virtualization opens a lot of doors for creating a virtual machine on your computer. You can then do a lot of crazy things with it. Most of the VR Apps, Graphics Software & Emulators like Bluestacks & Gameloop & high-end games such as PUBG, CS:GO, etc. recommends users to enable Virtualization to boost speed and make the software or computer perform smoothly. If you are looking for enabling Virtualization in Windows 10 then this guide will help you do that without any complications. Follow all the steps one by one without doing any mistakes and your work would be done.

[toc]
Things we have mentioned in this article:
- What is Virtualization Technology (VT)? What are the Advantages of Enabling Virtualization?
- Check if Virtualization is enabled or disabled on your PC.
- How to Check if Virtualization is Supported on your CPU.
- Virtualization support on Intel CPU and Virtualization support on AMD CPU.
- How To Enable Virtualization in BlueStacks?
- How to Enable Virtualization in BIOS HP?
What is Virtualization Technology (VT)? What are the Advantages of Enabling Virtualization?
Virtualization Technology (VT) helps you to expand your hardware capacity. By enabling this you can run multiple Operating Systems simultaneously on a platform. The best part here is that all the applications will run within isolated spaces without affecting each other. This would increase your computer’s efficiency significantly and eliminate errors caused due to high cpu usage. Most Importantly, this would also boost the emulator by more than 10 times. You can even test apps inside a virtual machine without damaging your computer’s performance. You can even install the Linux shell on Windows. Apart from using the powerful Linux terminal and commands, you can even use the Linux GUI.
CHECKOUT – Top 10 Methods to Fix PUBG Mobile Lag in Gameloop Emulator
Check if Virtualization is Enabled or Disabled on your PC
Before we start enabling Virtualization in Windows 10 and transforming your computer into a Supercomputer let’s first see if it already enabled or not. Follow the steps given below:
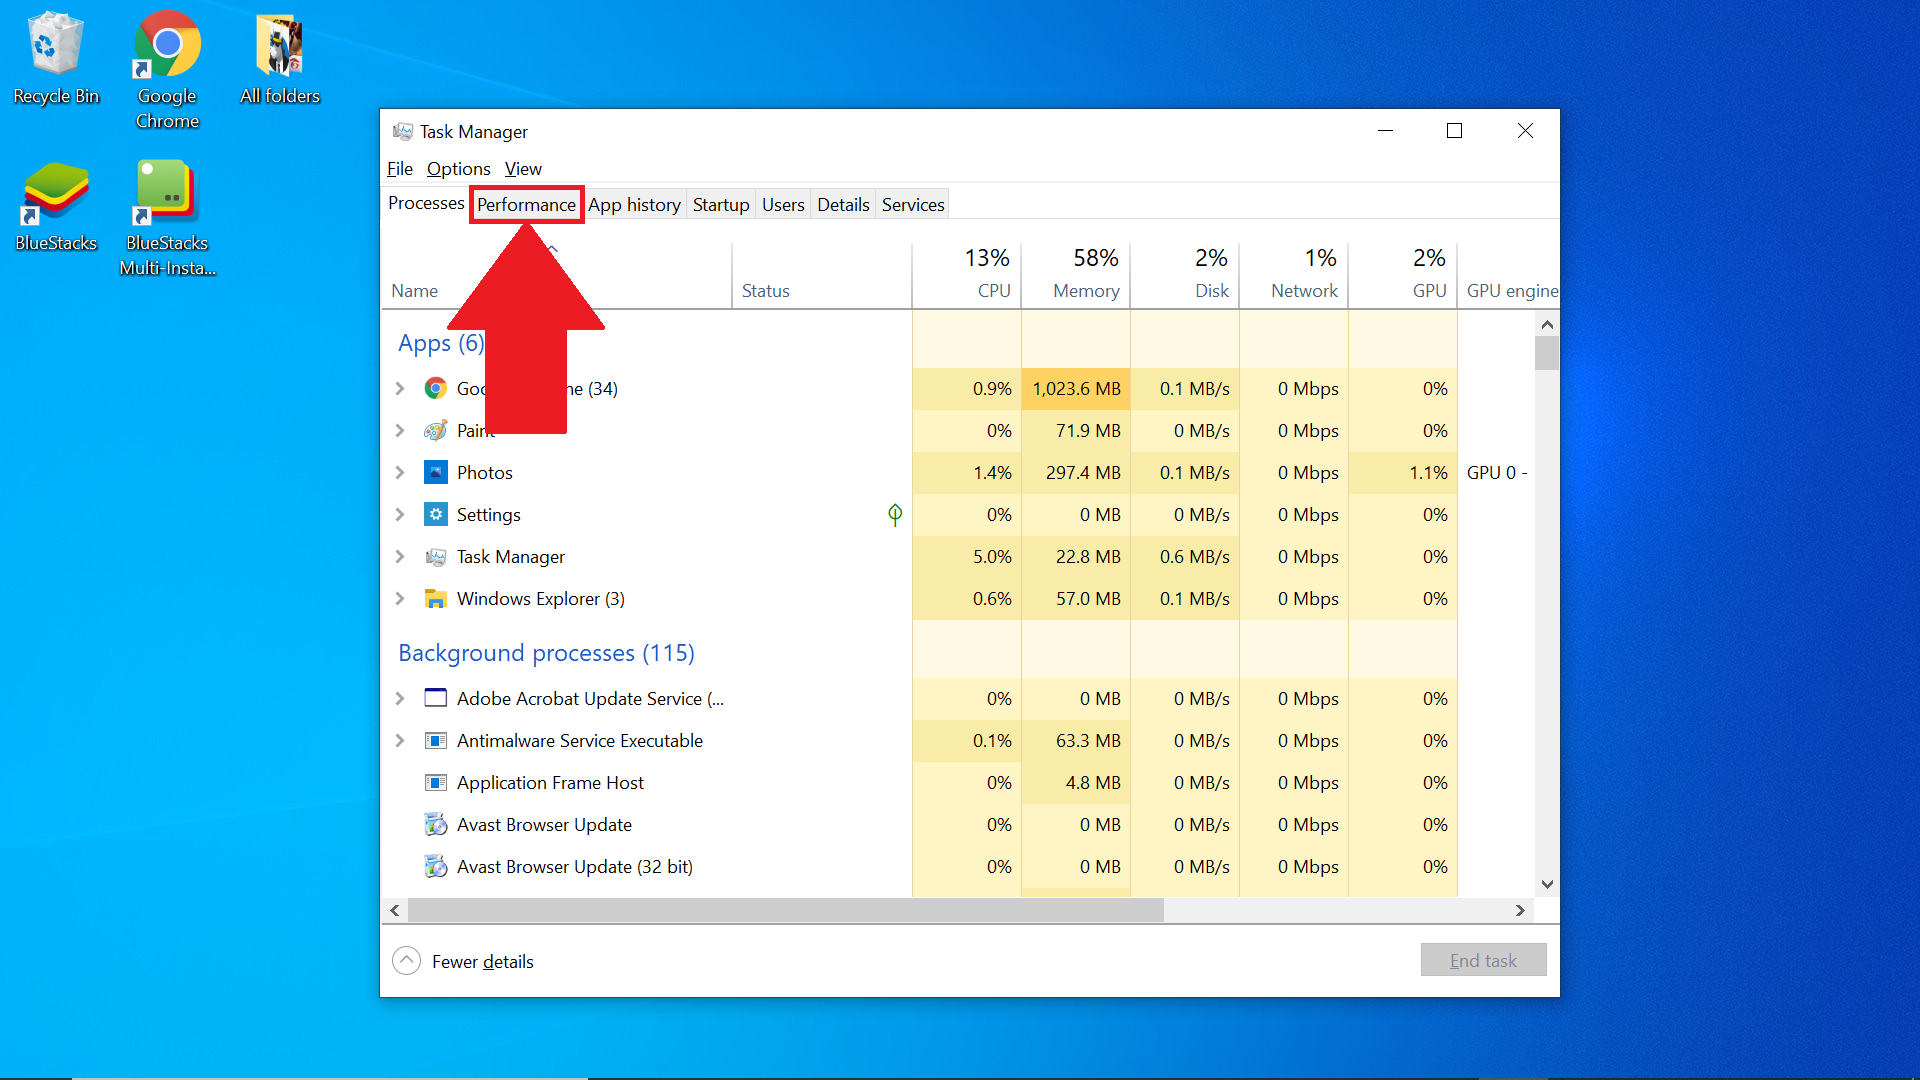
- First, you need to open the Task Manager. You can do this by typing Task Manager on your Windows Search Bar.
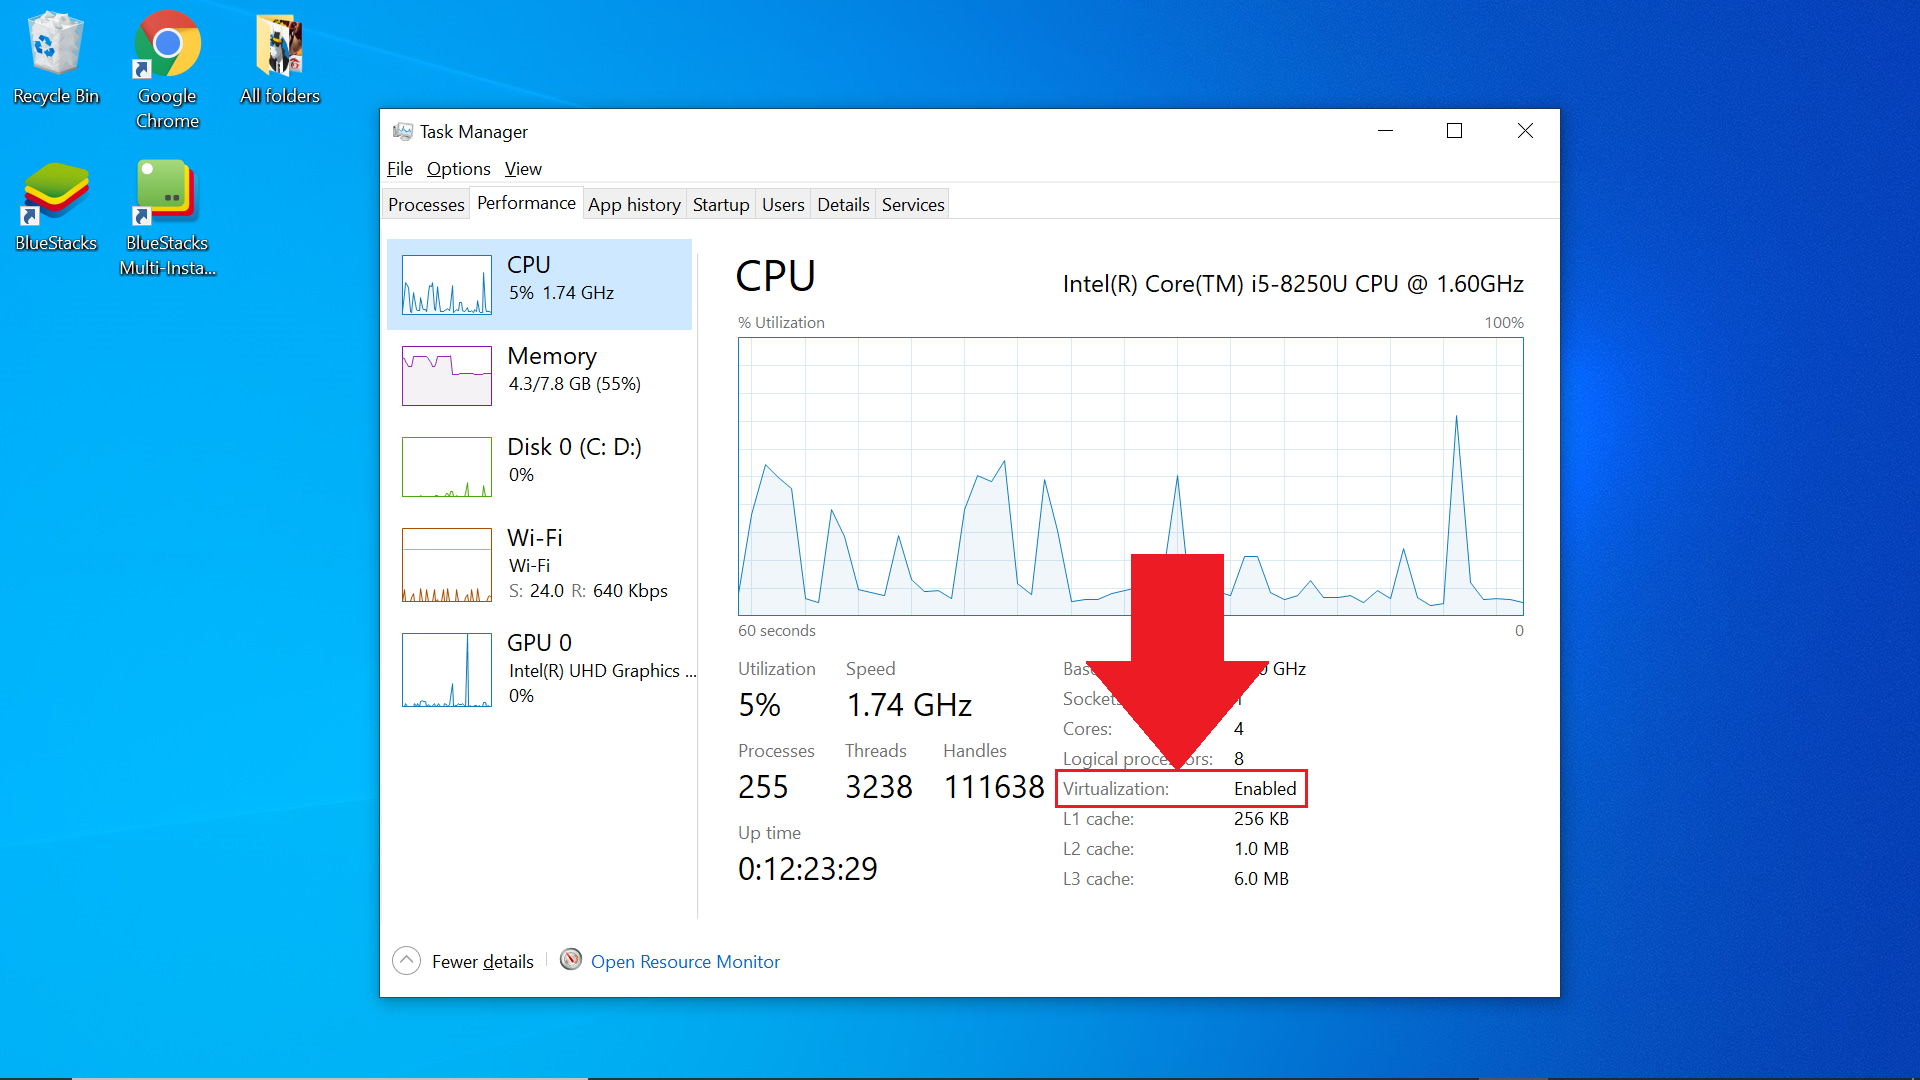
- Now, you need to click on the Performance Tab which is available in the top left corner.

- Here, you will find information regarding Virtualization.
- Besides Virtualization if it says Enabled then it simply means that it is turned on.
- On the other hand, if it says Disabled then it is not on.
ALSO CHECK – What is Werfault.exe and How to fix the error?
How to Check if Virtualization is Supported on your CPU?
Your computer needs to have Hardware-Assisted Virtualization to successfully support Virtualization. Here’s how you can check if your computer supports it or not.
Checking Virtualization support on Intel CPU:
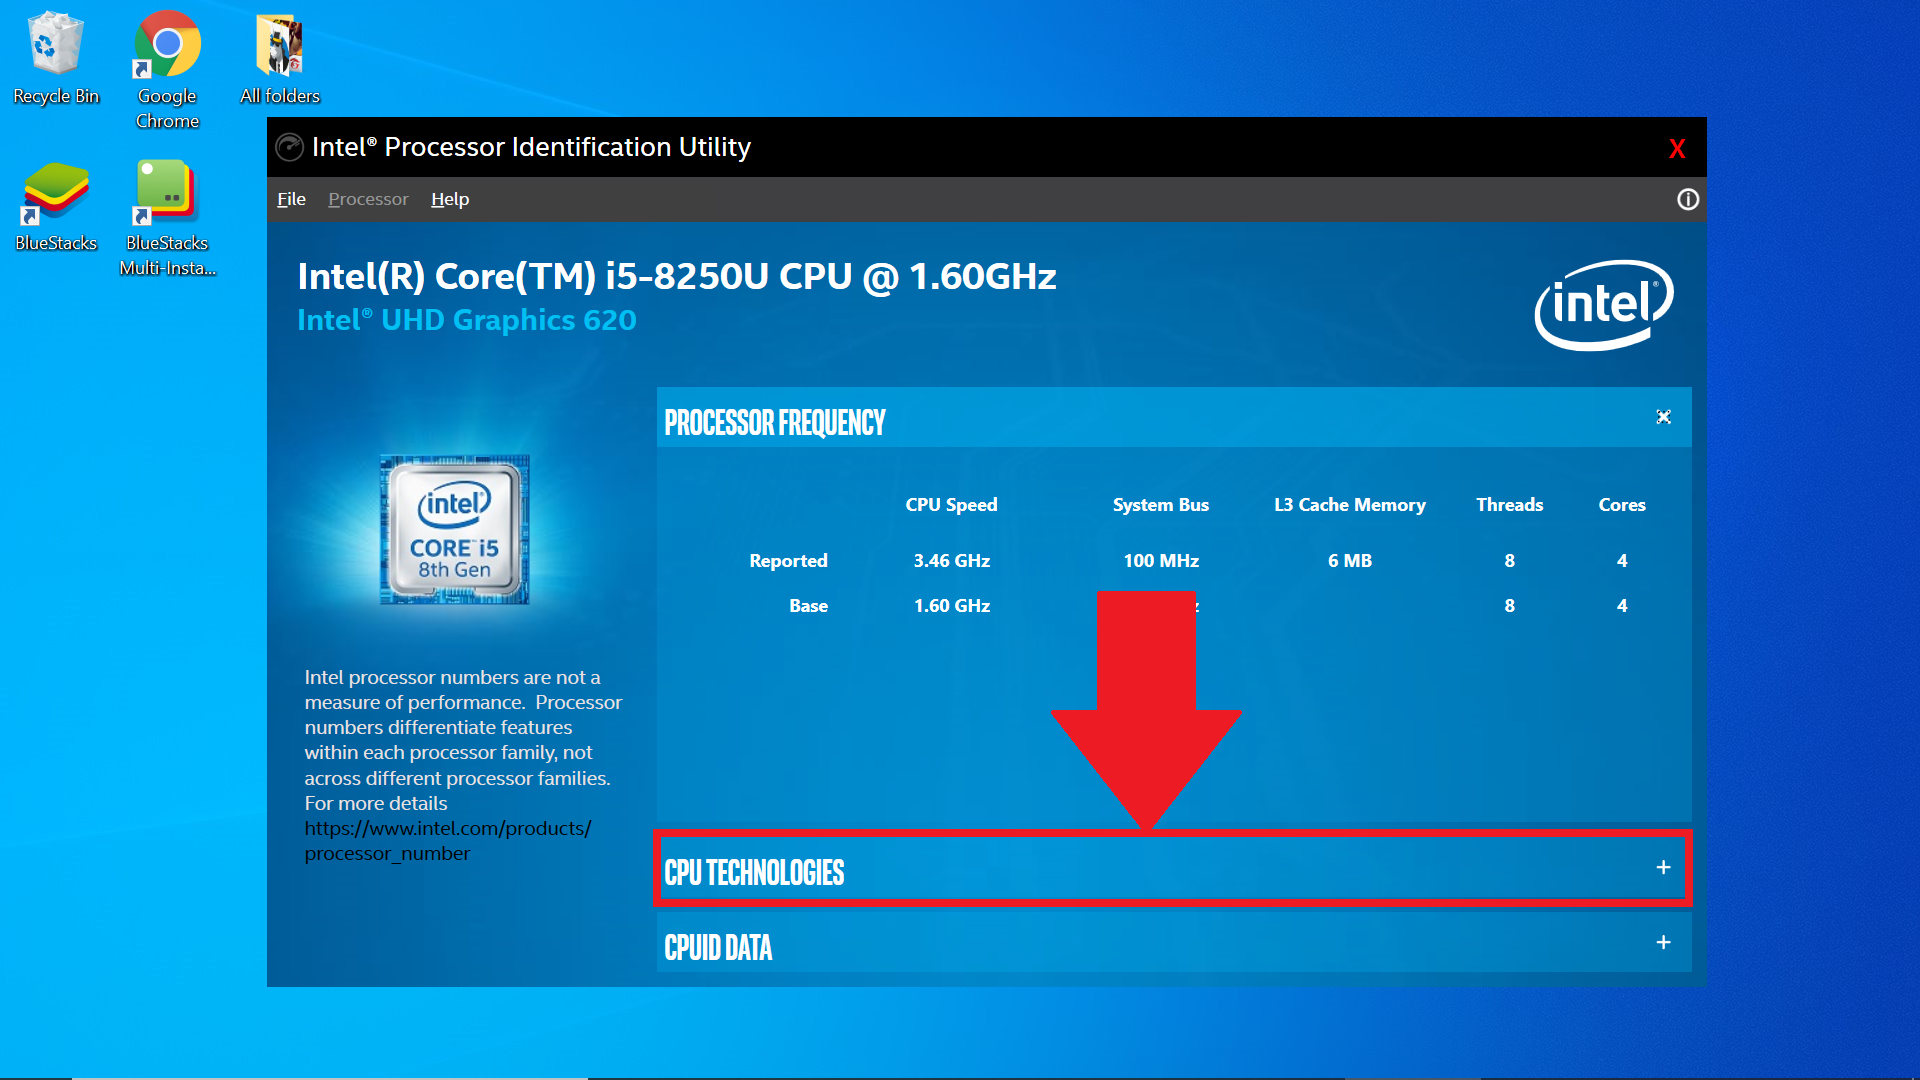
- Hop over to the Intel’s Official Website and Download and install the Intel Processor Identification Utility.
- After it is successfully installed launch it on your system.
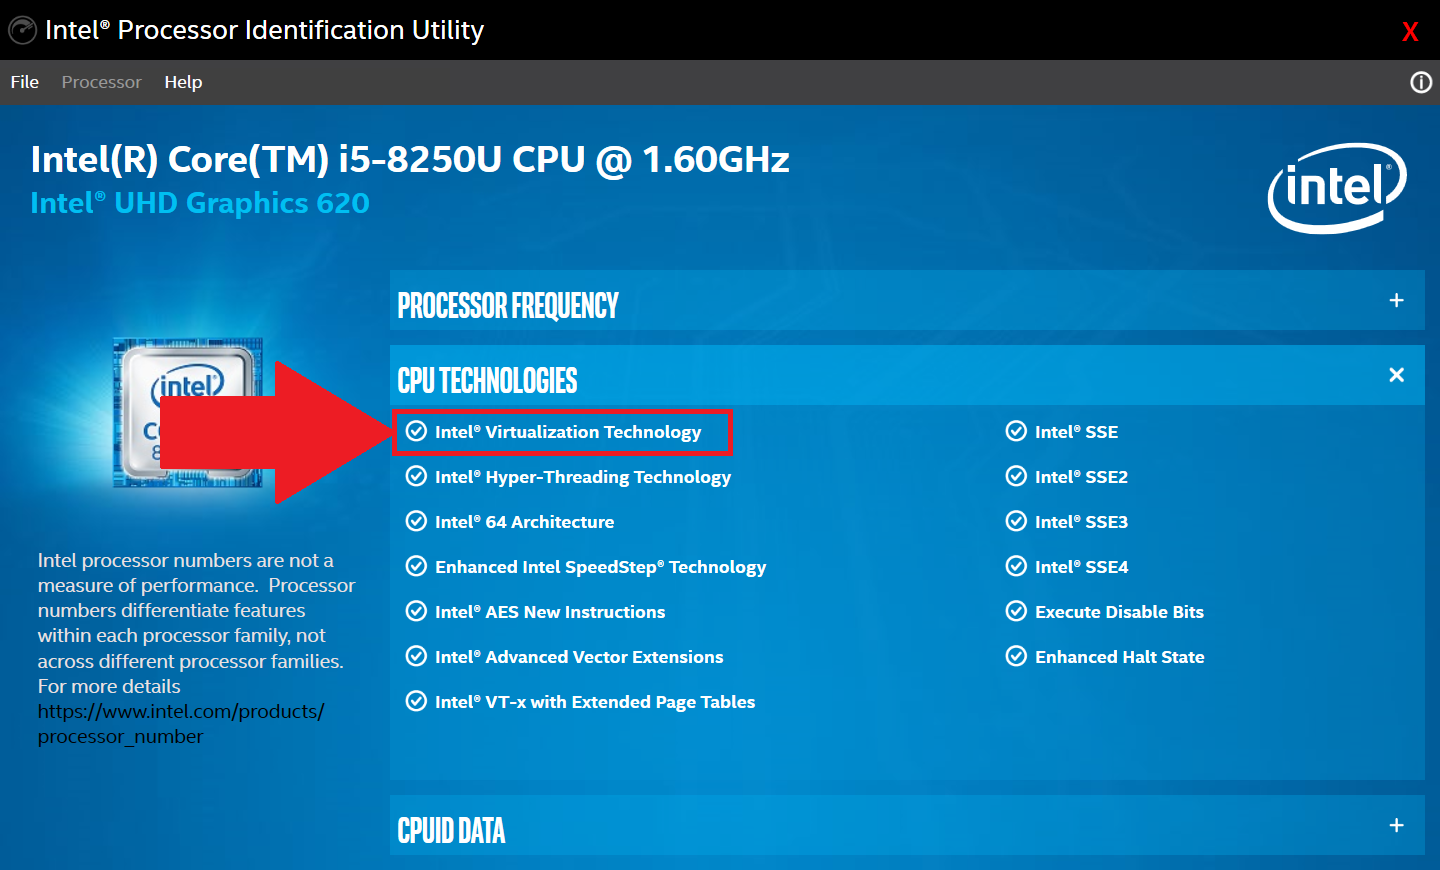
- Click on the CPU Technologies tab which is available on the Bottom.
- You would now see a drop-down menu.
- If you see the Intel® Virtualization Technology option checked or ticked then it means that Virtualization is supported on your Computer.

Checking Virtualization support on AMD CPU:
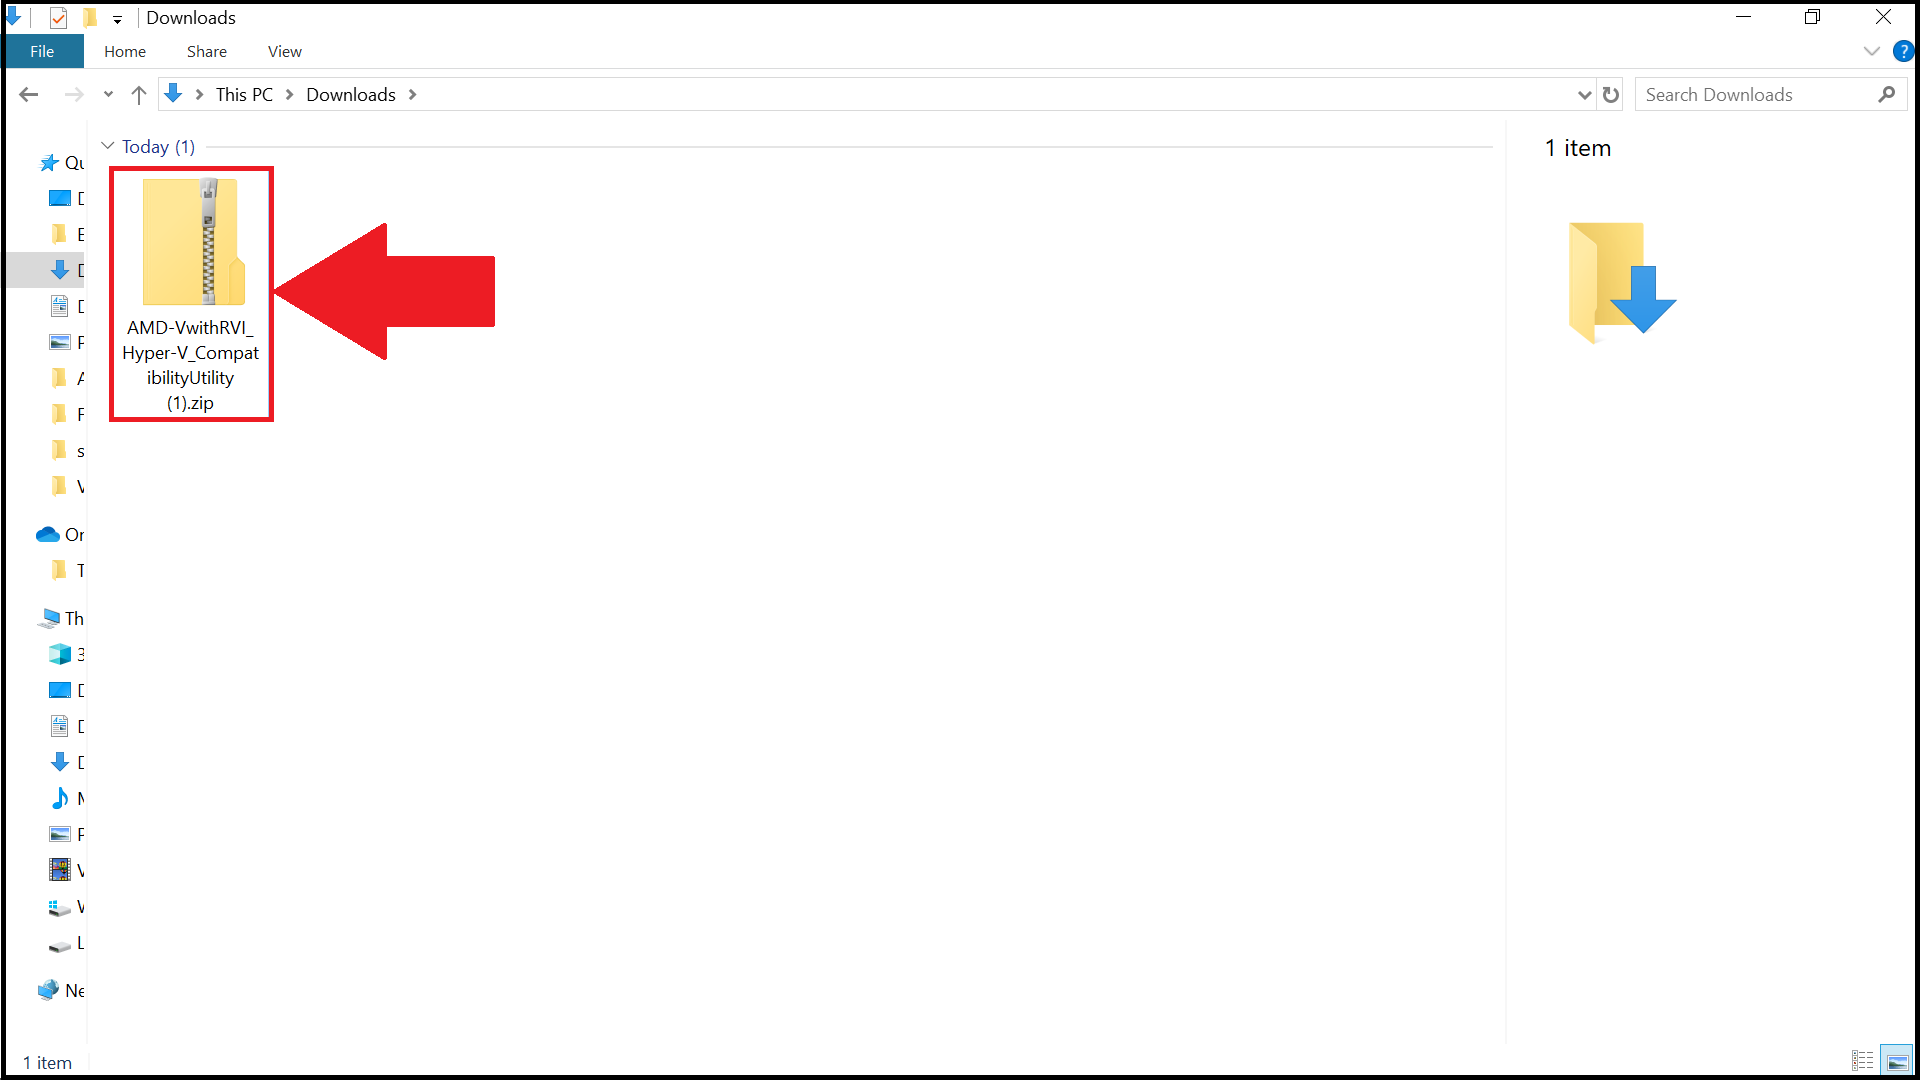
- First, you need to Download the AMD-V Detection Utility.
- Extract the Zip File.
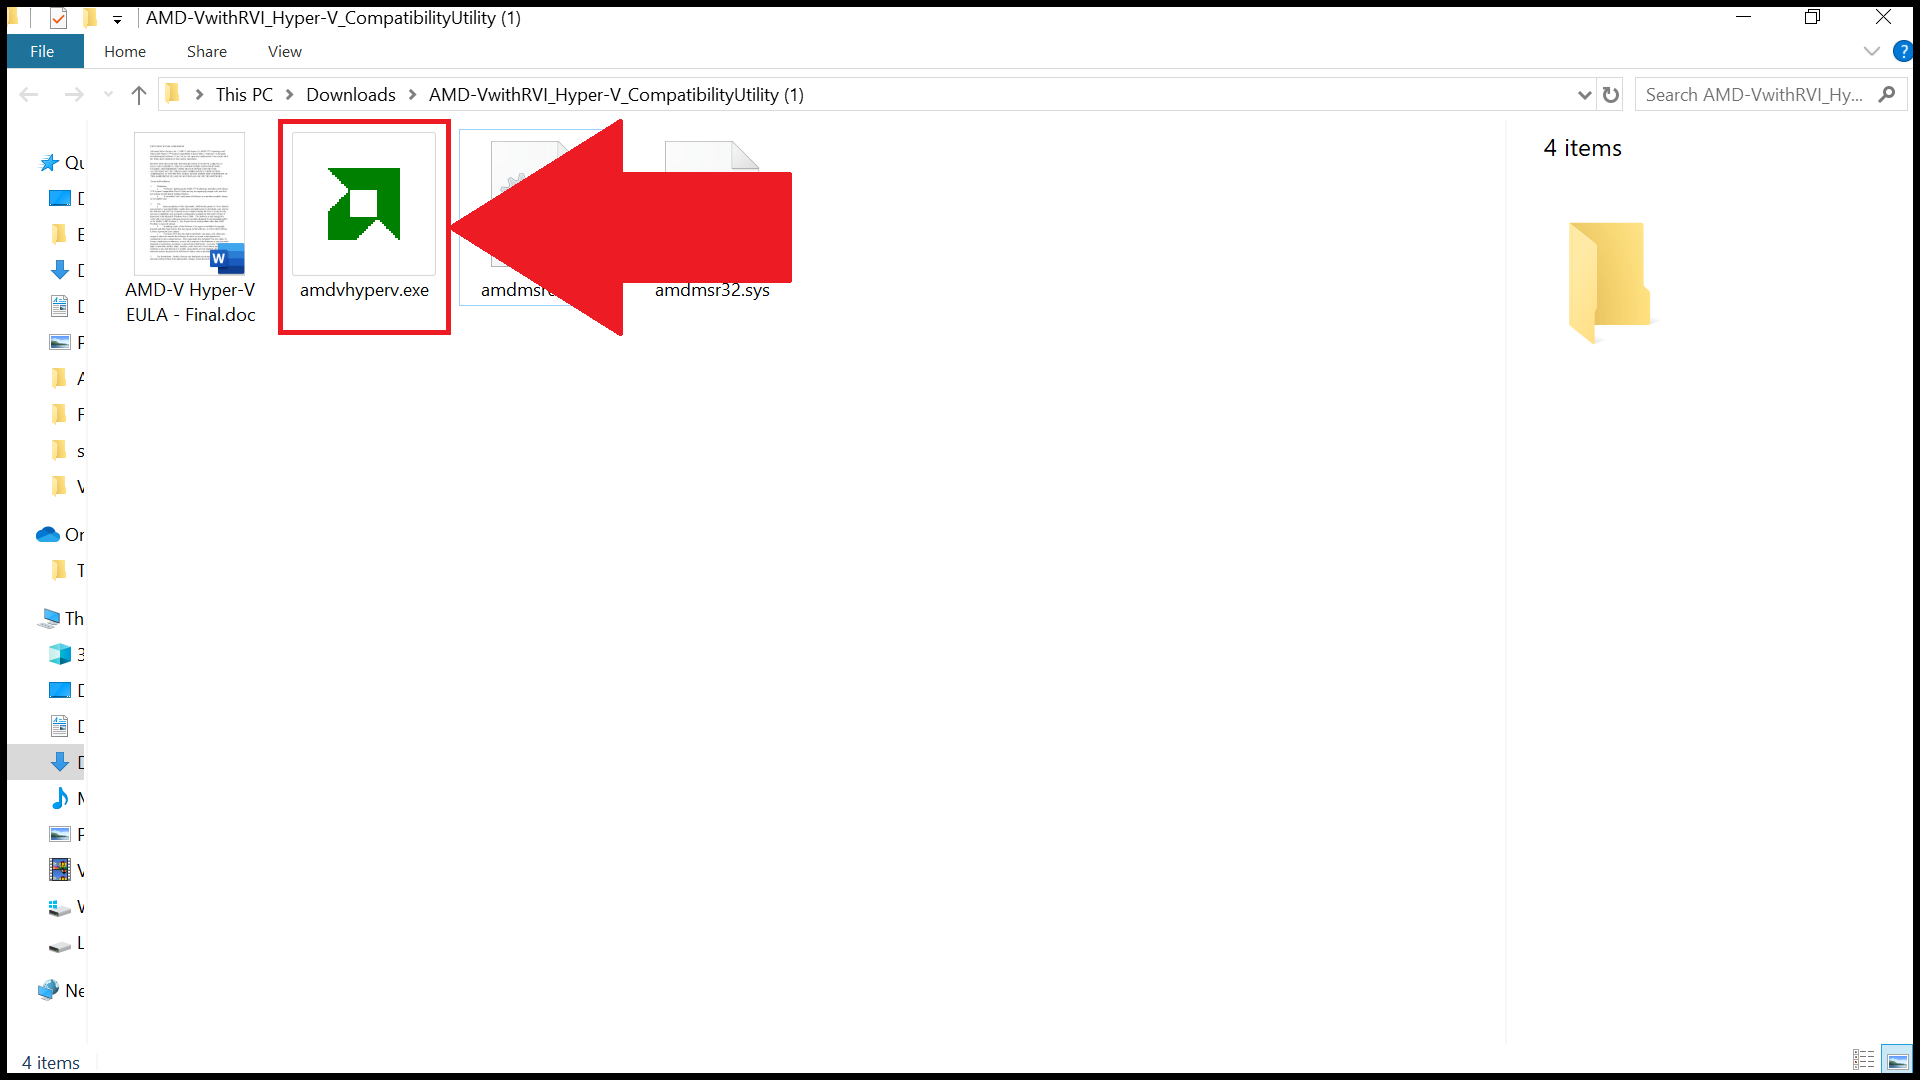
- Once you are done Extracting right-click on the .exe file and select Run as administrator.
- Then you will receive a notification regarding the status of Virtualization on your PC.
How to Enable Virtualization in Windows?
So once you verify whether your CPU is eligible or has support for virtualization, let’s see how to enable virtualization in your CPU or Computer. These methods will help you turn on virtualization for Bluestacks or any other software that recommends or requires the feature. Anyways, steps remains same or similar for any of the software’s need.
Step 1 – Enter BIOS to Enable Virtualization
BIOS (Basic Input Output System) helps in performing Hardware Initialization. You can control various functions of a computer by entering your PC’s BIOS settings. You can also Enable or Disable Virtualization. Follow the steps given below to enter BIOS in Windows 10.
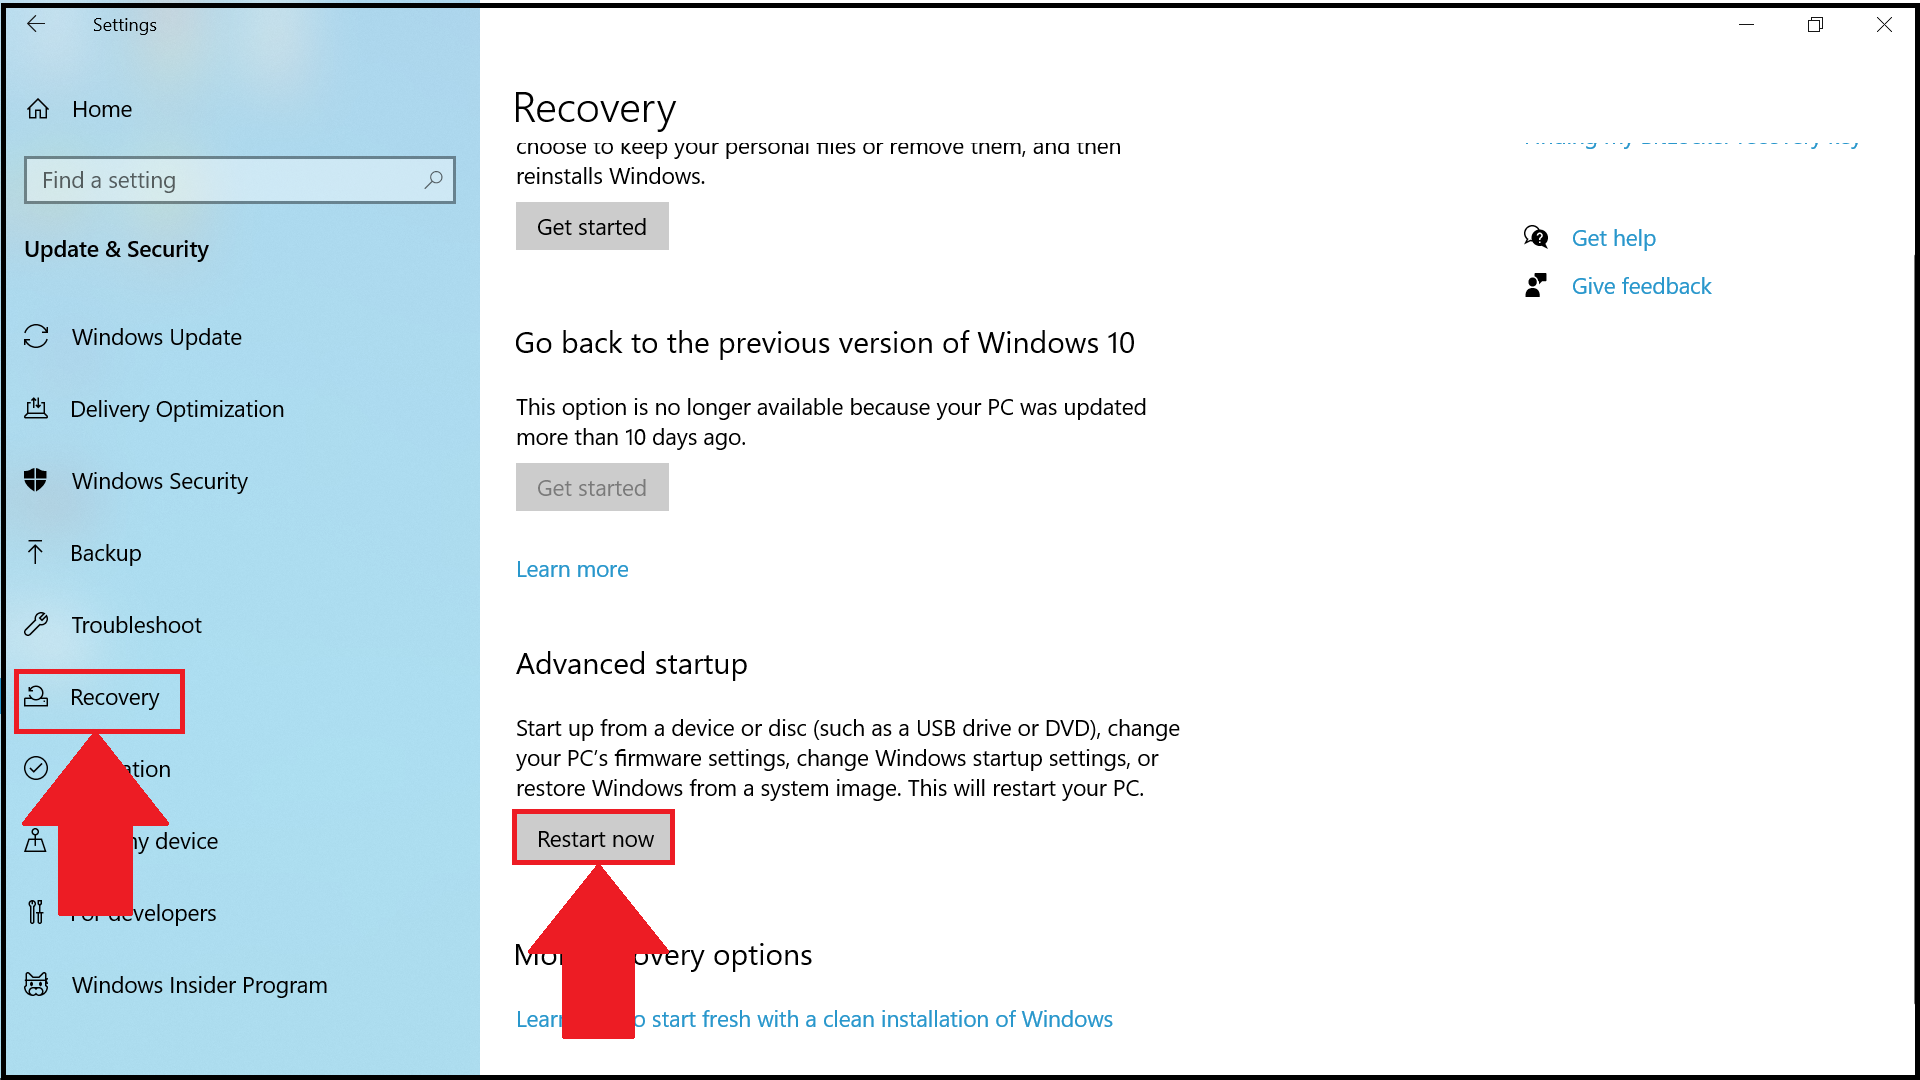
- Click on the Start button and select the Settings Option.
- Then select Update & Security settings.
- Click on the Recovery tab which is available on the Left. Then Hit the Restart Now option.
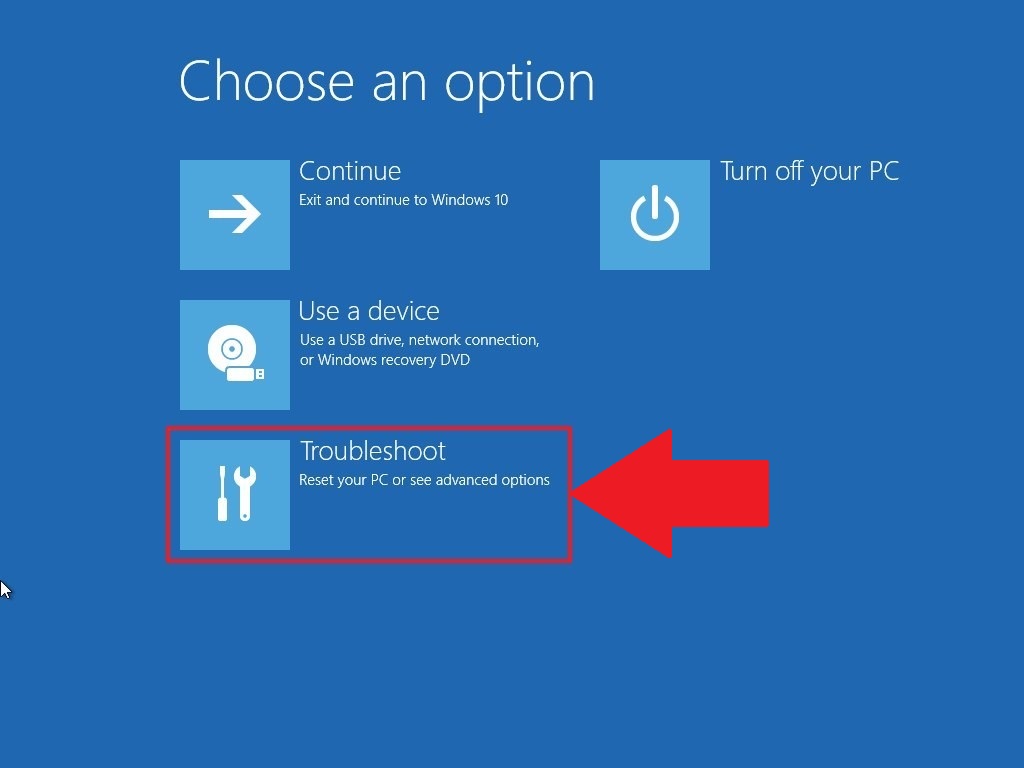
- Now, you will see four options. Select the Troubleshoot option.

- Then select Advanced Options.
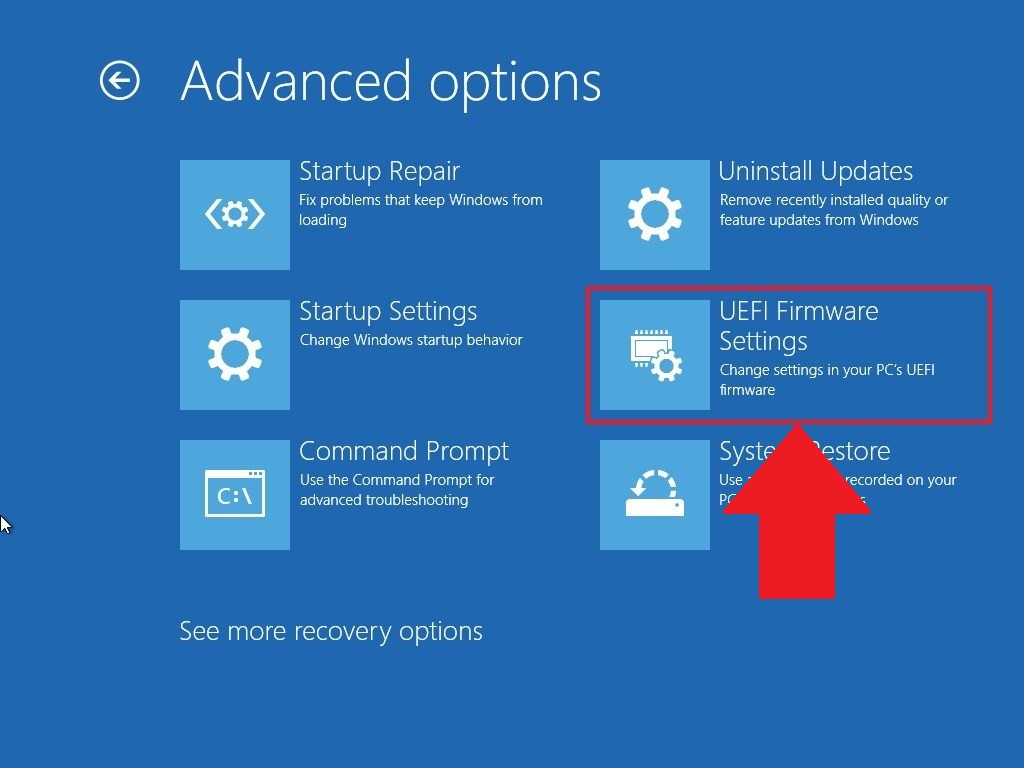
- Now, you need to click on UEFI Firmware Settings.
- In case, if you are not able to see the UEFI Firmware Settings then you need to then disable Fast Startup.
- Select the Restart Now option.
BONUS – Trick to Get Netflix Free Trial without Credit Card
Step 2 – Enable Virtualization in Your BIOS
Now, as you have done entering the BIOS settings in your computer it’s time to Enable Virtualization in your BIOS. The Virtualization Process will vary according to the CPU. We have mentioned ways to Enable Virtualization for both Intel CPU and AMD CPU.
How to Enable Virtualization in BIOS for Intel CPU?
(Note: The layout of BIOS Settings may be different for you)
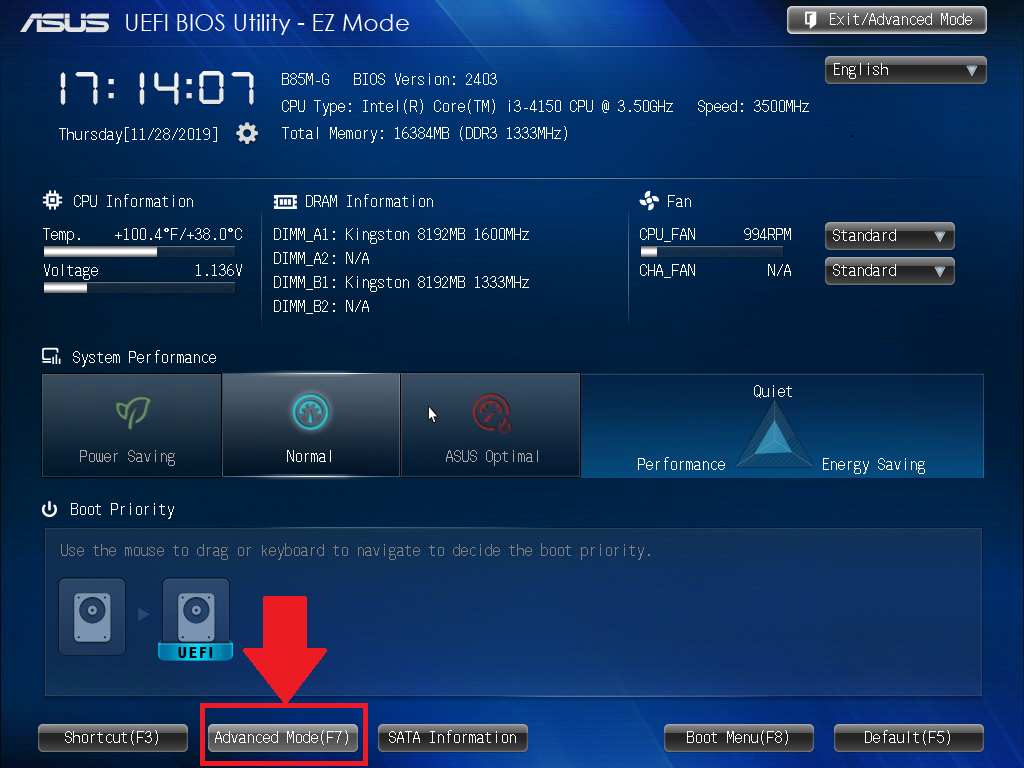
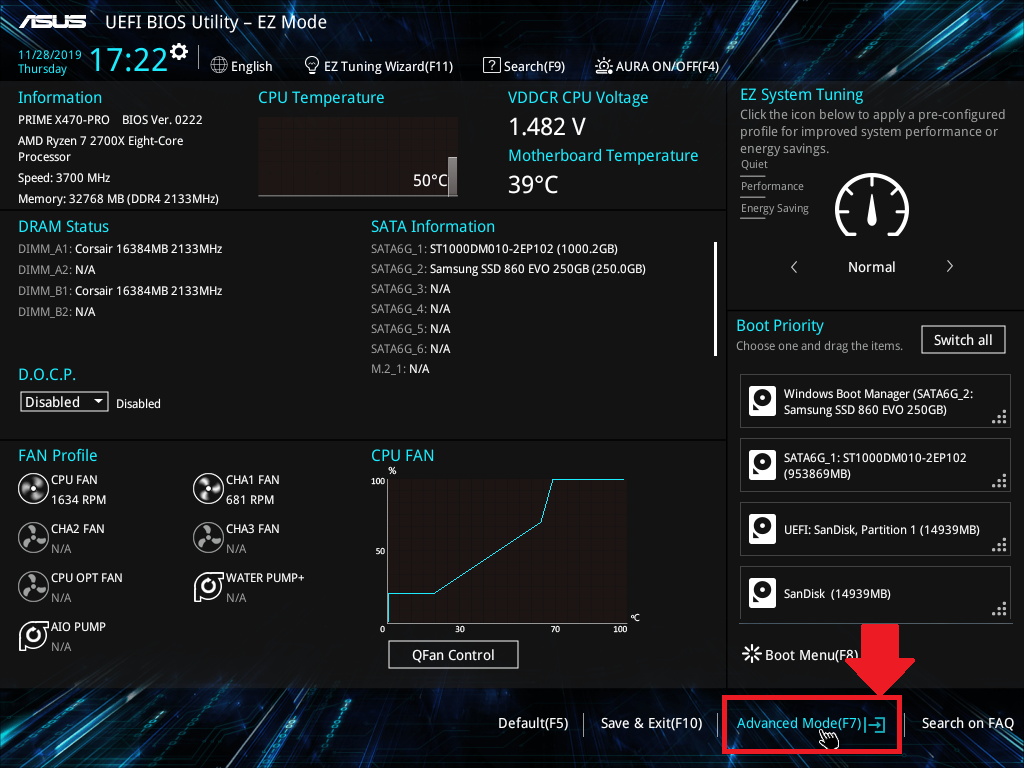
- Press the F7 key. You can also click on the Advanced Mode button.
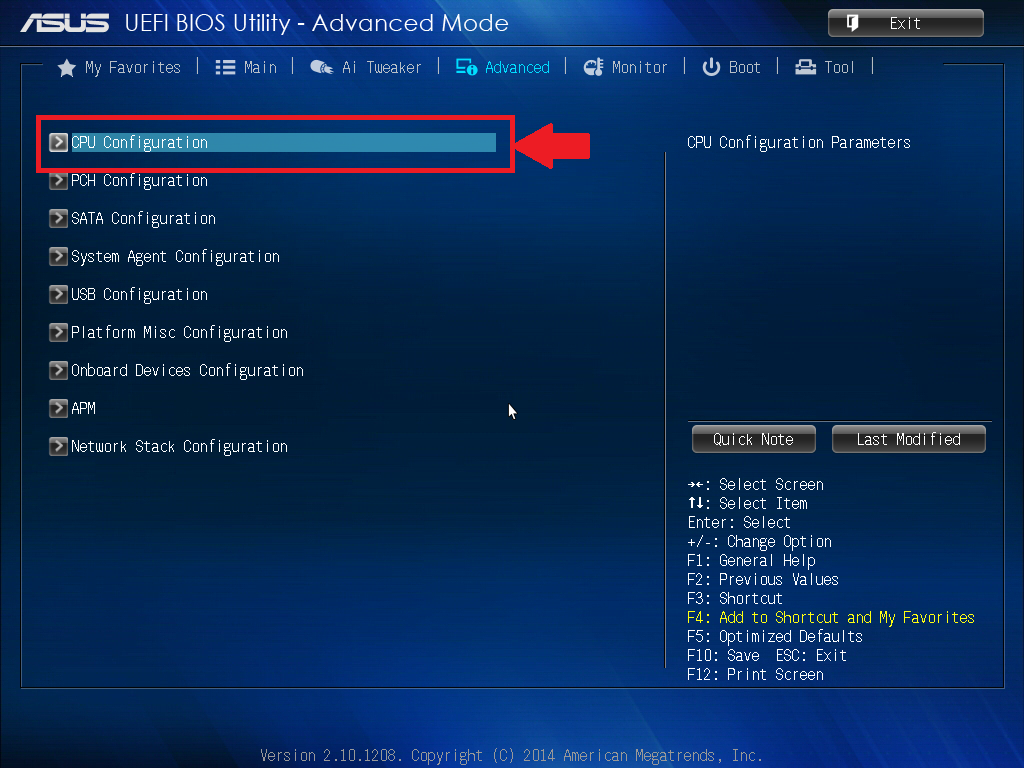
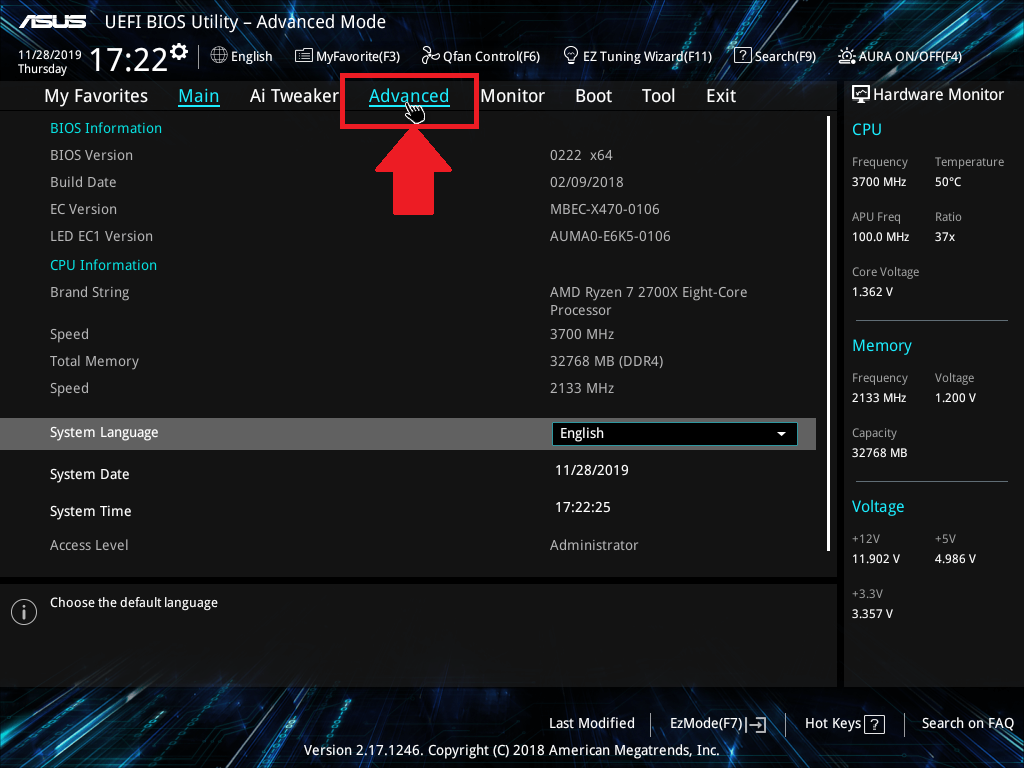
- On the top, you will see the Advanced Tab. Click on it.
- Now, you need to select CPU Configuration.
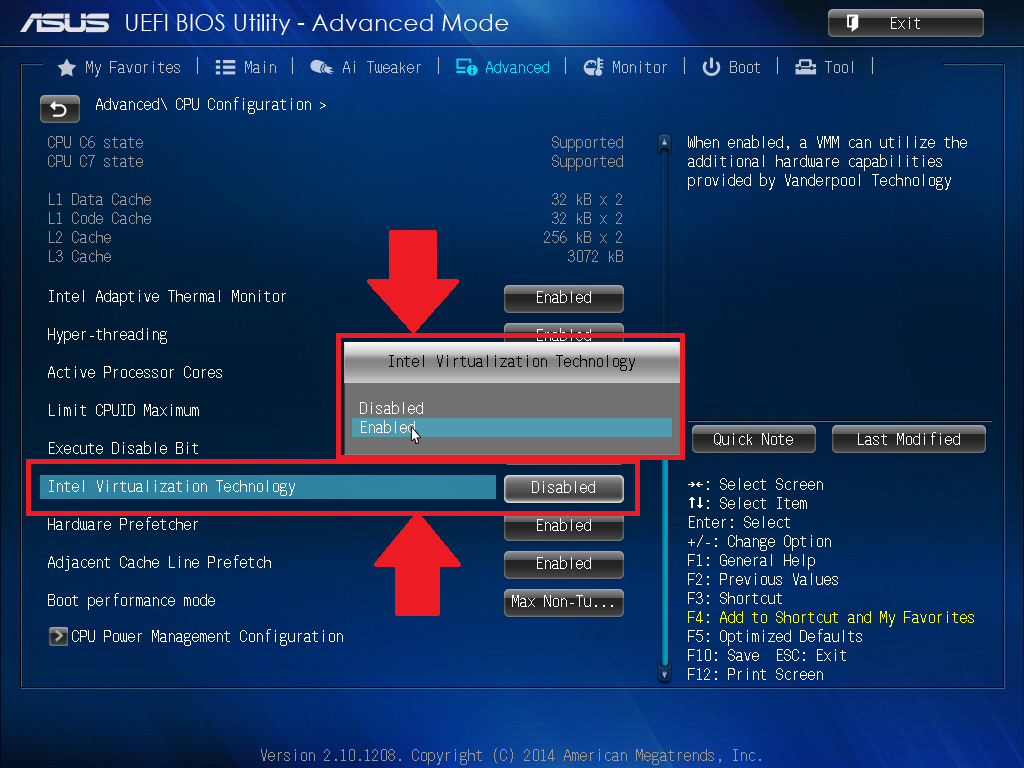
- To enable Virtualization click on Disabled next to Intel Virtualization Technology. Then, click on Enabled.
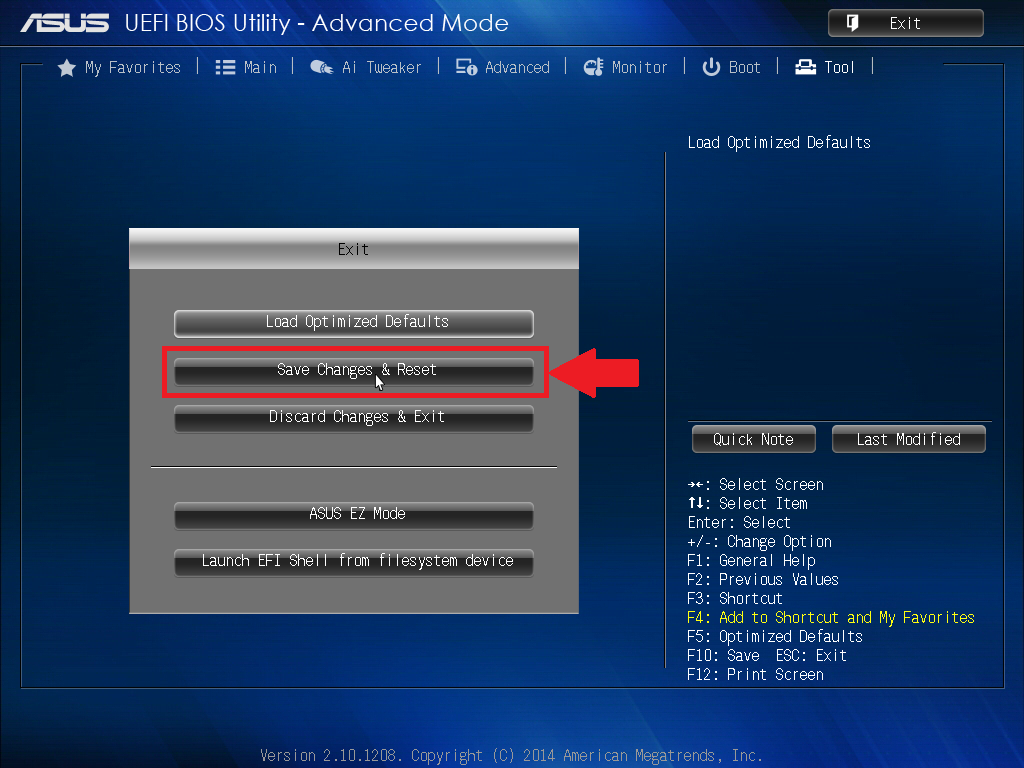
- In this last step, you need to click on Exit and select Save changes & reset.

How to Enable Virtualization in BIOS for AMD CPU?
(Note: The layout of BIOS Settings may be different for you)
- Within the BIOS settings, press the F7 key. You can also click on the Advanced Mode option.
- On the top click on the Advanced Tab.
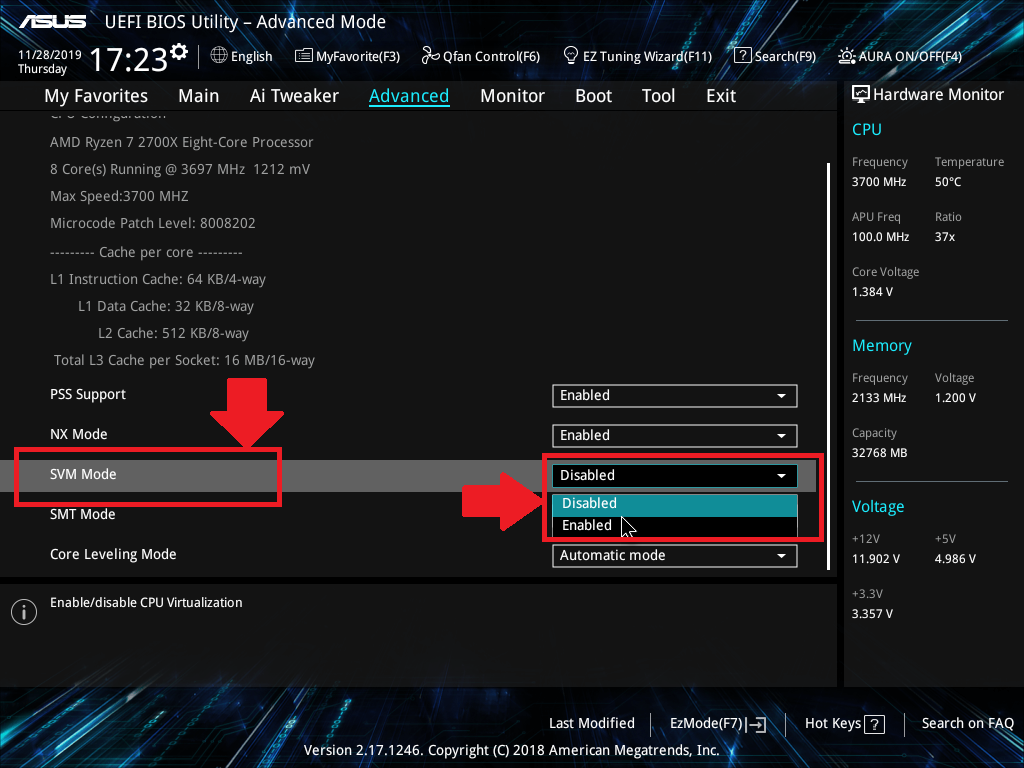
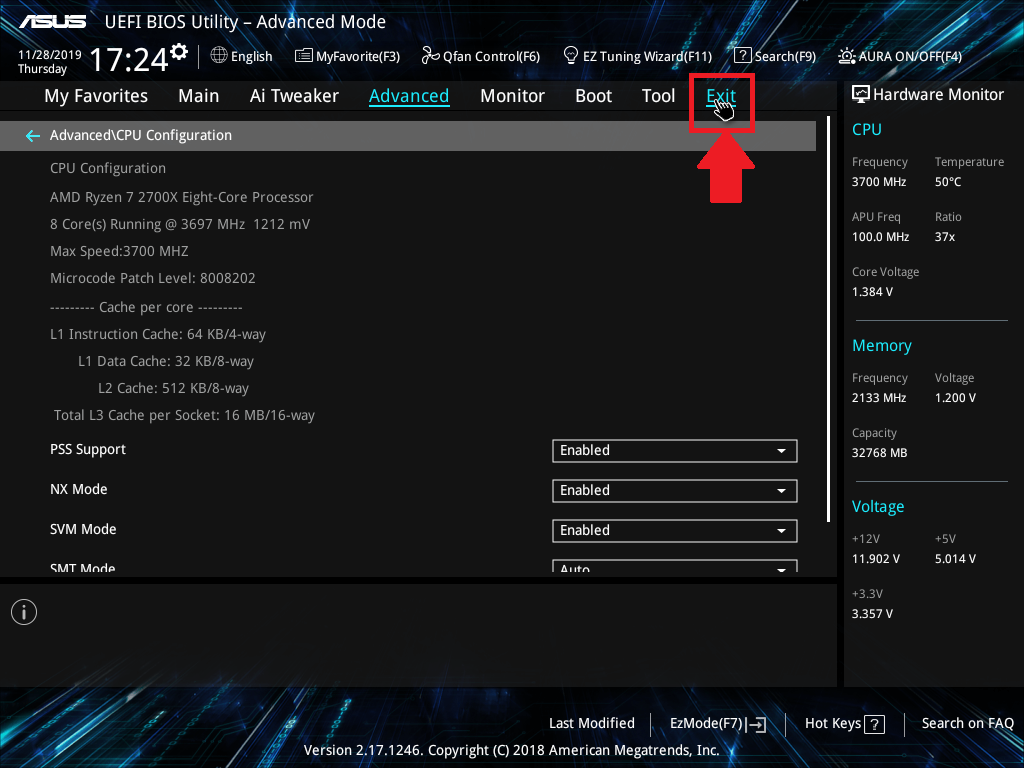
- Now, you need to select CPU Configuration.
- Open the drop-down menu next to SVM Mode. To enable Virtualization to choose Enabled.
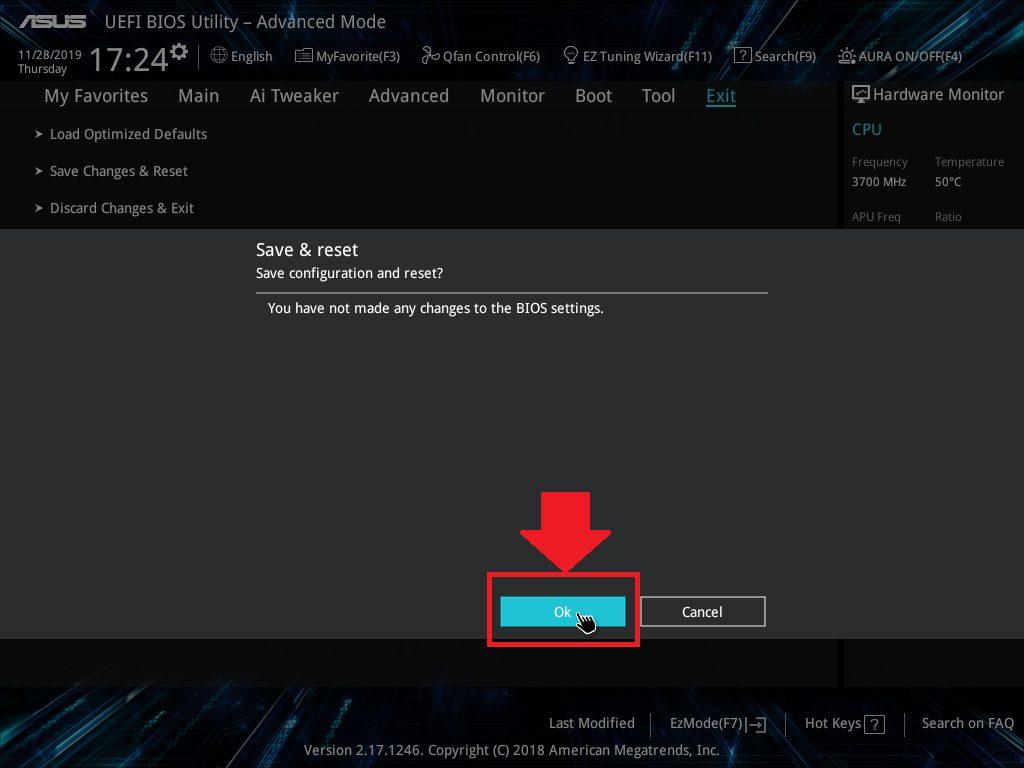
- Lastly, you need to click on Exit.
- Now, you need to save your changes. Select the OK option.

YOU SHOULD READ – Top 5 Methods to Fix Microsoft Compatibility Telemetry High Disk Usage Issue
How to Enable Virtualization in BIOS HP?
- Start your computer and keep pressing the Esc key at startup.
- Click F10 to enter BIOS.
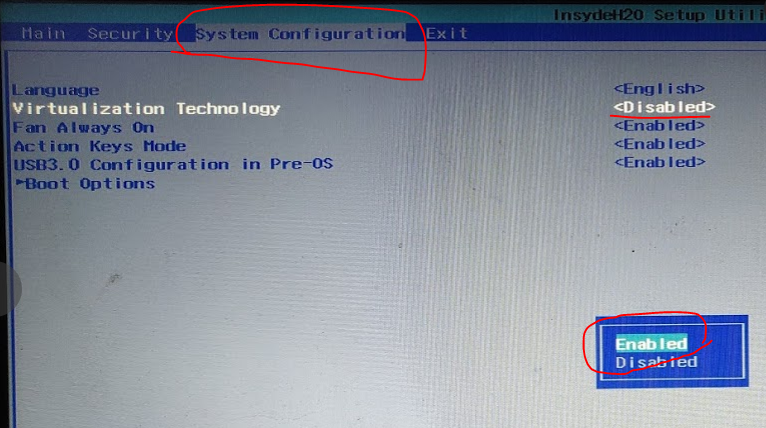
- Simply click the Right Arrow Key to System Configuration tab.
- Now, you need to select Virtualization Technology. Then press Enter.
- Select the Enabled option and press Enter.

- Press the F10 key on your keyboard and select Yes.
- Press the Enter key to save changes
- Reboot.
KNOWLEDGE HUB – What is SuperFetch and How to Disable SuperFetch in Windows?
How to Enable Virtualization in BIOS Asus?
- Start your Asus Computer and press the F2 key. If this is not working for you press the Delete or Insert key. Even if this is not working for you press F10.
- Press the Right Arrow Key on your keyboard to the Advanced tab.
- Simply select the Virtualization Technology and then press Enter.
- Select the Enabled option and press Enter.
- Press the F10 key and select Yes.
- Press Enter to save Changes and Reboot.
Concluding…
In this way, you can Enable Virtualization through BIOS Settings easily by following all the steps properly. Whether you have Intel CPU or AMD CPU you can Enable Virtualization and do crazy things with your computer. Make sure you have followed the steps or methods for the computer of your brand, like Lenovo, HP, Dell or Intel & AMD CPU.