
[toc]
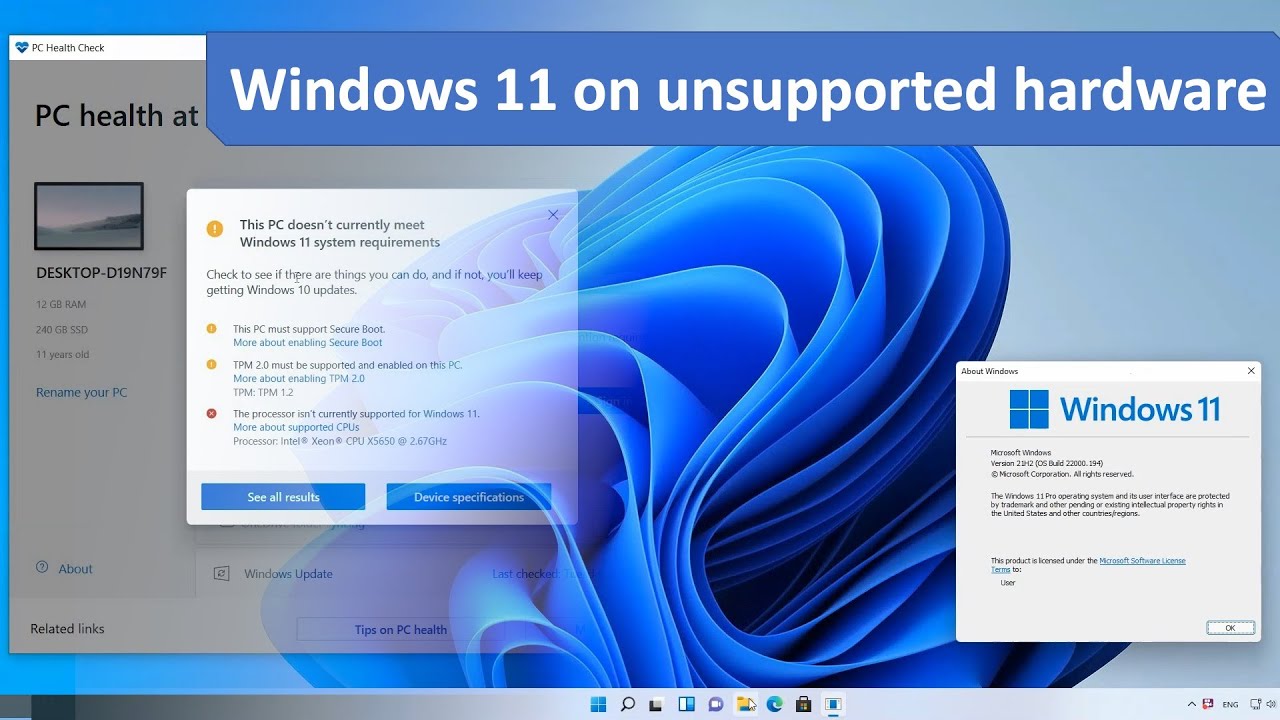
Overview
Yes. It is right that if you don’t have a compatible device, computer or laptop, you can still run Windows 11 on it. This you can not do with the Windows Update but you will have to use a bootable USB Flash Drive or also you can use an ISO file for this process. This will lead you to the neat installation of Windows 11.
Also that if you have chosen this method (Installing Windows on an unsupported Device), you will have to set it up manually. Microsoft have already defined this as an “Unsupported State” which means your Device is not meeting the Minimum hardware requirements. According to Windows’ terms and conditions company won’t be obliged to give any kind of technical support or any driver updates that come along with the Windows 11 in present or even in future. So whatever you do it’s on you.
So firstly you will have to install the Windows 11 on a bootable drive on an unsupported device. Here we are giving you the step-by-step guide for the process. It is humble request that not to skip any steps in order do the process faster. Because this is a lengthy process and more to add that you will not be having any kind of technical support from Windows for whatever you are doing. So without further ado let’s get started.

Step-by-step process to install Windows 11 on Bootable USB Drive
Step 1: Start the PC with USB inserted.
Step 2: Press Shift+F10 to open command prompt.
Step 3: Type following command and press enter
regedit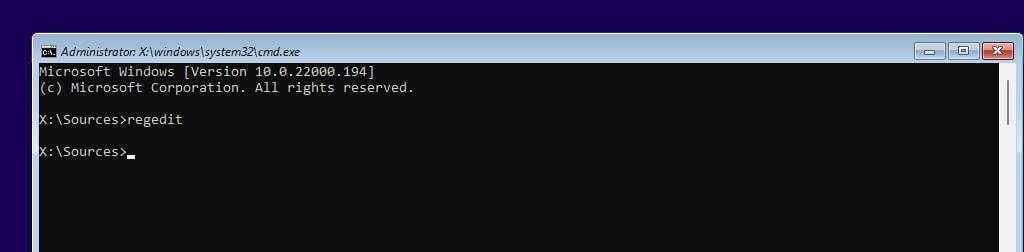
Step 4: Go through the path shown below
HKEY_LOCAL_MACHINE\SYSTEM\SetupStep 5: Next after finding the location you will have to click Setup>New>Key
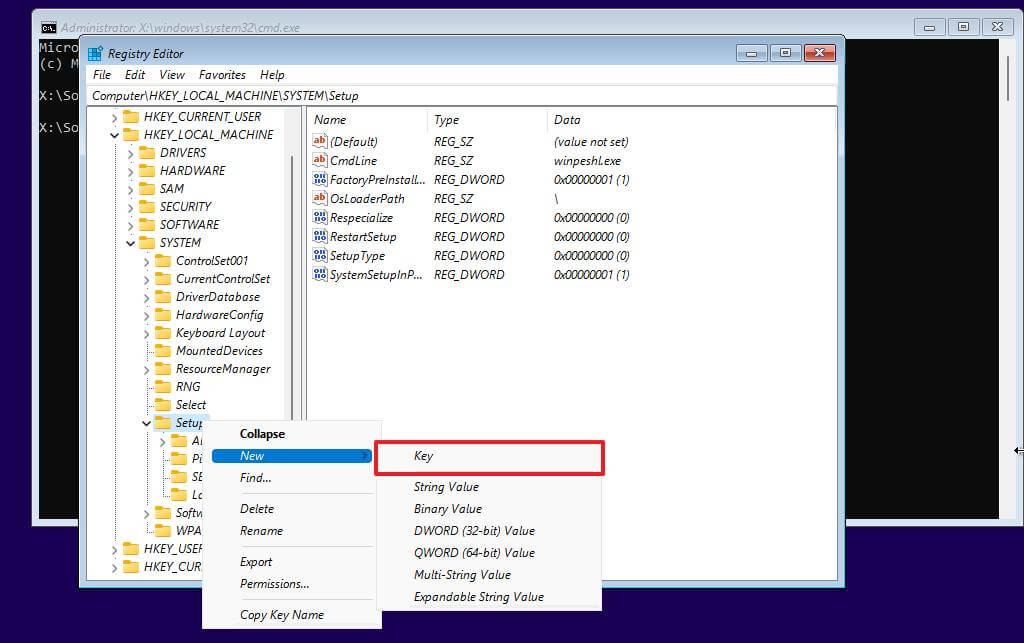
Step 6: Enter the key name as LabConfig and go forward.
Step 7: As soon as you click right on LabConfig you will have to select New>DWORD (32-bit) value option.
Step 8: Again name the key BypassTPMCheck and go Enter
Step 9: Double click the new key and set its value from 0 to 1.
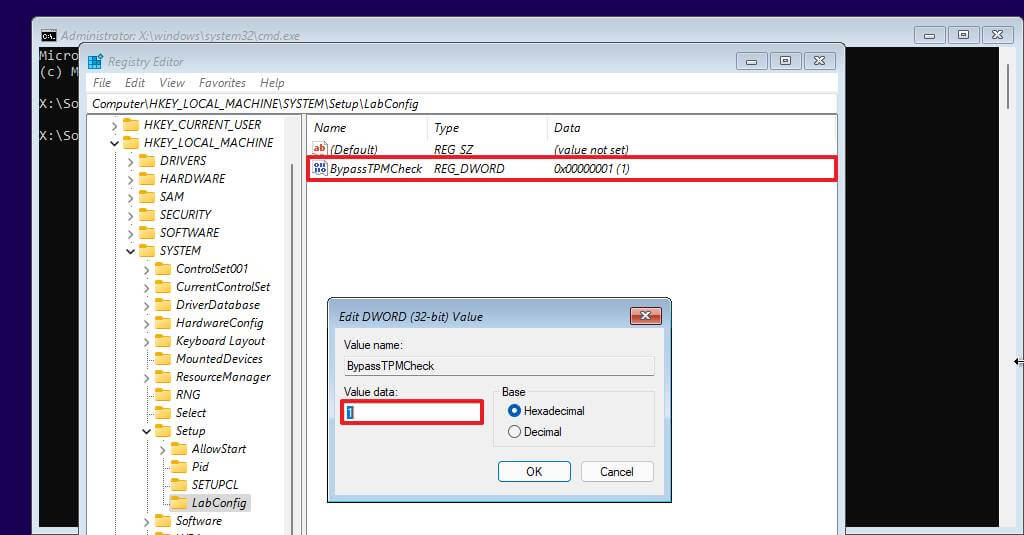
Step 10: Click on OK button
Step 11: click right on LabConfig you will have to select New>DWORD (32-bit) value option.
Step 12: Name the key BypassSecureBootCheck and press enter
Step 13: Again double click the ley you have made recently and value it from 0 to 1.
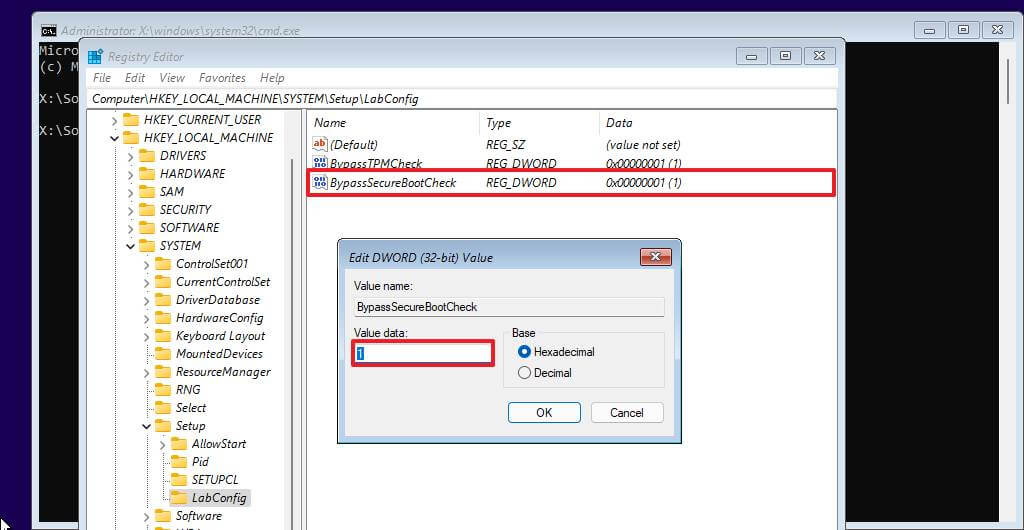
Step 14: Click OK then Next.
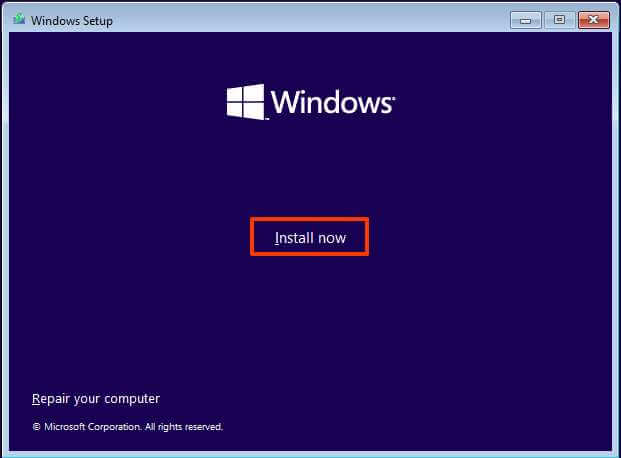
Step 15: Then Click Install now Button
CHECKOUT: How to Fix Windows Stuck on Just A Moment (Install, Update or Reset OS)?
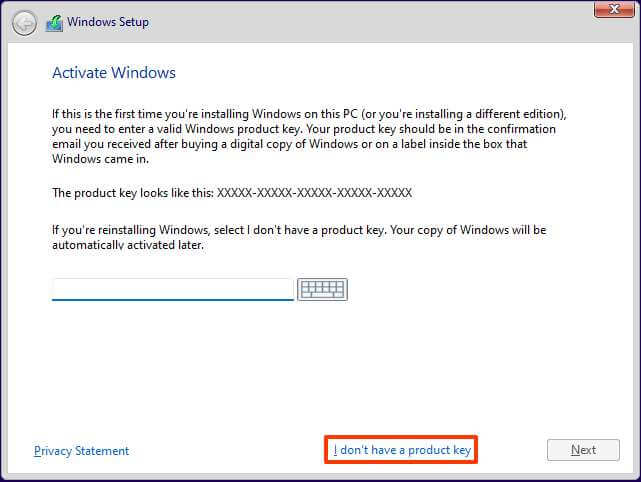
Step 16: You will have to select I don’t have a product key on the next page if you are reinstalling and if you have previously activated after the installation this will happen automatically.
Step 17: Select the edition of windows 11 that your license allows.
Step 18: Click the I accept the license terms option>Next>Custom: Install Windows Only(advanced)

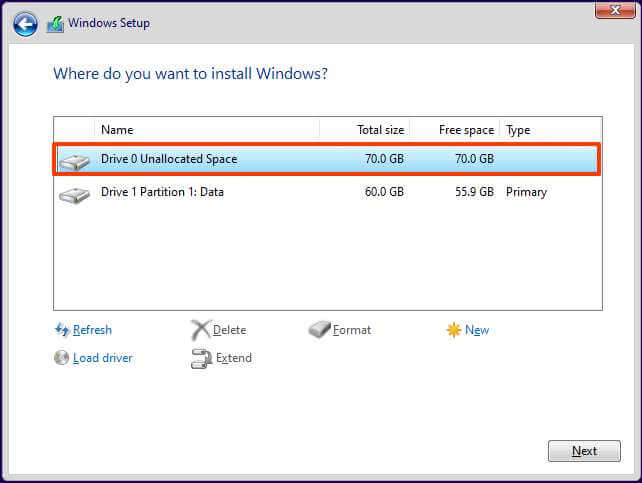
Step 19: Now you will have to select every partition in which you have to install Windows 11 and then click delete button.
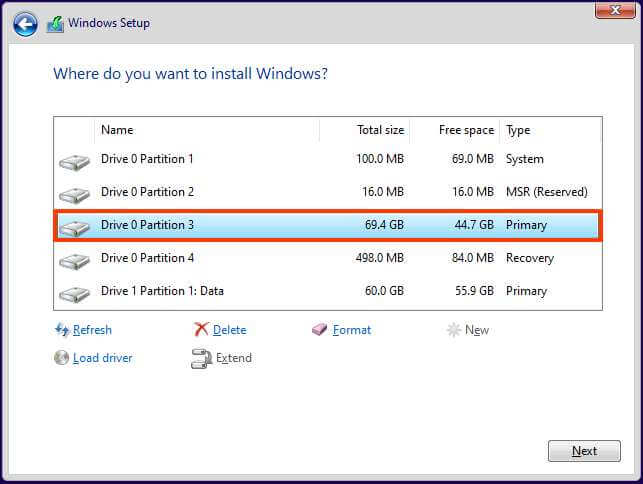
Caution: When you delete a partition it will delete all the data on a drive so you better keep backup of it.
Step 20: Select the drive to install Windows 11 on unsupported device.
Step 21: Click Next then select your Region.
Step 22: Select your Keyboard layout settings then confirm a name for your PC.
Step 23: Set up your personal data in next screens like Setting up a pin, adding email address, customizing your device, Backing up files, and installing Microsoft 365 for free.
Once you have done all this you will get your Windows 11 on an unsupported device but on a contrary you will not get any kind of driver updates on your device.
Conclusion
This process was all about installing Windows 11 on your Unsupported PC. But there are certain things that you have to keep in mind while you are doing so, firstly keep the backup of all of your data which were on your PC, also don’t skip any step from these 23 steps follow it through the point otherwise your PC may malfunction. And if still you are getting issues running this method on your PC just let us know on comment section we will be helping you there.
Check out: How to Install & Run Android Apps on Windows 11 using Amazon Appstore?