
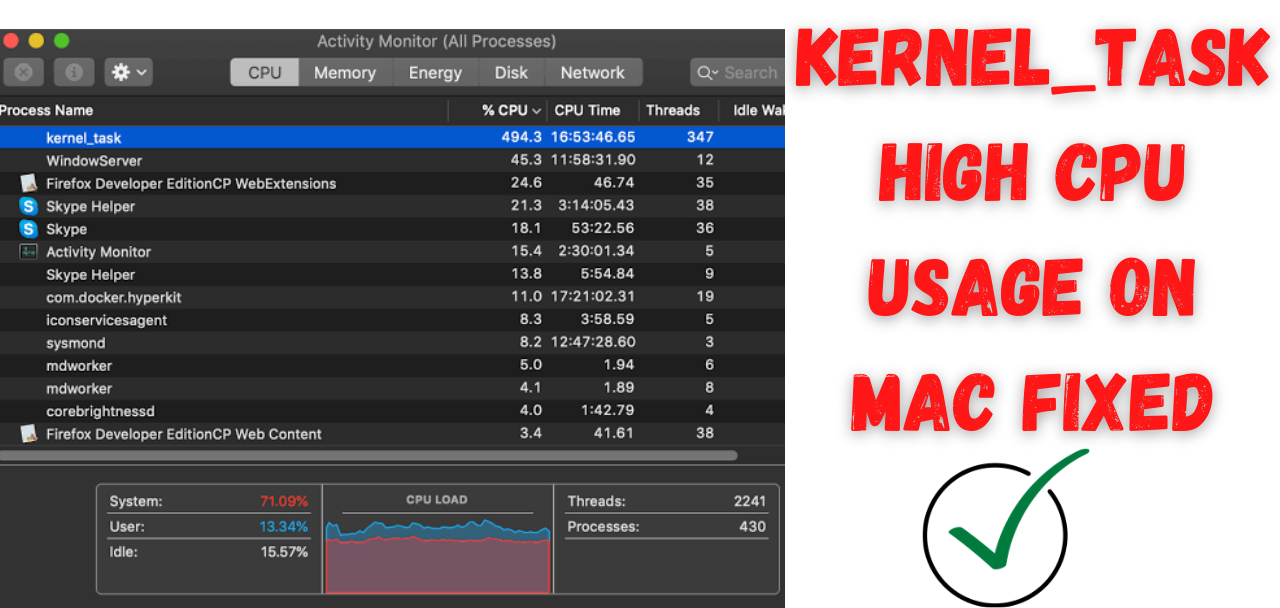
Kernel_task High CPU Usage is a very frustrating issue faced by many people. It makes your Mac super slow and you will also face overheating issues. Even after shutting down all the programs Mac still works like a turtle. I know you have not spent so much money on your Mac to face this! And such High CPU Usage issues are more common in Windows but unfortunately Mac users are somehow sailing in the same boat. 😐 But, don’t worry we are here to help you. In this article, we will tell How to Fix Kernel_task High CPU Usage on Mac without any complications.
[toc]
What is kernel_task on Mac?
The kernel_task process is present at the core of your Mac’s operating system. It is responsible for controlling the machine’s temperature. The main purpose of it is to regulate the CPU. So, every time you start your Mac, kernel_task process automatically starts and constantly runs in your background.
It uses a very small portion of your Mac’s CPU but, it may reach an unreasonably high level. This can be due to the excessive heat which is generated because of charging. Also, if you are using a lot of programs that use a lot of your CPU or if there is some issue in your Mac’s cooling fan then also you can face this issue. Some Hardware related issues can also increase the CPU’s temperature. See, whenever there is a sudden increase in your CPU’s temperature, macOS automatically detects it. To control this it sends kernel_task. While it is trying to cool down your Mac, kernel_task uses a huge part of your CPU.
CHECKOUT – Best iOS Emulators to run iOS or iPhone Apps on Windows PC
Check CPU usage on your Mac
Now, before we tell you the solutions to get rid of the ‘kernel_task mac high CPU issue, first you need to check CPU usage on your Mac. Follow the steps given below:
- In the Menu Bar, you need to click on Go.
- Then select Utilities.
- Simply double-click on the Activity Monitor.
- Now, switch to the CPU tab and focus on the %CPU column.
- In the %CPU column, you can see apps that are constantly using your Mac’s CPU.

- The CPU usage of the apps on your Mac is arranged in descending order(highest usage to lowest usage).
- In case you are not able to find the kernel_task process then follow the steps given below:

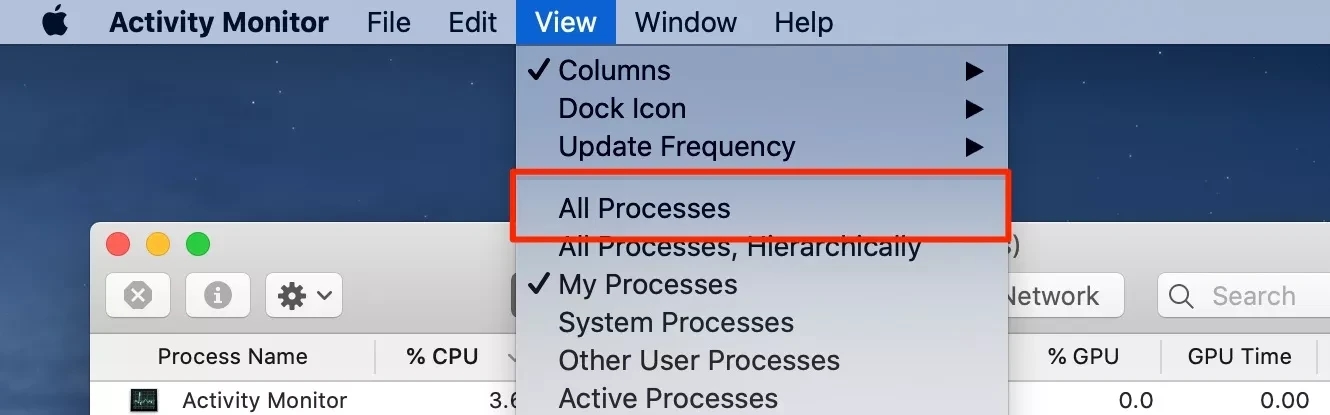
- Don’t close the Activity Monitor Window.
- On the Menu Bar, you need to click on View.
- You need to select the All Processes option from the drop-down menu.

- Now, you will be able to see the CPU usage of the kernel_task process.
How you can Reduce CPU Usage on Mac?
Now, as you have noticed the CPU usage of various apps on your Mac you will definitely have this question: How can I Reduce CPU Usage on my Mac? Don’t worry we got you covered. Just follow the instructions given below:
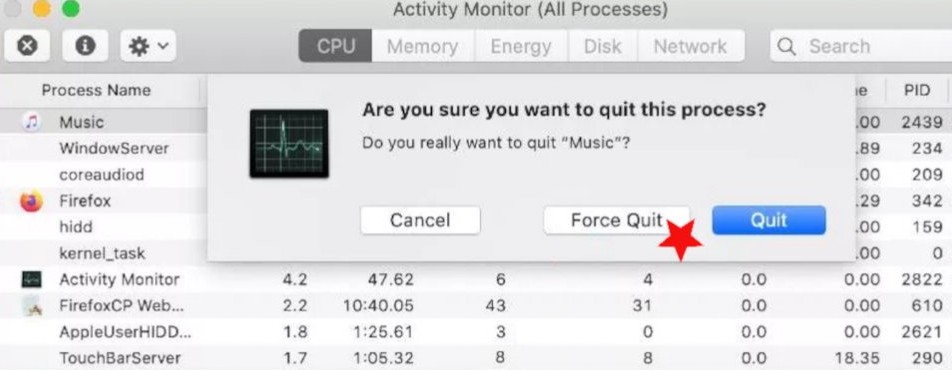
- Open the Activity Monitor on your Mac.
- Select any app and click on the x icon which is available on the top left corner of the Window.
- Choose the Force Quit option.

- We highly recommend you close down the CPU-intensive third-party browsers like Firefox, Google Chrome, etc.
- If still the problem exists follow the solutions given below.
ALSO CHECK – [Fixed] Windows Could Not Automatically Detect This Network’s Proxy Settings
Method 1: Restart your Mac
This solution may seem a little bit stupid but, before you try other complicated troubleshooting steps this one is worth trying! Restarting not only fixes the kernel_task process but also fixes other errors or bugs on your Mac. Restarting helps to kill malicious apps which are eating up your Mac’s CPU. Although, if you are getting this problem for a long period of time then this solution is not for you. On the other hand, if you have faced this issue for the first time then this might help you.
Method 2: Update to the Latest Version of macOS
Updating your macOS may help you in resolving the kernel_task issue. Apart from this updating macOS ensures the smooth running of your Mac.
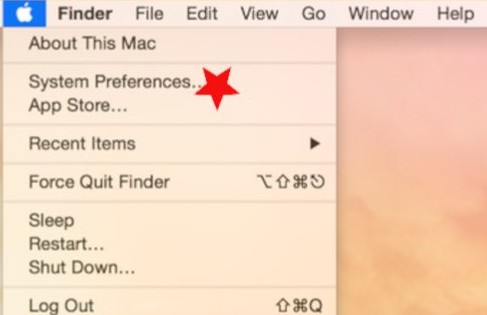
- Open the Apple Menu and select the System Preferences option.

- Hit the Upgrade Now option.

- It’s always a good idea to also update all the apps on your Mac.
- Open the App Store and then click the Updates option which is available in the sidebar.

YOU MAY ALSO LIKE – [Solved] CS:GO Error VAC Was Unable To Verify Your Game Session
Method 3: Change the USB Charging Position
If you are not using the original Mac charger then you can face overheating issues. Surprisingly, the original chargers can also cause overheating issues. Many users said that when they tried charging their MacBooks via the ports on the right-hand side it helped them to reduce their CPU temperature(and also the high kernel_task CPU usage). There might be some design flaw on some Macbooks which cause a surge in CPU temperature whenever it is charged from any port on the left side. If you have charging ports on both sides of your Mac then try using only the ports which are there on the right side. See, if it helps lower CPU usage.
Method 4: Get Rid of Malicious Add-Ons in Web Browser
If your web browser settings are taken over by the kernel_task then you should restore it to the default values.
(NOTE: If you follow this method then it will erase off all the web surfing history, your customisations, and the data stored by websites)
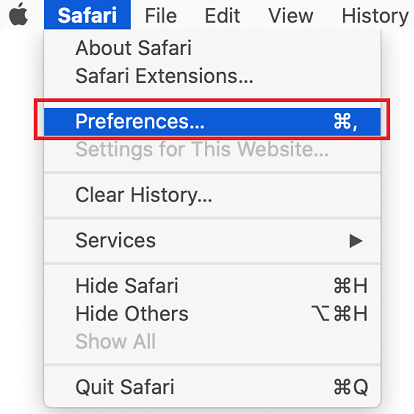
- Open the Safari Browser and head over to its menu.
- Select the Preferences option.

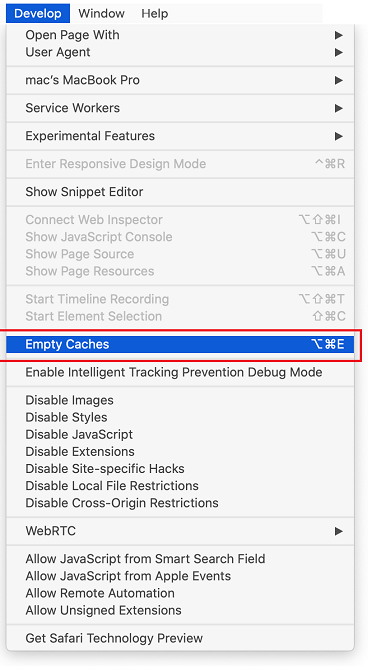
- Once you see the Preferences Screen hit the Advanced Tab. Then you need to enable the Show Develop menu in the menu bar option.
- This would add the Develop tab on your Safari Menu.
- Click on the Develop tab and select the Empty Caches option.

- Now, select the History tab and then hit the Clear History option.
- Safari will now ask you to mention the time for applying this effect. Simply, select the all history option.
- Hit the Clear History button.
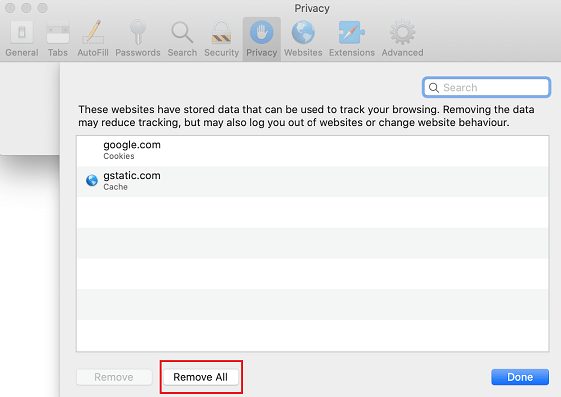
- Again, go back to the Safari Preferences and select the Privacy tab which is available on the top.
- The browser will now provide you with the names of all the websites which have stored your data about your Internet activities. It will also tell that you would be logged out of some services.
- If you okay with all these changes hit the Remove All button and Restart Safari.

- If you are also using Chrome Browser then we need to remove the Virus from there also.
- Open your Chrome Browser and then click the Customize and control Google Chrome (⁝) icon which is available on the top right-hand corner.
- Hit the Settings option from the drop-down menu.
- On the Settings pane, you need to click on Advanced.
- Scroll down and then hit the Reset settings option.
- You will get a confirmation message, select the Yes option.
Mozilla Firefox:
- Open Firefox and click on the three lines box.
- Click on Help from the drop-down menu and then select Troubleshooting Information.
- Hit the Refresh Firefox button and confirm the changes.
- Restart Firefox.
MUST READ – How to Enable Virtualization (VT) in Windows 10?
Method 5: Reset NVRAM
Resetting the Non-Volatile Random Access Memory (NVRAM) has helped many users to resolve the kernel_task process. It is a component that stores information about Mac’s configuration and settings like kernel panic information, startup disk selection, etc.
- Shut down your Mac completely.
- Press the Power Button once.
- When you hear the startup chime or when the display lights you need to hold the following keys: Option + Command (⌘) + P + R.

Method 6: Reset Your Mac’s SMC
The System Management Controller (SMC) is a component of your Mac. It powers all the important hardware in your Mac like keyboard, battery, fan, etc. Now, the procedure of resetting SMC is slightly different depending on which model of Mac you are using.
Resetting SMC on Mac with T2 Security Chip:
The T2 Security Chip is installed in MacBook Air and MacBook Pro’s released in 2018 or later. Follow the steps given below:
- Shut down your Mac completely.
- Once it is shut down you need to disconnect it from power (unplug the power adapter).
- Hold the keys which are mentioned below for at least 7 seconds: Control + Options keys + Shift key.
- Click and hold the Power button without releasing the above three keys.
- Hold these four keys simultaneously and release them after 10 seconds: Power + Control + Options + Shift
- Press the power button to start your Mac.

Resetting SMC on Mac Without T2 Security Chip:
If you are using a MacBook that was launched in 2017 or earlier then this is how you can reset SMC:
- Shut down your Mac completely.
- Once it is shut down you need to disconnect it from power (unplug the power adapter).
- Hold these four keys(all of them are available on the left side) for at least 7 seconds: Shift + Control + Option keys.
- Tap and Hold the Power Button while still holding the three keys mentioned above.
- Power On your Mac and now, you shouldn’t face any problem.

READ THIS – How to Quickly Fix Steam Friends Network Unreachable Error?
Concluding…
We hope that at least one method from the above list helped you in resolving the Kernel_Task issue. This problem is a nightmare for many people but, if you follow all the steps properly then you can easily fix this issue. Do tell us in the comments section which method helped you. If you were not able to follow the above steps write your query in the comments below and we will surely help you out.