
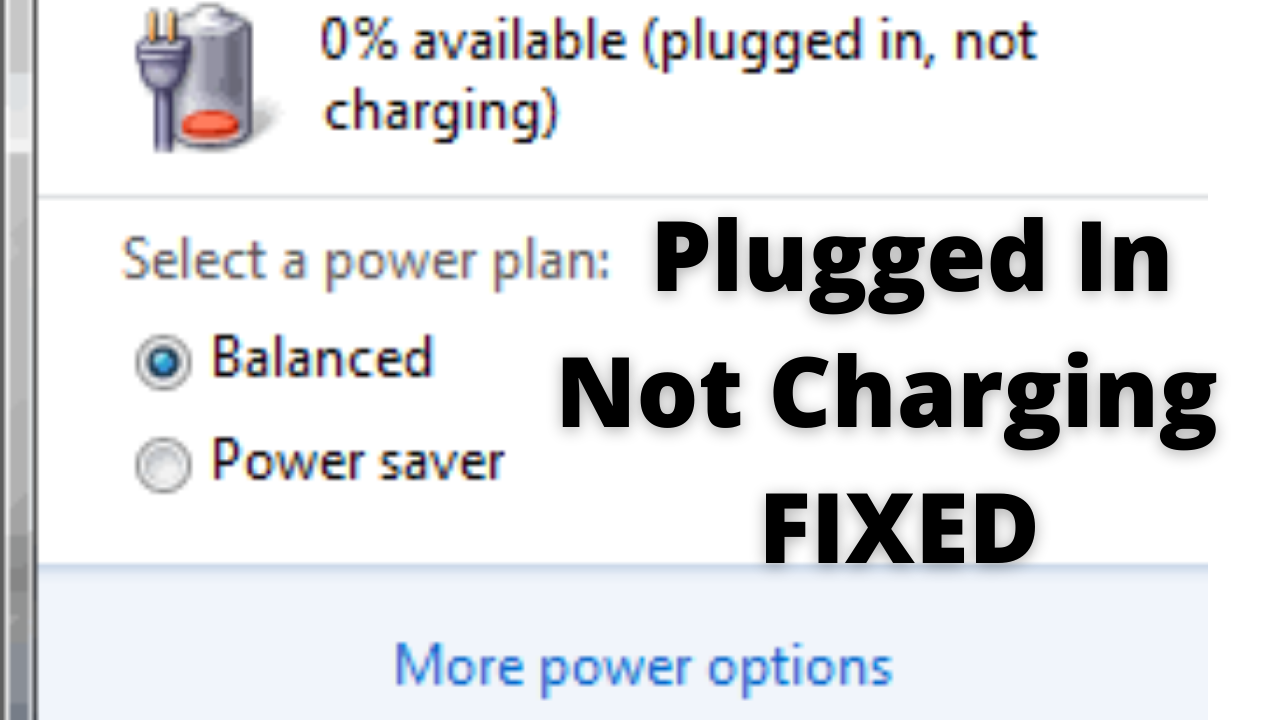
You have an important meeting in few hours. You want to charge your laptop fully so, you don’t face any problem later. You plug in your charger and see that your laptop is not charging. At the bottom, you are getting the “Laptop Is Plugged In Not Charging Message”. This is very common issue with HP, Lenovo, Dell, Acer and Asus laptops. You might be getting this problem because of outdated or corrupt drivers, hardware issues, and overheating. Don’t worry if you are facing this problem then this article is for you. Sadly, even we faced this terrible issue and found out some effective solutions. Read this article till the end to know How To Fix Laptop Is Plugged In Not Charging Issue easily.
[toc]
Method 1: Perform Some Basic Checks
Before we dive into some deep troubleshooting solutions it’s better to perform some basic checks. Make sure you have connected the below-mentioned things properly:
- Make sure you have inserted the charging pin properly onto your laptop’s charging port.
- Make sure the AC Adapter is properly connected to the Wall Outlet. Try connecting the charger to a different outlet.
- Double-check the connection where the cable plugs onto your Charger. There are high chances that the connection might have become loose.
- The battery inside your computer should be properly placed in the cell points. There should be no problem between the charger and laptop connect points.
- If there are any dust particles inside the charging point clean it.
- If your laptop is overheating remove the battery from your computer and leave it outside for a few minutes. Then put it back inside your computer and check if your problem is resolved or not.
If you have checked all the above things and still facing this problem then follow the solutions given below.
CHECKOUT – How to Fix File System Error (-805305975) while Opening Images in Windows?
Method 2: Do a Power Reset on your Computer
It has been noticed that performing Power Reset resolves the Laptop Won’t Charge Or Turn On issue. Follow the steps given below:
- Turn off your computer completely. Then unplug the charger and remove the battery from your computer.
- Hold the Power button for at least 30 seconds.
- Now, you need to put the battery back onto the computer again. Make sure it is properly placed inside the computer.
- Power On your computer again and see if the problem is solved.
If you don’t have a Removable Battery then we recommend you to visit a Technician. Removing the battery yourself can void your warranty if you don’t have a Removable Battery. So, it’s better to visit a Professional to be on the safer side.
Method 3: Run the Power Troubleshooter
Windows has a lot of dedicated Troubleshooters which are very helpful in resolving errors or bugs. Follow the steps given Below to Run the Power Troubleshooter:
- On your Windows Search Box type Troubleshoot.
- Click on the top result which appears on the screen.
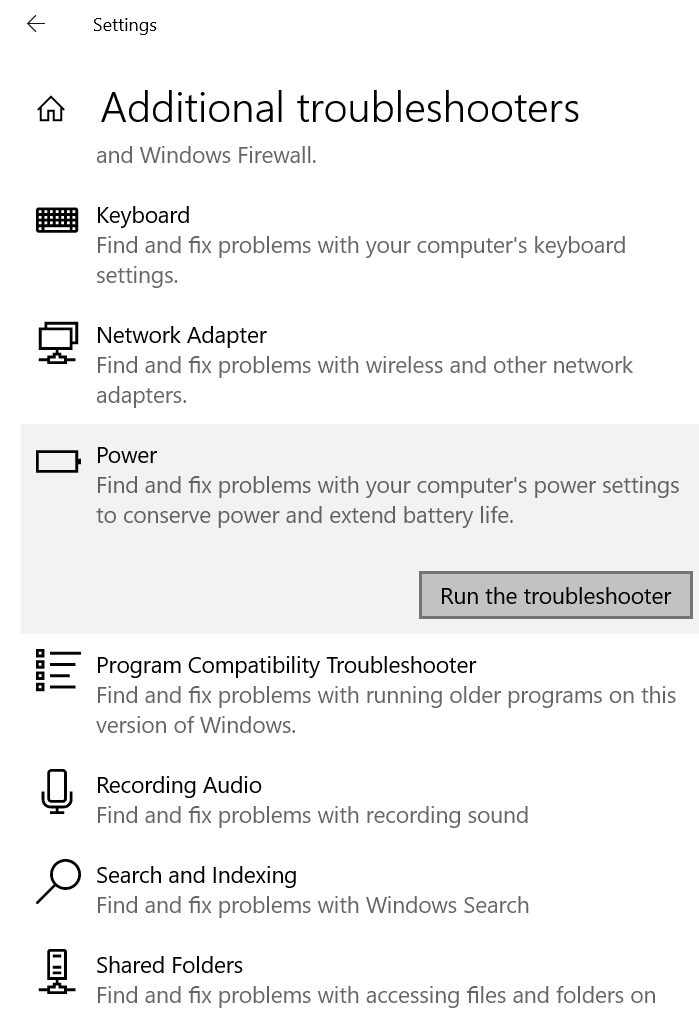
- Here, you will get the list of all the Troubleshooters. Locate the Power Troubleshooter from the list.
- Click on the Run the Troubleshooter Option.

- Now, Windows will start scanning your computer. It won’t take alot of time. If any error is found you will get instructions on the screen to fix it.
- Follow the instructions and then check if still, you are getting the Laptop Is Plugged In Not Charging Issue or not.
ALSO CHECK – How to Fix Error 0xc00000e9 on Windows 7, 8 and 10?
Method 4: Check Windows Advanced Battery Options
There can be a chance that you might have accidentally changed the Windows Power Plans. There is no such option in Windows which can prevent you from charging the laptop. Although you may have the system configured to stop charging after reaching a certain point. Follow the steps given below:
- Press the Windows Logo Key and I Key simultaneously on your keyboard in order to launch Settings.
- Then go to System.
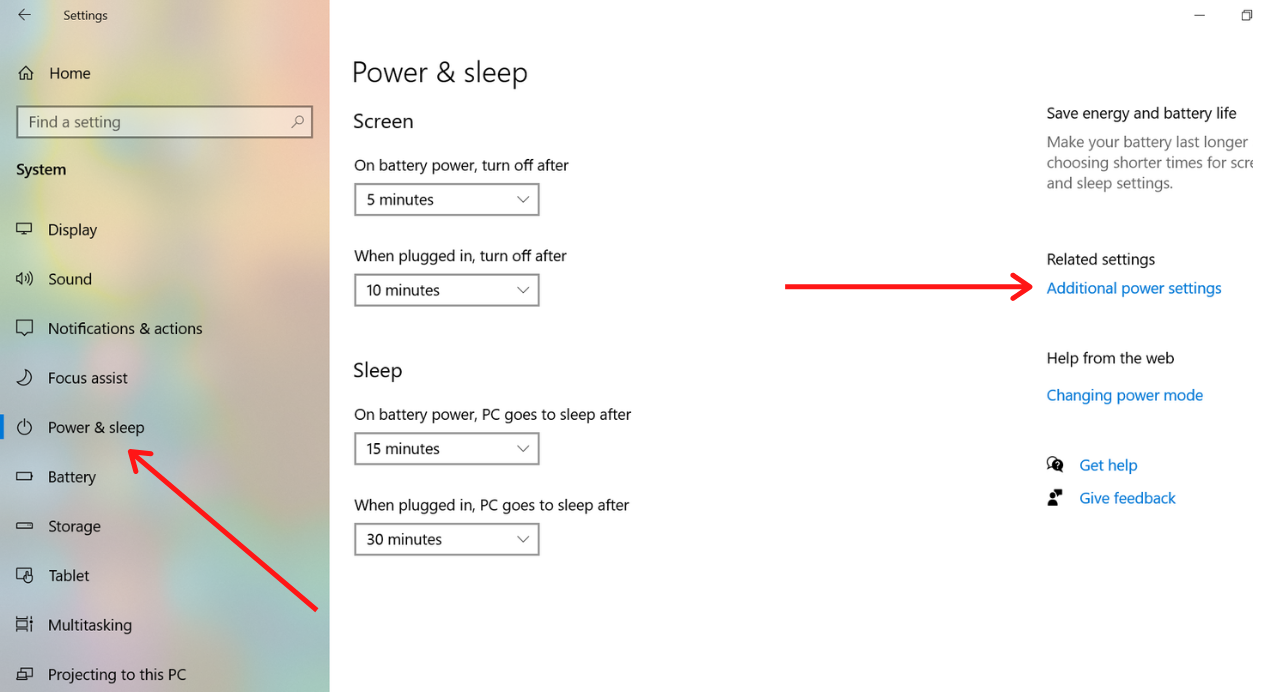
- Hop over to Power and sleep option.
- On the right side click on Additional Power Settings option.

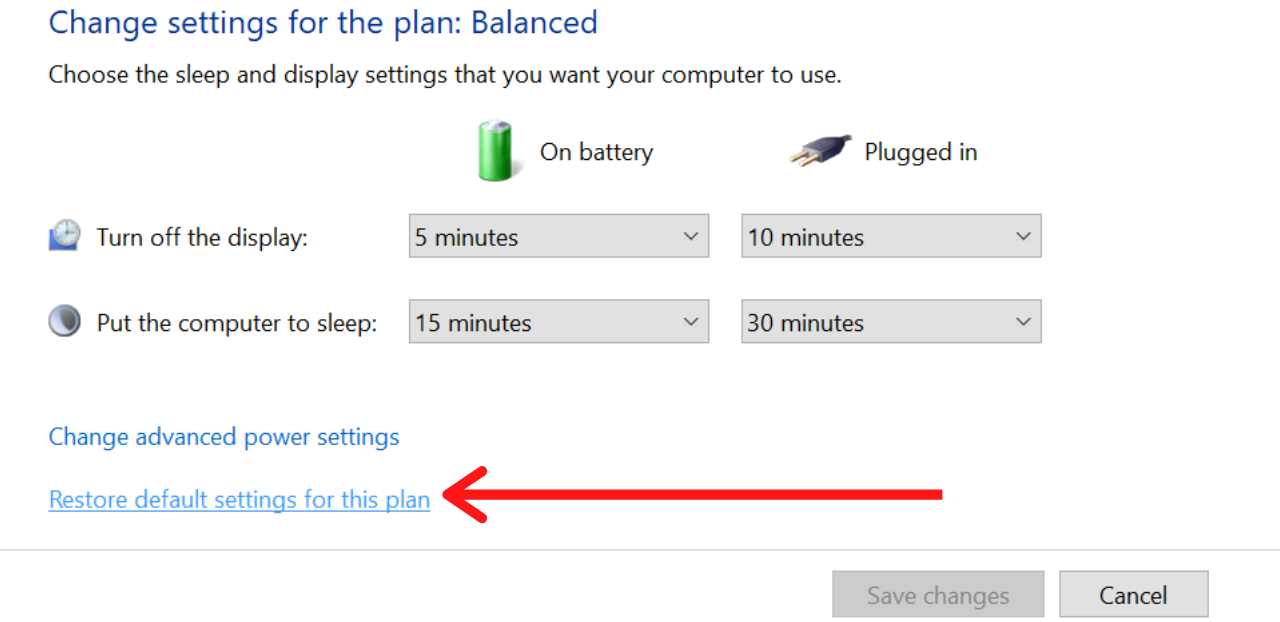
- On the bottom left corner click on Restore default settings for this plan.

- Hopefully, now you should be able to charge your laptop.
Method 5: Check the Battery Charge Threshold Option on your Computer
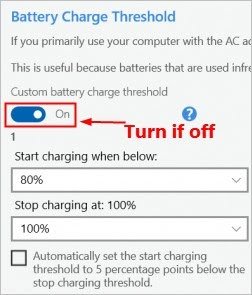
Some laptops have the Battery Charge Threshold Feature. Using this feature you can customize the battery charge threshold. So, whenever the battery reaches that threshold it won’t charge further. We have noticed that this feature is available on Lenovo ThinkPad. Follow the instructions given below to check if this feature is turned ON or not.
- On your Windows Search Box type Lenovo Vintage.
- Once you opened this app go to the Battery Section.
- If under Battery Section the Charge Threshold Option is turned ON click on it to turn it OFF.

- Now, you should be able to charge your computer.
YOU MAY ALSO LIKE – How to Quickly Fix Steam Friends Network Unreachable Error?
Method 6: Reinstall or Update the Battery Drivers
Most of the time outdated drivers are the main reason behind errors. In this scenario, updating your Drivers will help you to resolve the Laptop Battery Not Holding Issue. You can download the Updates manually and also automatically. Follow the instructions given below:
- Press the Windows Logo Key and X key simultaneously on your Keyboard.
- Hit the Device Manager option.
- Here, you will get a list of all the Drivers.
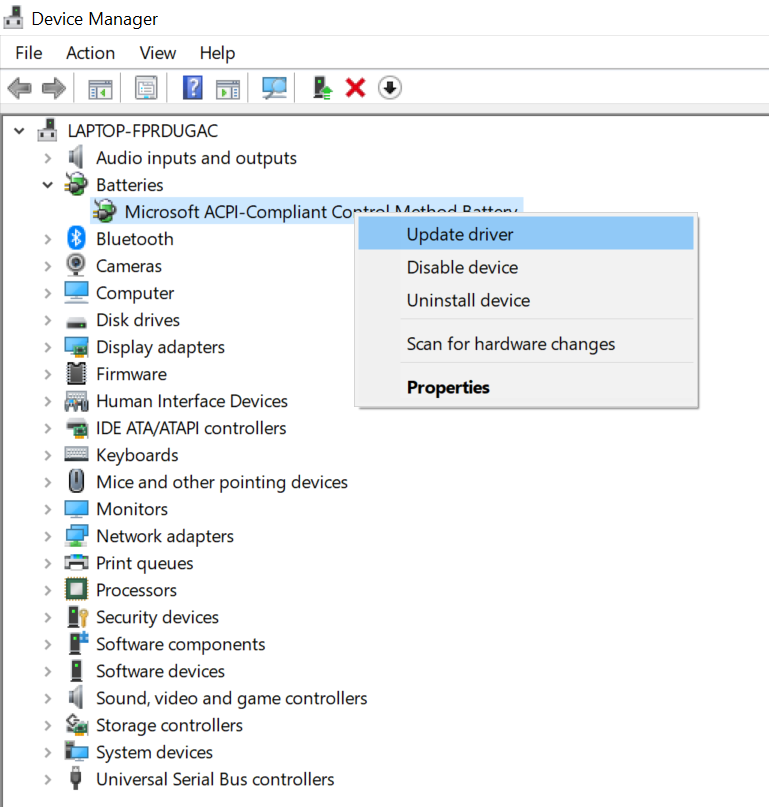
- Locate the Batteries Drivers and double-click on it.
- You will see Two Things: Microsoft AC Adapter and Microsoft ACPI-Compliant Control Method Battery.
- Right-click on both these things and select the Update Driver Option.(In some laptops you will only see the Microsoft ACPI-Compliant Control Method Battery Option. See the below image)

- Now, you need to select the Browse Driver on the Internet Option. Windows will automatically search for the updated drivers online and will install them on your computer.
- You can also do download the Updates from the Manufacturer’s Website.
- After installing the updates Restart your computer and now you won’t face any problem.
- If you are not able to find the Updates right-click again on the Battery Drivers and select Uninstall.
- Restart your computer and now Windows will be forced to install the latest drives.
- Check if you can charge or not.
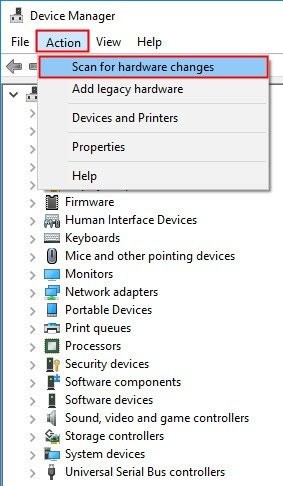
- If in case after restarting your computer you find the battery driver is not installed then open Device Manager again.
- Select Batteries and then hit the Action Option which is available on the top.
- Select the Scan for hardware changes option.

- Wait for some time and Microsoft ACPI-Compliant Control Method Battery should get Reinstalled.
Method 7: Update the Driver for your Battery Management Device
An outdated or missing battery management device can cause you this problem. To resolve this you need to update it. Follow the steps given below:
- Hop over to the Manufacturer’s Website and download the Latest Version of your Drivers. Make sure you download the Driver which is compatible with the version of your Windows and also with the sound card model.
- Then Install it on your computer.
- Your problem should now get resolved. If you find this method difficult there is an easy way to update the driver which is given below:
Updating the Driver for the Battery Management Device using Driver Easy:
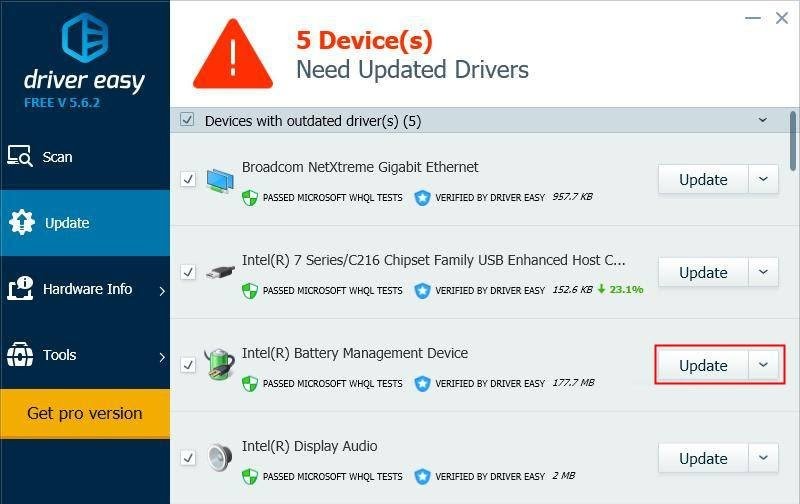
- Download Driver Easy from Google and install it on your computer. Launch Driver Easy and hit the Scan Now Option. The application will scan your computer and find problems with your Driver.
- Besides the Battery Management Device Option click on Update. (You can do this in Free Version).

- After updating the Driver, Restart your computer and now you will not face the Laptop not charging when turned problem.
MUST READ – How to Enable Virtualization (VT) in Windows 10?
Method 8: Reduce Resource Usage
Maybe the reason behind this problem isn’t related to hardware. If your computer is getting very hot then the fans really have to work very hard to cool it. This will require more battery power. If all the power-hungry programs on your computer are running at the same time, it will suck up more battery power. To resolve this we need to reduce resource usage.
- Open Task Manager by pressing these key Ctrl + Shift + Esc. You can also open it by typing Task Manager on the Windows Search Box.
- Try closing down some programs so that your computer can cool down.
- Wait for some minutes and then try charging your computer again. Now, you shouldn’t get the Laptop Battery Not Holding Charge problem.
CHECKOUT – Best iOS Emulators to run iOS or iPhone Apps on Windows PC
Concluding…
Hopefully one of the above methods helped you in resolving the Laptop Is Plugged In Not Charging Issue. If still, you are facing the problem then maybe some part of your computer has got damaged. In this case, we recommend you to don’t do anything by yourself. Take the laptop to the nearest Laptop Service Center. The Technician will tell you the exact problem for this error. You can even try calling Technical Support. The Technicians on the call will guide you on how you can solve the Laptop Is Plugged In Not Charging Issue. See, you need to understand that batteries wear out with age. So, after a certain number of cycles, your battery won’t charge more. Tell us which method helped you in the comments section. If you faced any other problem while following the steps do tell us in the comments section below.