
If you are looking to find a way to disable your keyboard then this article is for you. In this article, we will tell you in detail on How to Disable Laptop Keyboard without any complications. For some reasons Disabling the keyboard is a little difficult but, we have mentioned all the things in a simplified manner.

[toc]
How to Temporarily Disable Laptop Keyboard?
If you want to Disable your laptop keyboard for some time only then this method is for you. For this, we will use the Device Manager. Follow the steps given below:
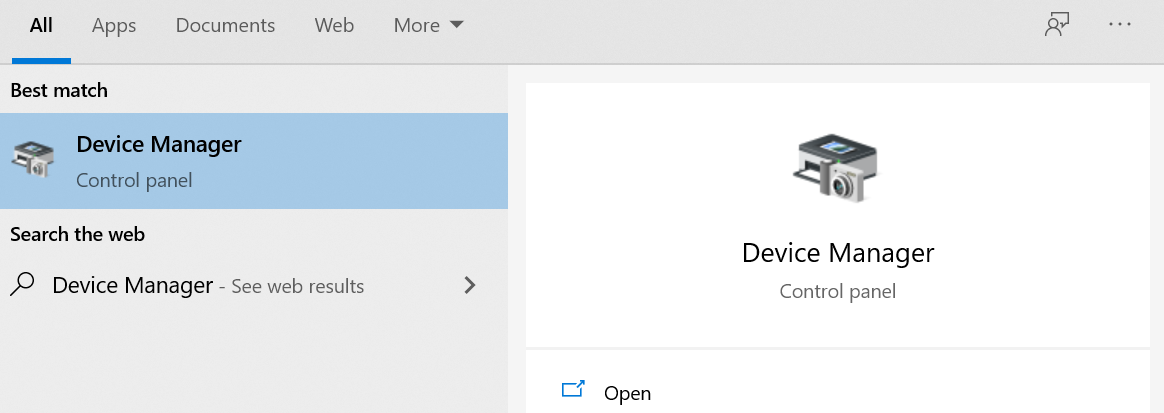
- On your Windows Search Box type Device Manager.

- Click on the top result which appears on your screen.
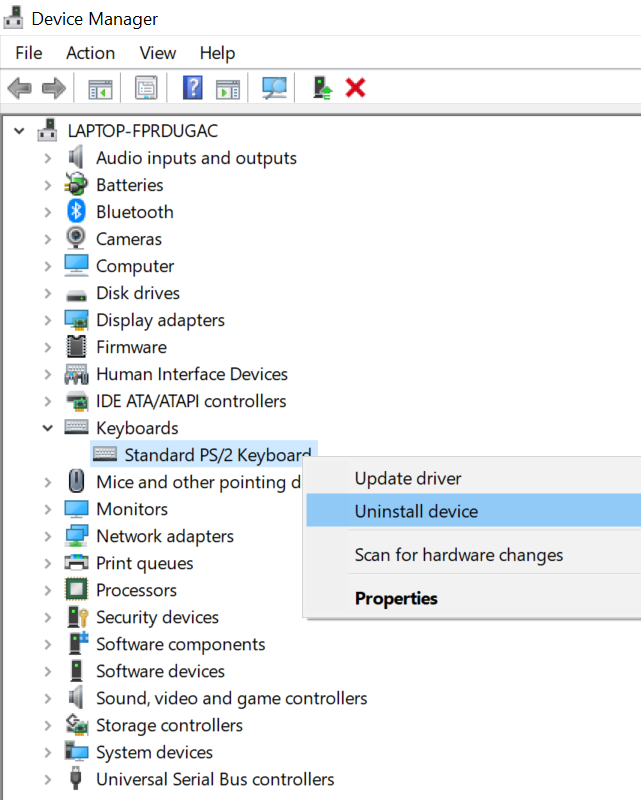
- You would now get the list of all the drivers.
- Double-click on the Keyboards option to expand it.
- Right-click on the driver and select the Uninstall driver option (version name of your laptop keyboard or driver will be listed).

- You will get a confirmation message, simply select the Yes option.
- Now, the keyboard would not work until you start your computer next time.
Windows automatically installs the drivers which are not there on your computer at the time of booting up. So, when then next time you will start your computer the keyboard drivers would get automatically installed on your computer and your keyboard would be working again.
CHECKOUT – [FIXED] Windows 10 KB5003173 Update Fails With Error 0x800f0922
How to Permanently Disable Laptop Keyboard Using the Group Policy Editor?
You can permanently disable your laptop’s keyboard using the Group Policy Editor. The steps are similar to the above method. We just need to disable the option of automatic starting of the keyboard on every restart.
- Launch the Run Command on your computer by pressing the Windows Logo Key and R Key simultaneously on your keyboard.
- In the Run Box type gpedit.msc and hit the Enter Key.
- You would be redirected to the Local Policy Group Editor Window.
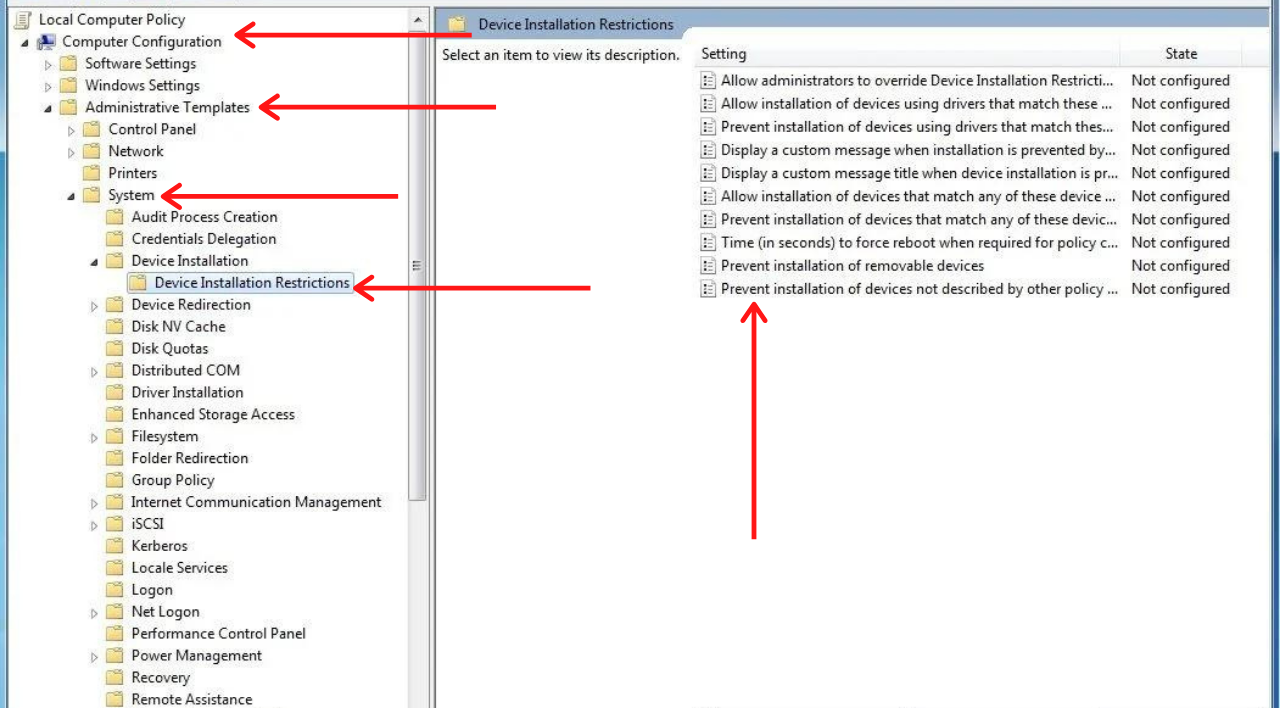
- On the left-hand side, you need to click on Computer Configuration.
- Now, you need to follow this thread: Administrative Templates > System > Device Installation > Device Installation Restrictions.
- On the right-hand side, you will get a list of all the policies.
- Right-click on the Prevent Installation of Devices not described by other policy settings and select the Edit option from the drop-down menu.

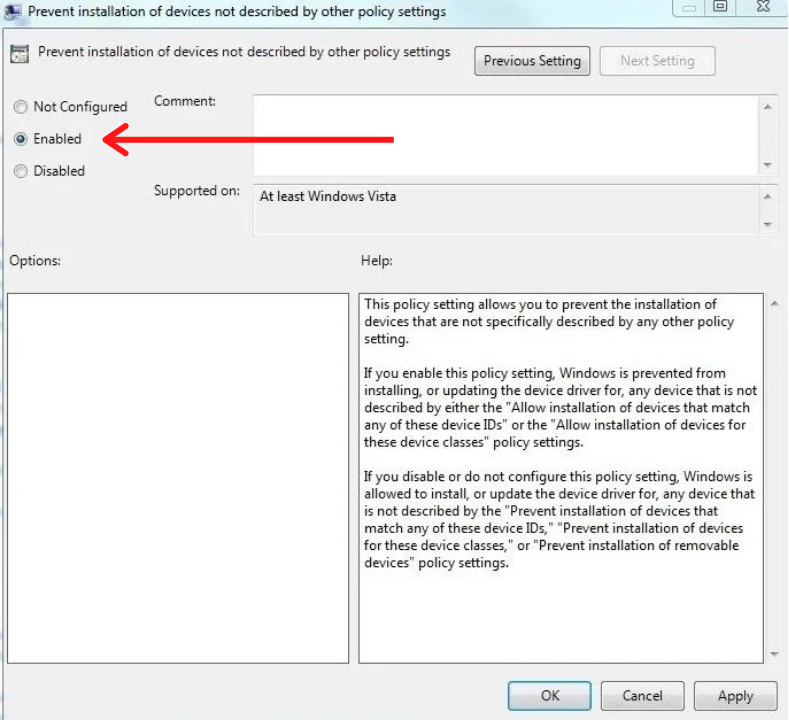
- Check the Enabled option from the left-hand side.

- Hit the OK option to save the changes.
- Repeat all the Steps 1-7 from the above How to Temporarily Disable Laptop Keyboard paragraph.
ALSO CHECK – How to Create a System Restore Point in Windows 10?
Disable Laptop Keyboard Using the Device Manager
This method will update the keyboard driver with an incompatible one which will cause the keyboard to disable. This is not a safe method and we don’t recommend you this method.
NOTE: This is a very unsafe method. Only perform this method if it necessary for the keyboard to be disabled. This method can also cause you BSOD Errors and your computer may not work properly. Also, check this out to fix a not working laptop keyboard.
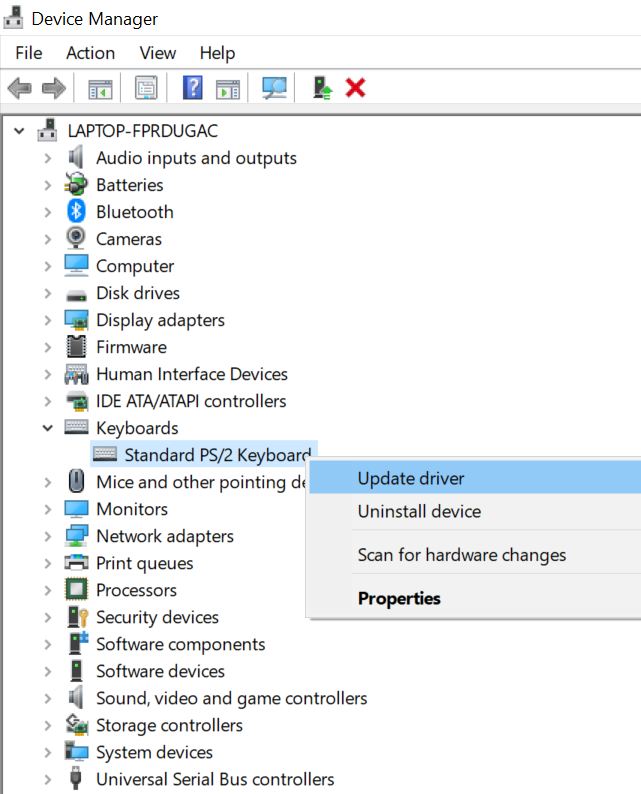
- Type Device Manager on your Windows Search Box.
- Double-click on the Keyboards option to expand it.
- Right-click on the driver and select the Update Driver option.

- Select the Browse my computer for driver software option.
- Now, you need to select the Let me pick from a list of available drivers on my computer option.
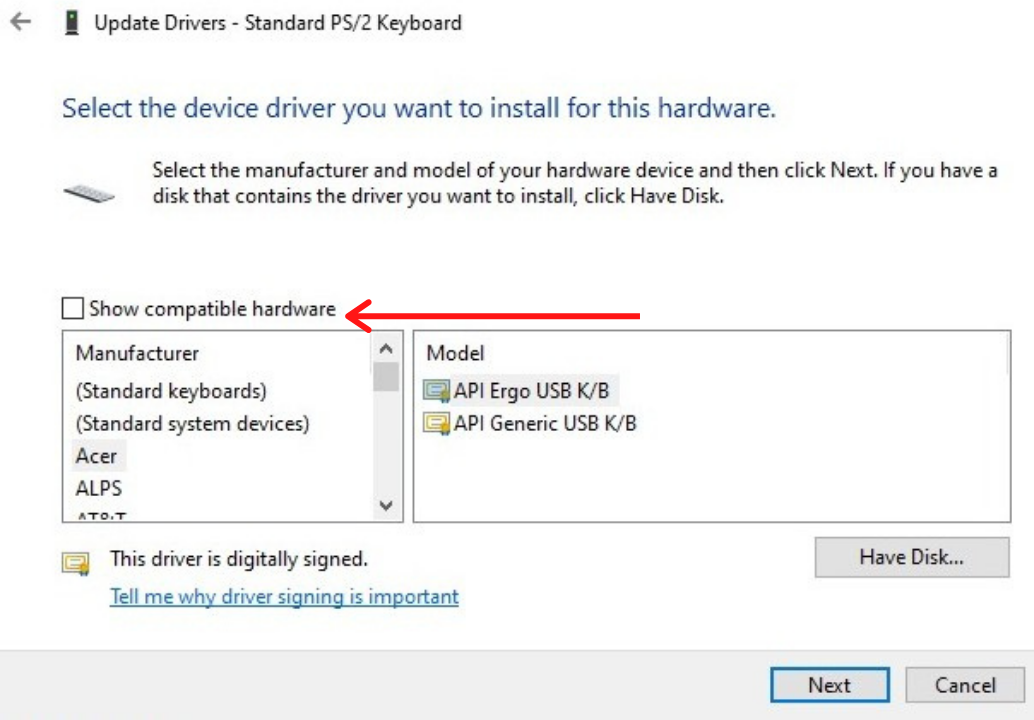
- Uncheck the Show compatible hardware option.

- Once you uncheck the option you will get a list of all the driver from different manufacturers.
- ( MAIN PART ) You need to select any driver of your choice which is not compatible.
- You will get a warning saying that the driver will not function the hardware properly. Select the Yes option.
- Once you have installed the driver Restart your computer.
- Now, your keyboard won’t work and is disabled permanently.
YOU MAY ALSO LIKE – How to Fix “Critical Structure Corruption” Error on Windows 10?
How to Disable Keyboard on Mac?
You can also disable your Macbook keyboard using the terminal commands. This is one of the easiest and fastest methods. To disable your keyboard on your Mac follows the steps given below:
- Press the Command Button and Space Bar simultaneously on your keyboard.
- This would launch the Search Bar on your screen.
- Type Terminal in the search bar.
- On the left-hand side, you need to Double-click on the Terminal option to open it.
- Type this command:
sudo kextunload /System/Library/Extensions/AppleUSBTopCase.kext/Contents/PlugIns/AppleUSBTCKeyboard.kext/ - When it asks for the password just type your password and then your keyboard should get disabled.
- To re-enable the keyboard, again go to Terminal and type this command:
sudo kextload /System/Library/Extensions/AppleUSBTopCase.kext/Contents/PlugIns/AppleUSBTCKeyboard.kext
MUST READ – How to Boot Windows in Safe Mode (Windows 10, 8, 7)?
Concluding…
As you can see there are various ways to disable your laptop keyboard. We have mentioned all the methods in detail so, that you don’t face any problem. Do tell us in the comments section which method helped you. If you know any other method to disable keyboard then write about it in the comments. We hope that this article was helpful for you.