
Windows has a lot of useful features amongst which, one of the best tool or feature is System Restore. In very simple words System Restore basically takes a snapshot of the Windows Registry and System Files. Then it stores them as Restore Points on the hard drive. Using System Restore you can simply revert the computer to an earlier point to resolve the problem, if you face any in the timeline. So, if you face any problem after updating Windows, Drivers, or you have wrongly modified the system settings using the Registry you can use System Restore Point to revert back to the point when the restore point was made. Most importantly, you don’t have to reinstall the operating system for reverting back. In this article we will guide you on How You Can Create System Restore Point on Windows 10 and then How You Can Use It?
[toc]
Why to Create a System Restore Point?
So you might be wondering what’s the need of creating a system restore point? How it will help you in future? So just consider a situation in which you are stuck, your system freezes, you have no idea what has happened, maybe you hard bricked your system by installing any 3rd party malicious software, or you are thrown by some error in your windows and you have no options left, then System Restore point will be there in your help, it will stand by you and cover your losses, I mean you will not have to worry about anything, just use the system restore point that you or the system created recently to go back to the previous working state.
Here are some of the Windows Errors or Issues which can be solved or fixed using System Restore Point:
- Fix “Critical Process Died” Error
- Fix Error Code 0xc0000225
- Fix “IRQL_NOT_LESS_OR_EQUAL” Error
- Fix “Unknown USB Device (Device Descriptor Request Failed)”
How to Enable System Restore on Windows 10?
Although System Restore is a very handy tool, it is Disabled by default. So, it means we need to manually Enable it on our system. Follow the steps given below:
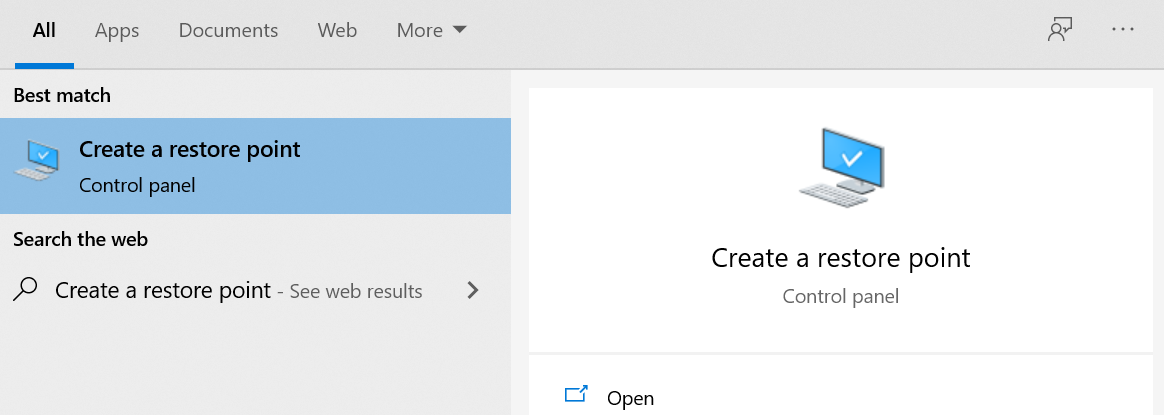
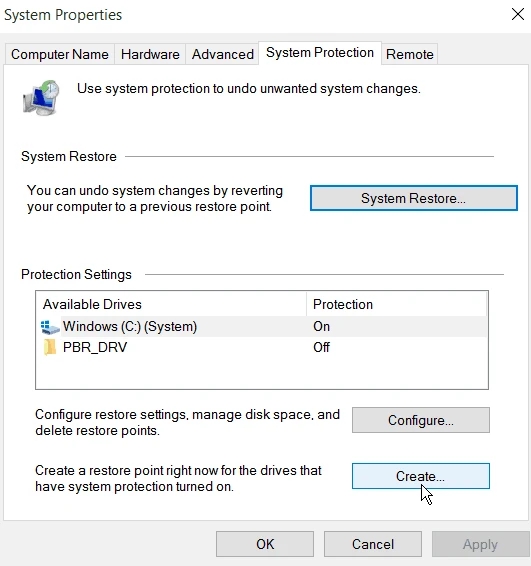
- On your Windows Search Box type Create a restore point. Click on the results which show up on your screen.

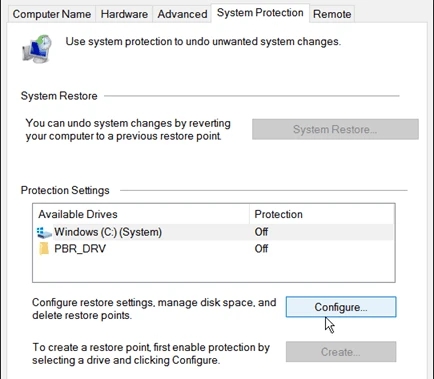
- You would be redirected to the System Properties Window.
- Now, you need to select the main system drive which is usually the C Drive.
- Make sure that except the Configure Button all the buttons should be grayed out.
- Hit the Configure Button.

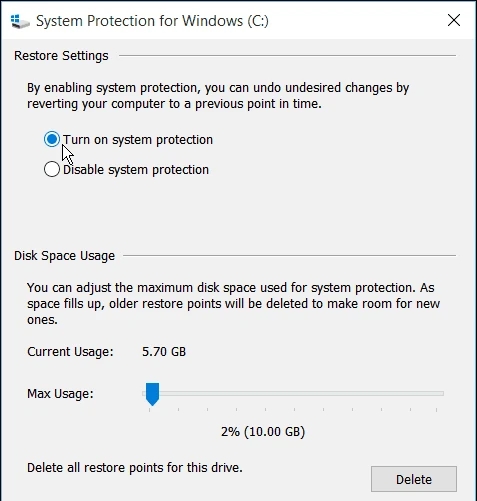
- Now, under the Restore Settings Option you need to check the Turn on system protection option.

- You will also see a slider on the bottom. See, Windows has the ability to automatically manage the space.
- But, you can specify the storage amount which would be reserved for the Recovery Feature. To do this simply move the slider. (OPTIONAL)
- You can use the Delete button to remove all restore points. This feature would help us to free up space and also when you want to start from scratch with this feature.
- To save the changes click on Apply and OK Button.
If you have followed all the steps properly then you have successfully Enabled the System Restore. Now, whenever you are updating something Windows will automatically create a restore point before applying the changes.
CHECKOUT – How to Fix File System Error (-805305975) while Opening Images in Windows?
How to Manually Create a System Restore Point?
If you have enabled the System Restore then it will automatically create checkpoints. But, you can manually also create Restore Point. We recommend you create a system restore manually to be on the safer side.
- Press the Windows Logo Key and on the search box type Create a restore point. Click on the top result.
- Under the System Protection Tab you need to click on Create Button. Make sure you have selected the main drive which for most of you will be C Drive.

- Now, Windows will ask you to name the Restore Point.
- Be as descriptive as possible. You can give the name like: Before updating Windows.
- After giving the name hit the Create Button.
- After few minutes you will get a message like The restore point was created successfully.
- Click on Close and now you are done.
You have successfully created the Restore Point. Remember that the new Restore Point is only created when you update your Windows, Driver’s, or install any app. You can manually create the Restore Point if you are doing some kind of experiment with your computer. Also, don’t confuse this thing with Backup.
YOU MAY ALSO LIKE – Trick to Get Netflix Free Trial without Credit Card – [5 Methods]
How to Use a Restore Point From Desktop?
If you updated your Windows system, or maybe installed any game or changed the system files which has led to obnoxious things on your computer. It’s time to use the System Restore Point that we have previously created. We will go back to a time before you made the mistake using the Restore Point. Follow the steps given below if you are on the Desktop or Home Screen. You can also revert back using advanced startup settings if your system is not booting up.
- Type System Restore on your Windows Search Box and click on the first result.
- Again, you would be redirected to the System Properties Window.
- Under the System Protection Tab you need to click on System Restore… (If the System Restore Option is grayed out then it means that there are no System Restore Points available. You can not revert back).
- Then click on the Next Option.
- Now, you will get the list of all the Restore Points that have been created (Both Automatically and Manually).
- All the Restore Point Files will come up with their respective names, date, and time on which they are created, and whether they are created manually or not.
- Choose the file according to your choice.
- We highly recommend you to click on Scan for affected programs.
- This will give you a list of programs that might get automatically restored and which will get deleted. Close this window and hit the Next Option.
- You will receive the Final Confirmation Window listing the Restore Point which you have selected, the drive which will get changed or affected. You will also receive a warning saying that if you have recently changed your Windows Password then using a USB Drive you should create a password reset disk.
- Again you will get the chance to Scan for affected programs.
- Hit the Next and Finish button to start the process.
ALSO CHECK – What is FileRepMalware and How to Remove it?
How to Perform System Restore on Windows 10 from Boot?
If your computer is not booting up then you can still perform the System Restore using Advanced Startup Settings. Follow the steps given below:
- Power On your computer.
- When you see the Windows logo on your screen press the Power Button. Repeat the above steps 2-3 times.
- Then an Automatic Repair Screen will appear on the screen. Hit the Advanced Options Button.
- Now, you need to select the Troubleshoot option.
- On the Right, you will see the System Restore Option. Click on it.
- Choose your Windows 10 Account and put up your password. Hit the Next Option.
- Click the Restore Point which you want to use and then click on Scan for affected programs. This would give you a list of programs that might get automatically restored and which will get deleted.
- Hit the Close and Next Option.
- Finally, you need to click on Finish.
After doing all the steps properly which are mentioned above the changes causing the problem will be removed. Your computer will come back to its working state and now you won’t face any problem.
Concluding…
As you can see System Restore is a very helpful feature that doesn’t cost you anything. Enabling it will help you a lot in future uncertainties. You can Enable it both from Desktop and Boot. We have mentioned each step in detail so, you don’t face any issues. Do tell us how did you find this article in the comments section. Also, tell on which topic you want us to write an article next.