
If your Laptop Keyboard is not working then you have visited the right place. The keyboard is a very essential part of your laptop and when it stops working your laptop becomes useless. Some keys on your keyboard might not be working or the worst thing can be your keyboard is completely dead. Don’t worry we will tell you effective solutions for this frustrating problem. Is your Touchpad is also not working? Then read this article to resolve this problem.
NOTE: To follow some of the solutions given below you need to use an external keyboard. If you have a Touchscreen Laptop then you are good to go! Also, if you don’t have a external keyboard, you can make use of virtual keyboard that is available in Windows 7, Windows 8 or Windows 10. Virtual keyboard can be accessed from Taskbar (Right Click Taskbar > Select Toolbars > Select Touch Keyboard or Virtual Keyboard).
[toc]
Laptop Keyboard Not Working: Is it a Software or Hardware Issue?
You must first identify if this is a Software or Hardware Issue? This will help you to select the best solution for this problem and save a lot of your time. If your Laptop can enter BIOS then it is a Software Issue. On the other hand, if your laptop can’t enter BIOS then it is a Hardware Issue. To enter BIOS Restart your computer and press a special key repeatedly on your keyboard. Now, the special key can be anything depending upon your laptop’s model. But, mostly the special key is F2, F8, F12, ESC, Delete, etc. You would be able to see the exact key at the bottom of the screen at the time of booting up. You can also search it on Google to know which is the special key to enter BIOS for your laptop.
CHECKOUT – [Fixed] The Active Directory Domain Services is Currently Unavailable
Things to do if it is a Hardware Issue
If it is a Hardware issue then follow the solutions given below:
Method 1: Clean the Keyboard
I know this is a little tough but we will guide you through this process. Remember when you are cleaning your Keyboard you need to very gentle. Follow the steps given below:
- Turn off your laptop completely.
- Turn your laptop upside-down and tap gently on the base at least 4-5 times. Hold the laptop at different angles and tap on the back.
- All the loose dust should come out.
- If your Keyboard is very dirty then you need to use Keyboard Vacuum to clean all the dust.
- Check if you can use the keyboard or not.
Method 2: Remove the Battery (If it is Possible)
Your keyboard may not be working properly due to the battery. If you have a Removable Battery then follow the instructions given below:
- Shut Down your laptop completely.
- Remove the Battery.
- Don’t put your Battery in the laptop and plug in your Power Cable to the laptop.
- Try to start your computer/laptop without the battery while only using the AC Power.
- If your Keyboard is very working without the battery installed on your laptop then you need to replace your Battery.
- We highly recommend you buy an original battery for your laptop from the laptop’s manufacturer.
If still, the Keyboard is not working then you need to visit a Technician to resolve this issue.
ALSO CHECK – [FIXED] Windows 10 KB5003173 Update Fails With Error 0x800f0922
Things to do if it is a Software Issue
If it is a Software Issue then there are a lot of Solutions to fix the Keyboard not working on the Laptop issue. We have mentioned all the methods in a simplified manner so that you can easily follow them.
Method 1: Run the Keyboard Troubleshooter
Many users were able to solve this problem using the Keyboard Troubleshooter. Windows has a lot of dedicated Troubleshooters to fix the majority of the errors or bugs. Running these Troubleshooters is a very easy and fast process.
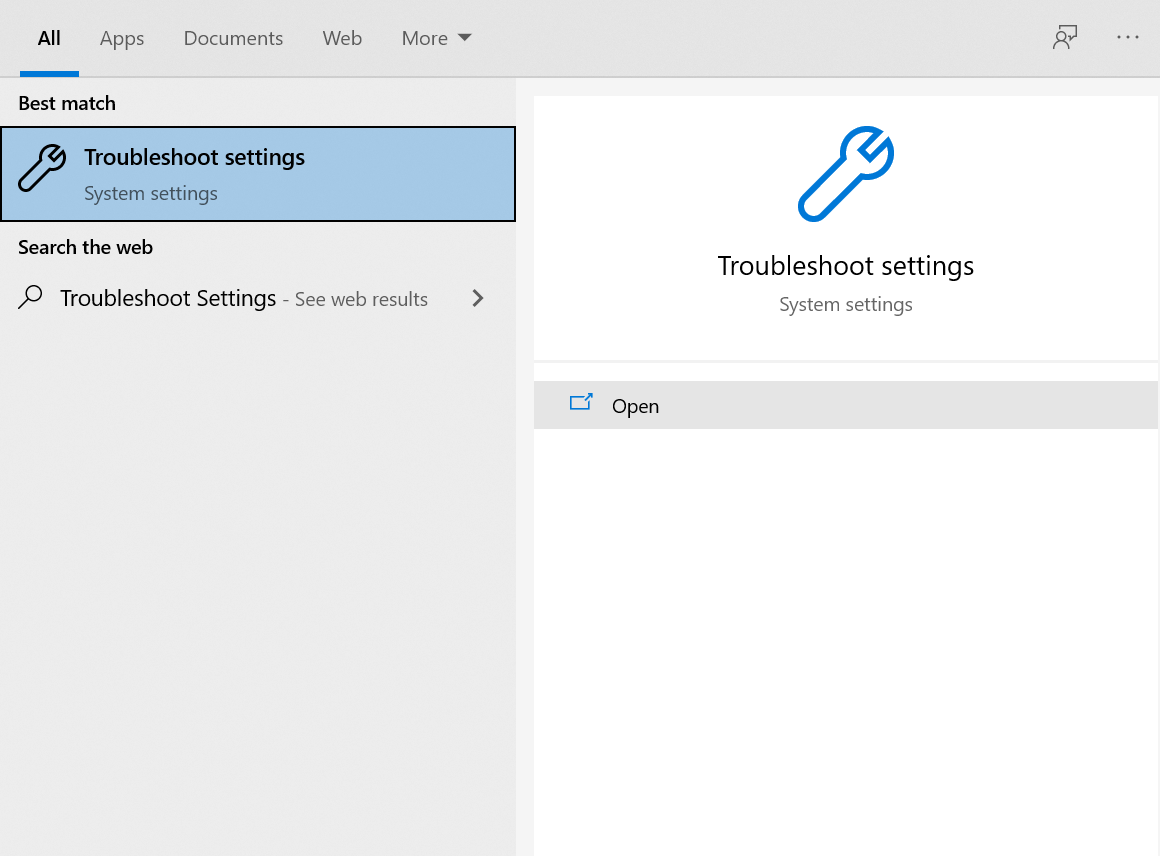
- On your Windows Search Box type Troubleshoot and click on the first option.

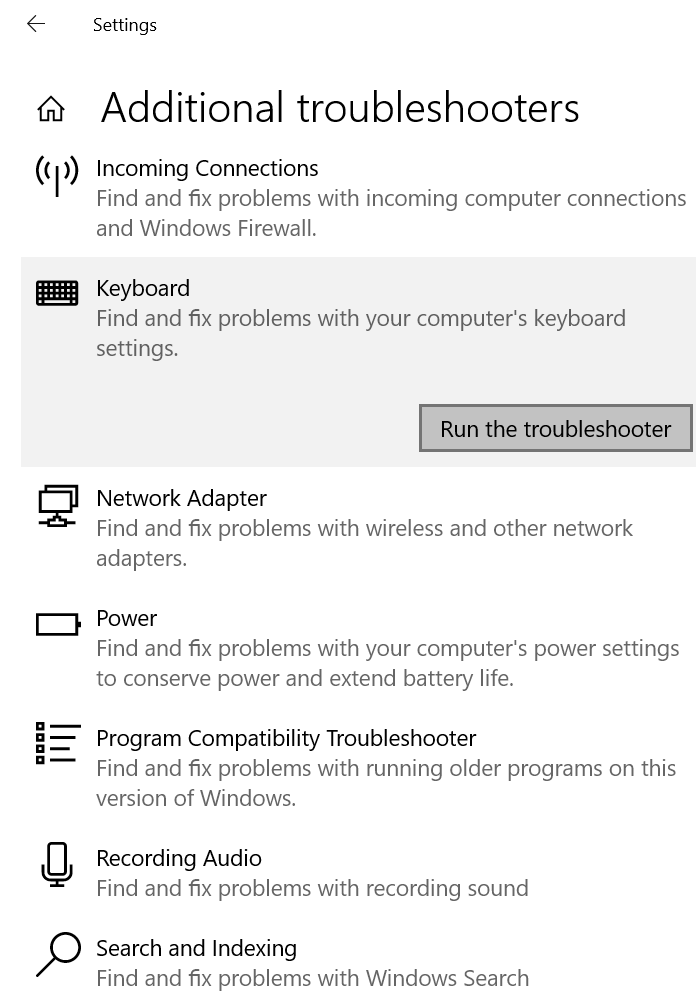
- Click on the Additional Troubleshooters option.
- Find the Keyboard Troubleshooter and click on it.
- Hit the Run the troubleshooter button.

- Windows will automatically scan your computer and provide you with fixes for the problem.
- Follow the on-screen instructions and you will be able to use your Keyboard in no time.
MUST CHECK – [Fixed] Wireless Mouse Not Working on Windows
Method 2: Update Windows to the Latest Version
If you are using an outdated version of Windows then you can face a lot of errors or bugs on your laptop. Updating your Windows system will automatically fix most of the errors and bring you exciting features.
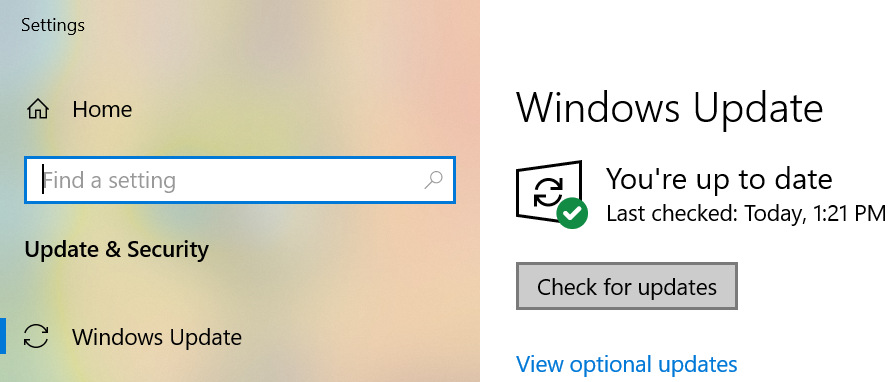
- On your Windows Search Box type Updates and click on the first option.

- If there are any updates available you will be able to see them on the right side.
- If you are seeing the Check for Updates button then click on it.

- After installing the updates on your laptop you won’t face the Keys on keyboard not working issue.

YOU MAY ALSO LIKE – [Fixed] Windows 10 Not Detecting Headphones When Plugged In
Method 3: Disable Filter Keys
If you are facing lag or delay when you press the keys then this solution is for you. If the Filter Keys feature is enabled on your laptop then it would ignore the repeated keystrokes. This feature can cause some keyboard issues. Hence, we need to disable this feature.
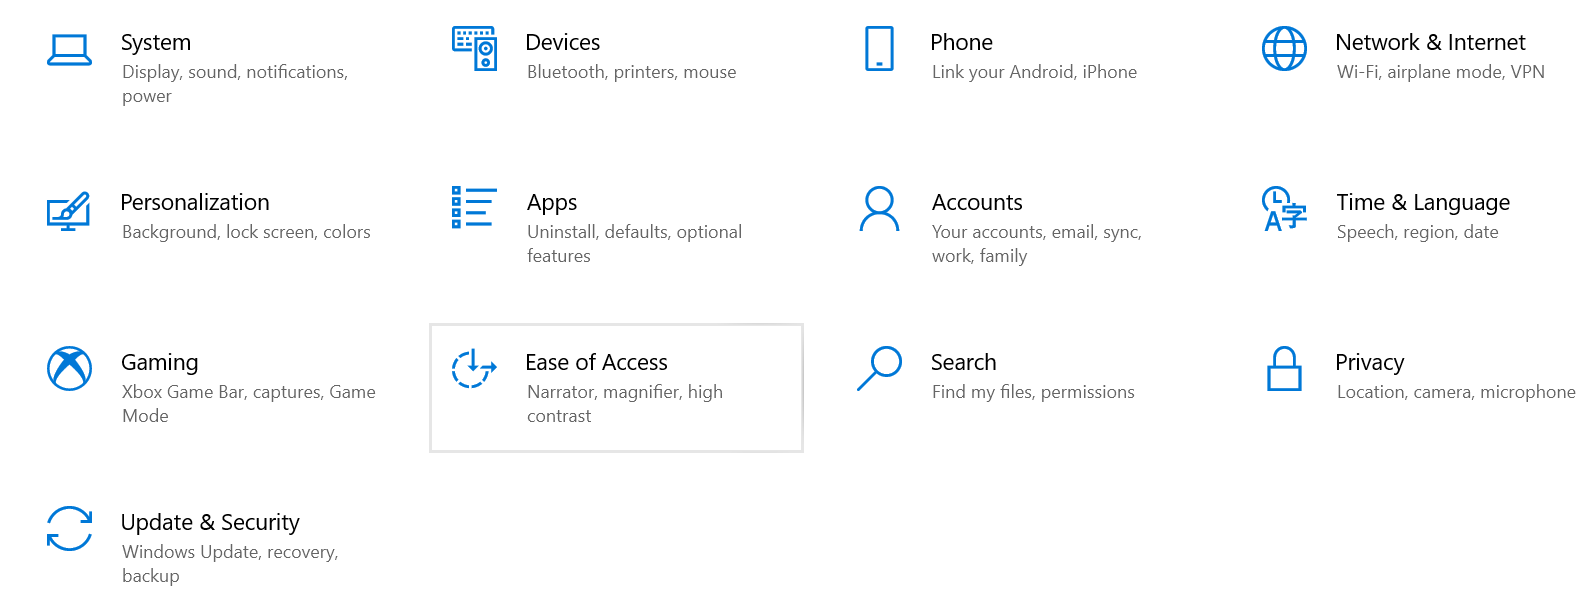
- Click the Start menu and then hit the Settings icon.
- Select the Ease of Access option.

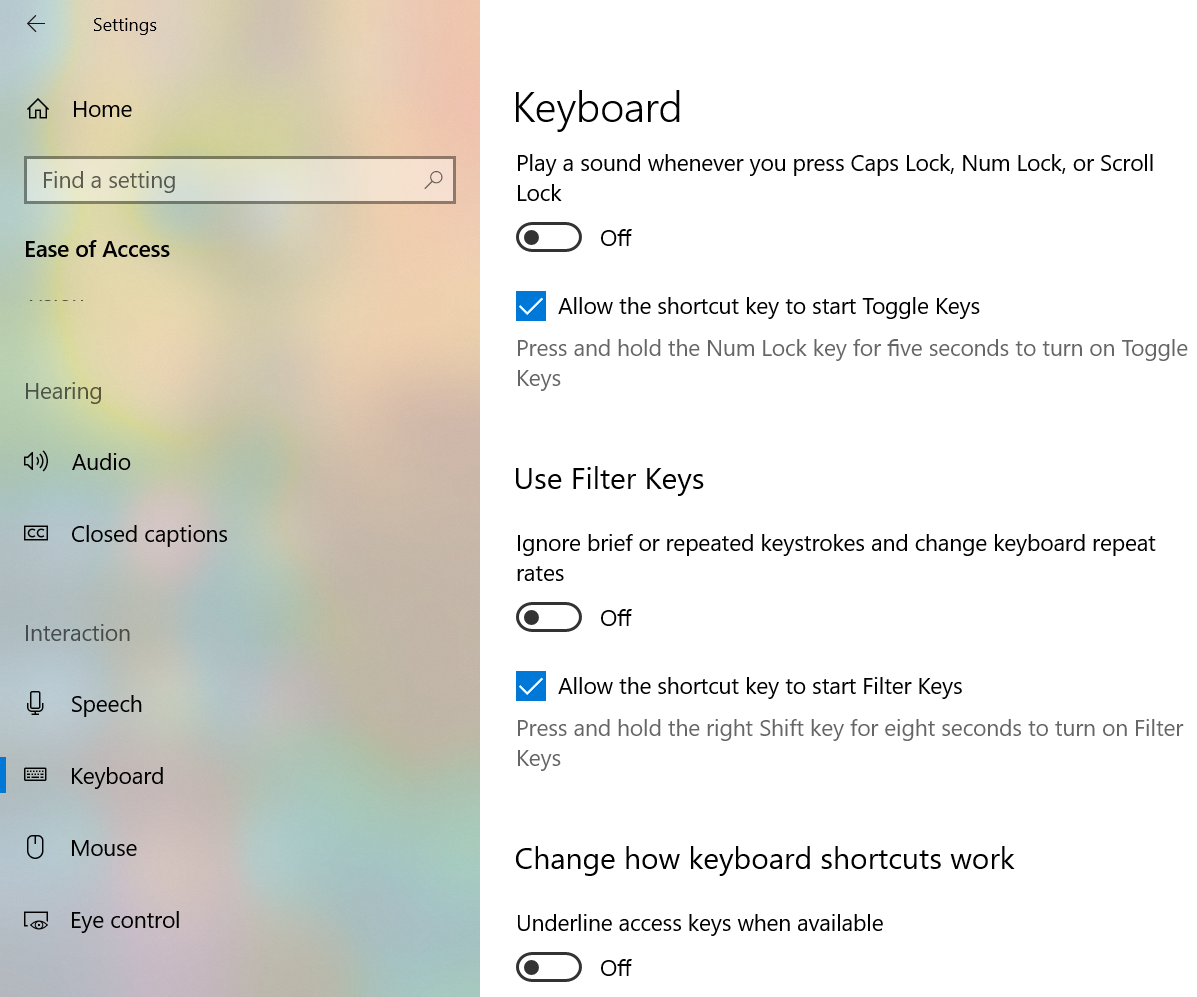
- Click on the Keyboard Option which is available on the left side.
- Under the Use Filter Keys section make sure the toggle is turned OFF.

- If it is ON click on it to turn it OFF.
- Now, you can use the keyboard without any lag or delay.
CHECK THIS OUT – How to Disable Laptop Keyboard on Windows or Mac?
Method 4: Uninstall Secondary Keyboard Drivers
The Drivers of Keyboards that you have previously used may be interfering with each other and causing you this problem. In this case, you need to uninstall all the secondary keyboard drivers.
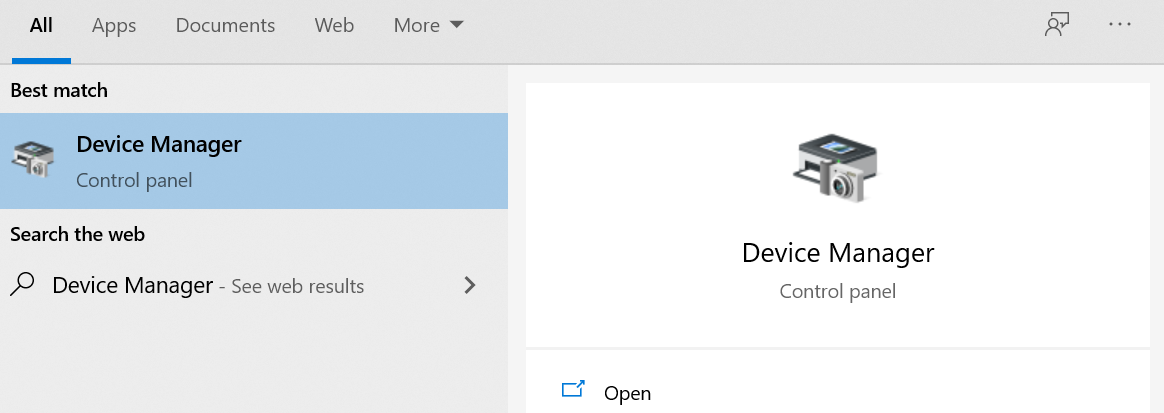
- On your, Windows Search Box type Device Manager and click on the top result which appears on your screen.

- Double-click on the Keyboards option to expand it.
- Right-click on all the drivers of your previously used keyboards and select the Uninstall driver option.
- You will get a confirmation message, select the Yes option.
- Once you have uninstalled the driver Restart your Computer.
MUST READ – How to Create a System Restore Point in Windows 10?
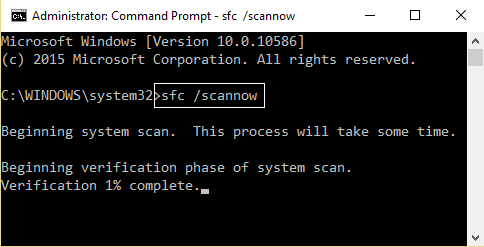
Method 5: Run SFC Scan
System File Checker (SFC) Scan will scan system files for errors and fix all the corruptions. This is an in-built tool on your Windows System so you can easily run it. To run this scan you just need to use one command.
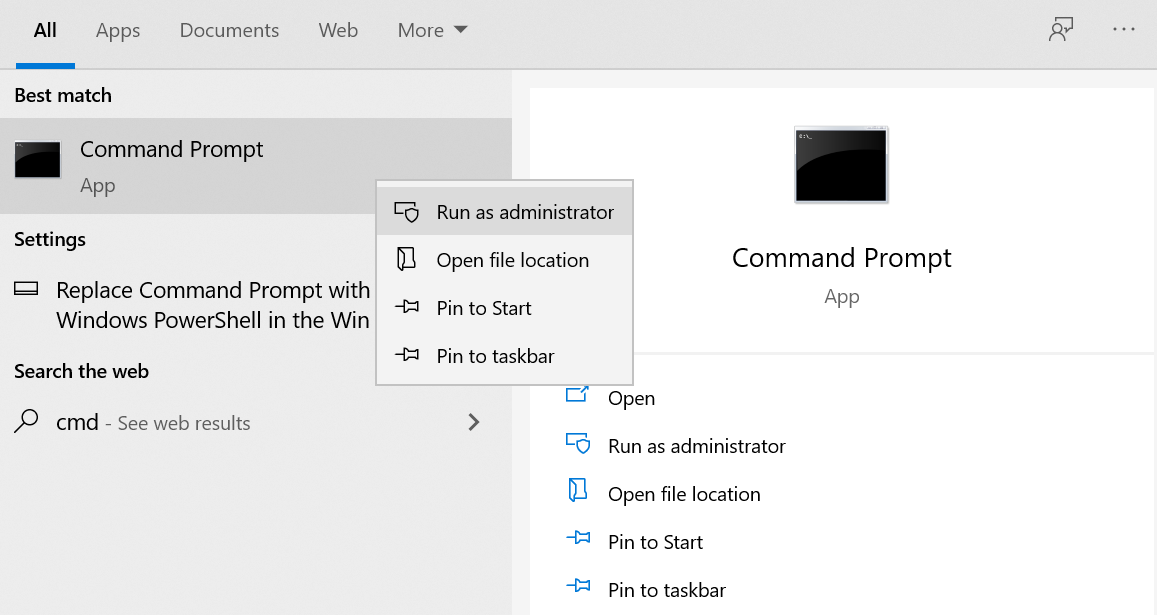
- Type cmd on your Windows Search Box.
- Right-click on the top result and select the Run as Administrator option from the drop-down menu.

- In the Command Prompt type sfc /scannow and hit Enter.

- Windows will automatically scan your computer and restore corruptions in system files.
- Once the process is finished Restart your laptop.
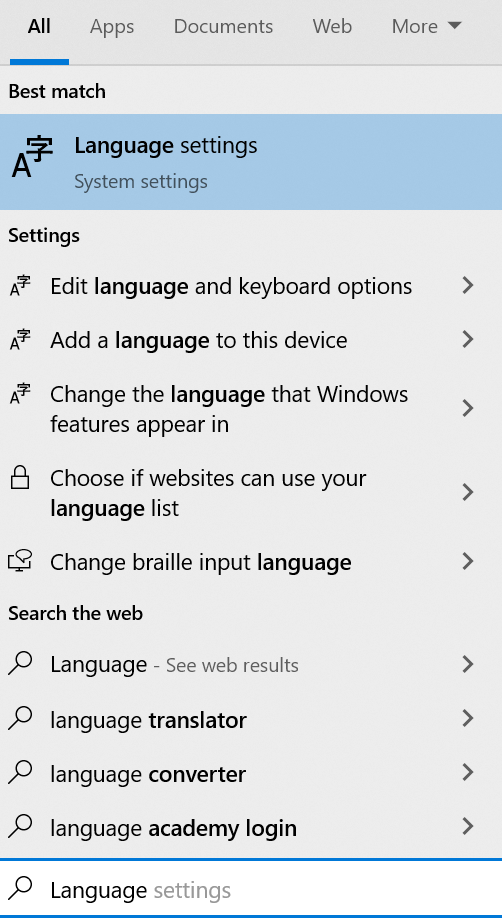
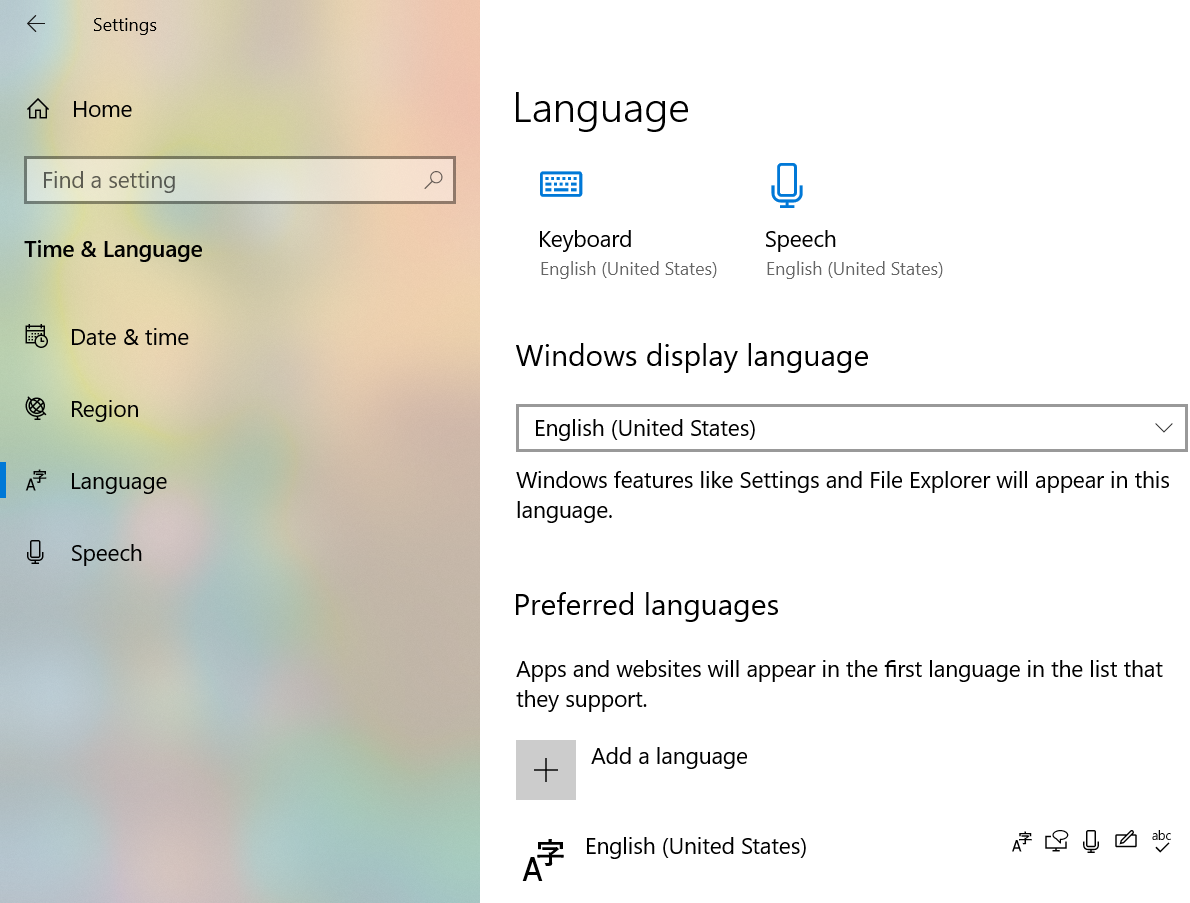
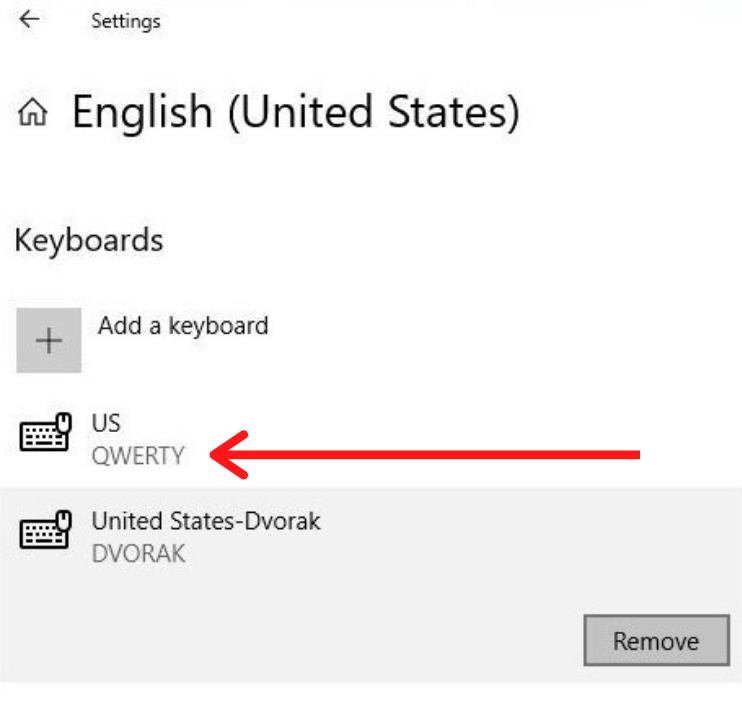
Method 6: Change your Keyboard Layout
If your Keyboard keys are working but they are producing different letters then your Keyboard Layout or Language have got changed. You need to check the keyboard layout and language which is set on your laptop.
- Type Language on your Windows Search Box and click on the top result.

- Now, you need to click on the Region and Language option.
- Select the language you want to use.

- Click on the options button and make sure that under the Keyboards section US QWERTY is available.

- Remove the Keyboard Layouts which you are not using.
Method 7: Update your Keyboard Drivers
If still, you are facing the ‘Keyboard not working laptop’ issue then you need to update your Keyboard Drivers. Outdated or corrupted drivers can cause you this problem. In this scenario, you need to update the drivers to fix this issue permanently.
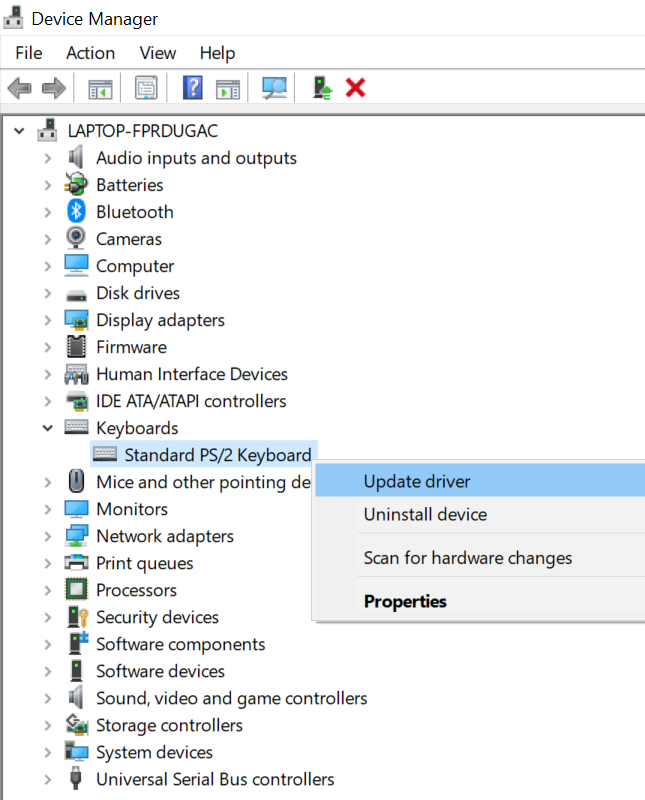
- Type Device Manager on your Windows Search Box.
- Double-click on the Keyboards option.
- Right-click on the Standard PS/2 Keyboard option and select the Update driver option from the drop-down menu.

- Now, you need to select the Automatically search for the updated driver software option.
- Now, Windows will automatically search for Updated Drivers and install it on your computer.
- Once the drivers are installed Restart your laptop and check if still, the problem exists.
- Sometimes, Windows won’t be able to search for updated drivers. In this case, you need to manually install the latest drivers.
- Go to your Manufacturer’s Website and download the latest Keyboard Drivers.
- Once you have downloaded them repeat steps 1-3.
- Now, select Browse my computer for the driver software option.
- Give the location where you have installed the drivers.
- After installing the latest drivers Restart your computer.
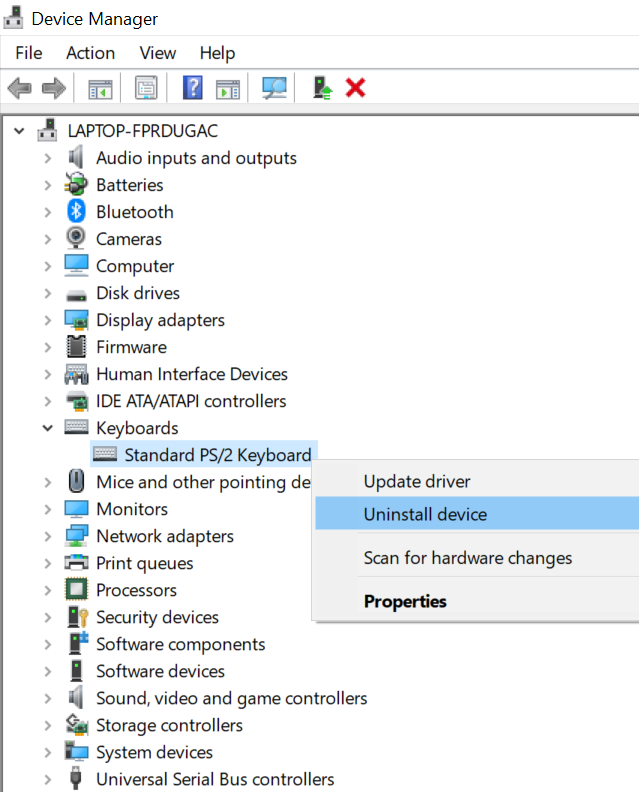
- For some reasons, if you are were not able to install the latest drivers then there is an alternative way to installing them.
- Repeat steps 1-3 again and instead of selecting the Update Driver option (Step 3) select the Uninstall driver option.

- Once you have uninstalled the Drivers Restart your computer.
- Windows will automatically install the latest drivers at the time of booting up.
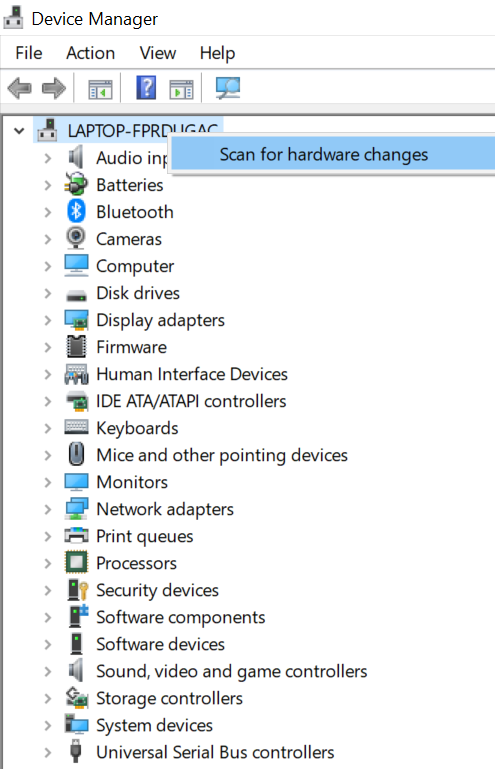
- After opening your laptop if you find that the Drivers are still not installed open Device Manager again.
- On the top right-click on your laptop’s name and then click on Scan for hardware changes option.

- Windows will now automatically install the missing drivers.
READ THIS – How to Boot Windows in Safe Mode (Windows 10, 8, 7)?
Concluding…
We hope that this article was helpful for you. We have mentioned all the effective solutions for this problem. But, if still your keyboard is not working then you need to visit a Technician. Do tell us in the comments section which method helped you. If you know any other method of resolving this problem write about it in the comments.